SQL Server Named Instance To SQL Server Failover Cluster: We will see how to create new SQL Server Failover for Named Instance, this is additional article in this series so if you done with my earlier article then this is not mandatory as few wanted Named Instance Cluster so I have created it!
Now we will create new FCI for SQL named instance and then we will follow the same steps as we have done for our SQL Default Instance, only few steps (Step 4) are different but everything is same as previous article…
Once done we will add the Node 2 (SQLB) to our cluster, so in this article we will see how to add this Node 3 (SQLABFCI) to our Node 2 (SQLB) cluster. What is does is, suppose if the SQLB Node is down then the SQLABFCI Node will server all the request without any issue/interruption.
SQL Server Named Instance Installation
Step 1: Open the ISO file which you have downloaded in the above step, and you can see the setup file just open it.

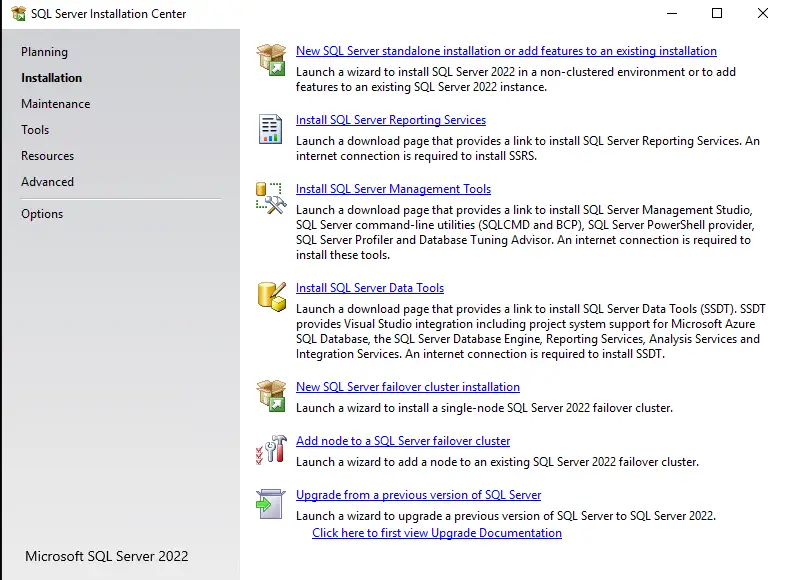
Step 2: Click on New SQL Server Failover Cluster Installation.
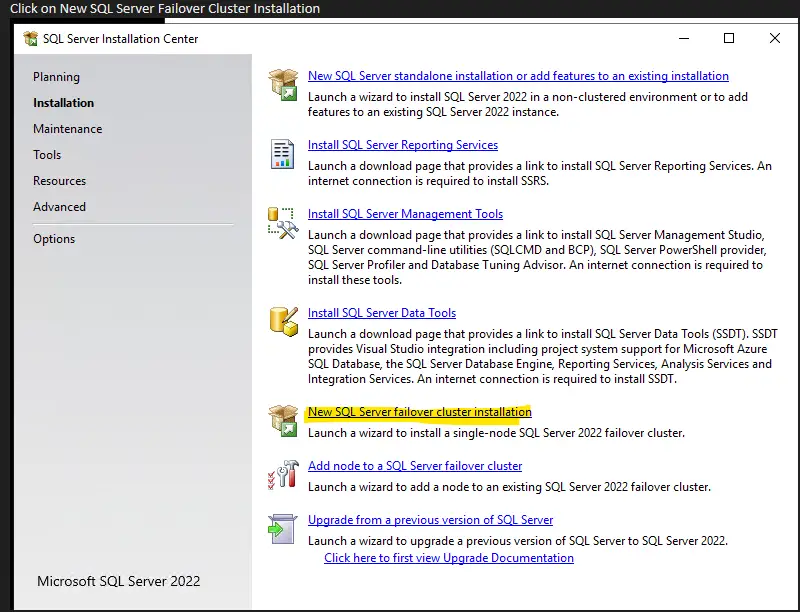
Step 3: Now go to “Installation” menu and click on the first option mentioned in the below image.
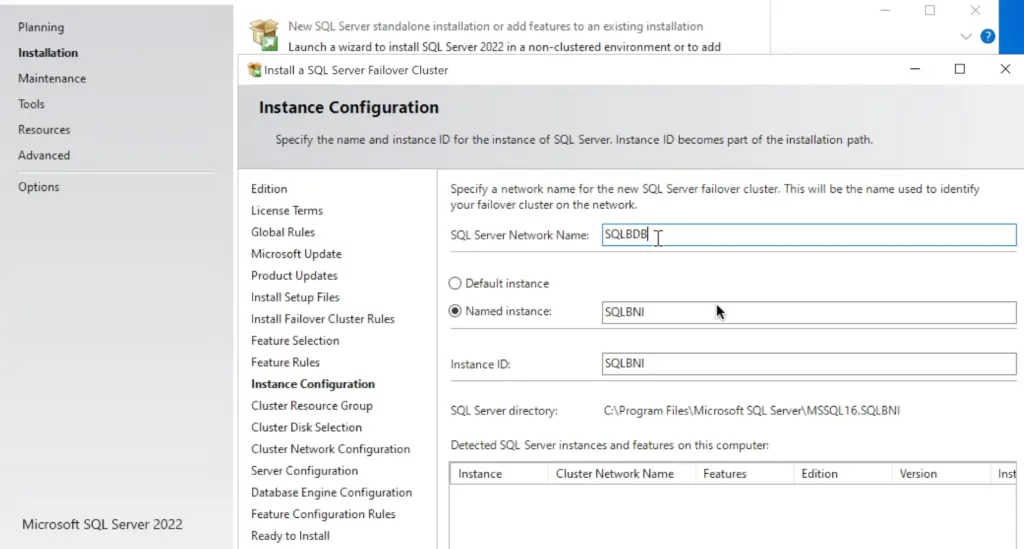
Step 4: Give primary node name for SQL instance as shown below. In my case I already have one SQL instance, so I can’t create MSSQLSERVER instance as it is default instance so if you look at the below image I have changed the option from Default to Named Instance and given a name, we will see how it differs when connecting from SSMS.
Step 5: It will check the basic details, just hit next to go to next step.
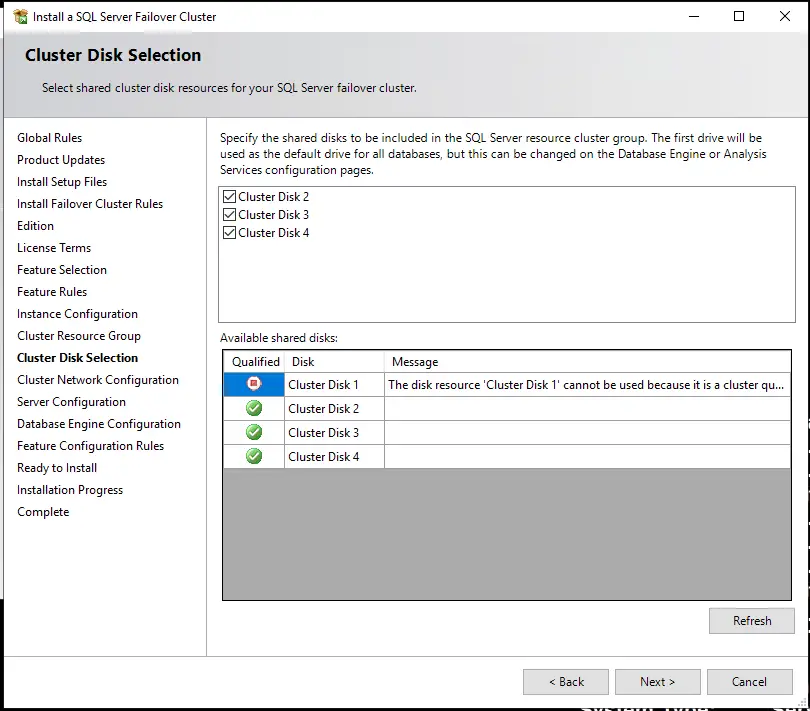
Step 6: It will give you list of options to select the disk, in my case I have only 3 disk which we created earlier for our SQL server.
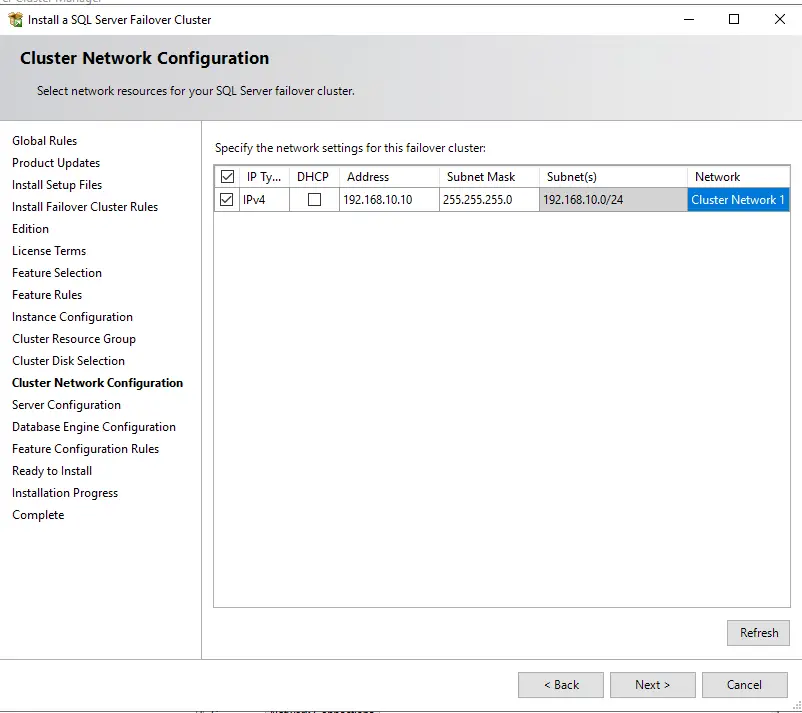
Step 7: Specify the SQL cluster IP, make sure it should be on same network, we can guess by seeing the existing subnets.
Step 8: Specify the SQL Agent and SQL Server Service account which we created earlier, if not please go back and create one form the link here!
Step 9: Add the account which we created earlier, the SQL Agent and SQL Server Service account.

Step 10: Now click on Data Directories and use the following file paths of drives to specify the locations. Please check this doc if you have not created one.
We will use this drive path later to install our Named Instance SQL server FCI. Please create one if you have not done yet, if not the SQL installation will automatically create it if you just specify the name similar to this below
- Data Disk: C:\ClusterStorage\Volume1\MSSQL\DataB
- Log Disk: C:\ClusterStorage\Volume2\MSSQL\LogB
- Temp Disk: C:\ClusterStorage\Volume3\MSSQL\TempB

Specify the directory path as shown in the above image and also specify the path correctly, in this above image we have just changed Data and Logs path and temp is done in next step.
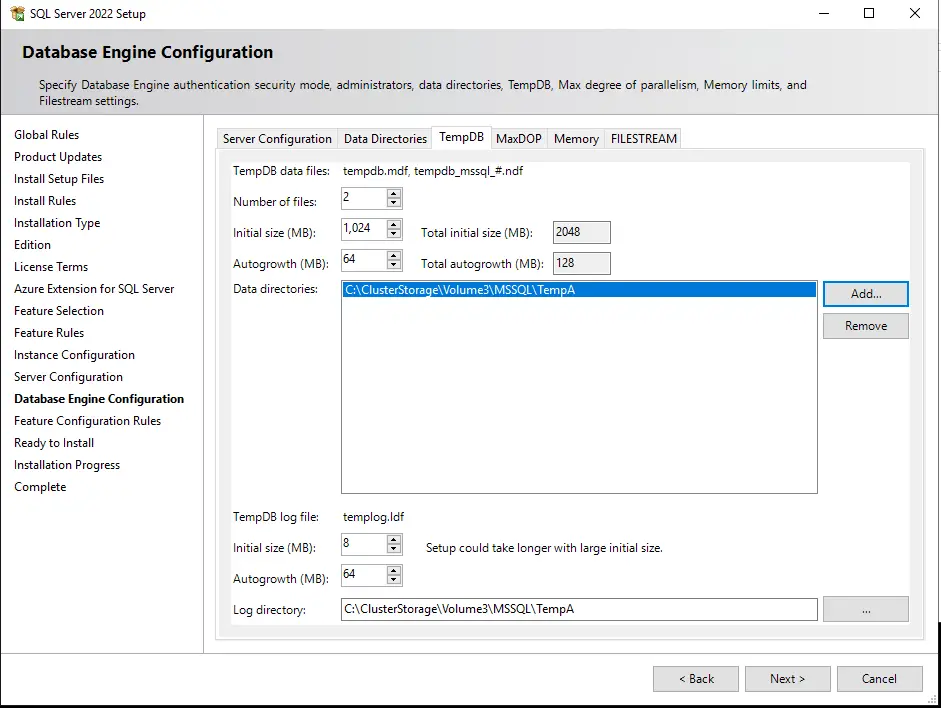
Step 11: Now we have to configure the temp db., if you are not familiar then please check this doc: tempdb database – SQL Server | Microsoft Learn Once done, come back and configure as per your requirements.
Note: According to Microsoft documentation, “The number of secondary data files depends on the number of (logical) processors on the machine. Generally, if the number of logical processors is eight or fewer, use the same number of data files as logical processors. If the number of logical processors exceeds eight, use eight data files. If contention persists, increase the number of data files by multiples of four until the contention decreases to acceptable levels, or modify the workload/code.” This information is available below: tempdb database – SQL Server | Microsoft Learn
Then comes the Temp DB size, for that please check this doc: https://www.brentozar.com/archive/2016/01/cheat-sheet-how-to-configure-tempdb-for-microsoft-sql-server/
Also I have changed the Temp DB location to our shared drives which we created earlier.
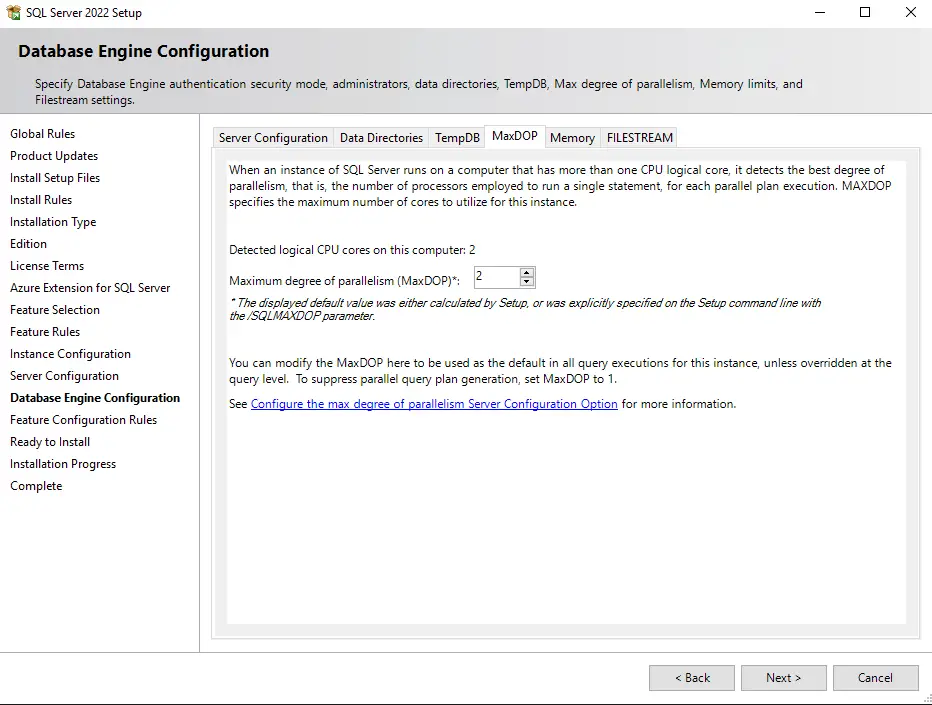
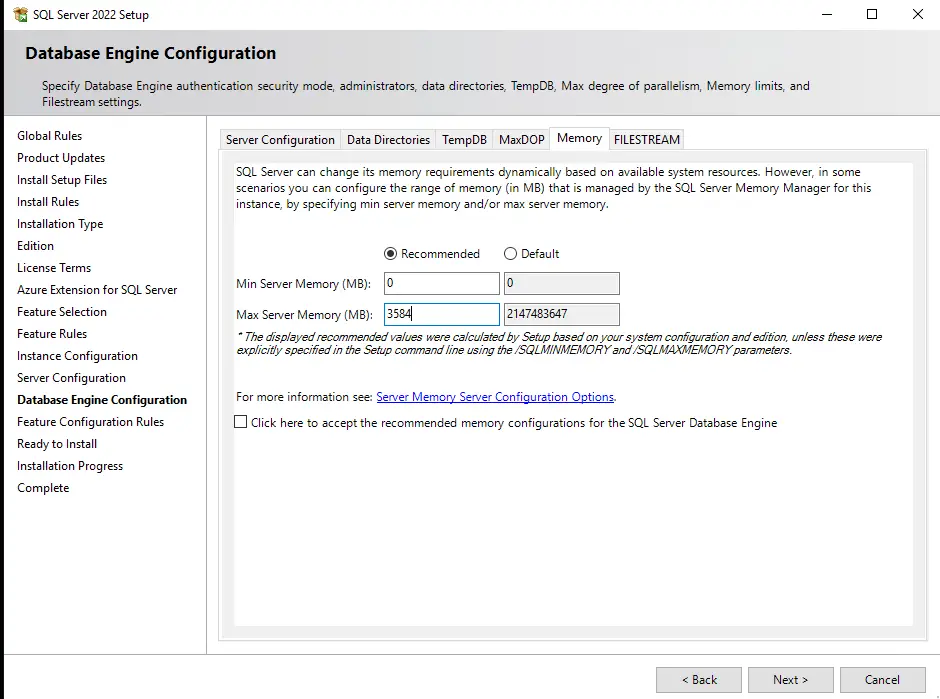
Step 12: We have to specify the MaxDOP as per this document: https://www.mssqltips.com/sqlservertip/6211/sql-server-2019-installation-enhancements-for-maxdop-and-max-memory/. In my case my logical processor is of 2 so it by default selected.
Step 13: I have given half of my VM memory, we should not include all your VM memory to SQL Server, so depending on requirements we have to specify the memory, for more click here!
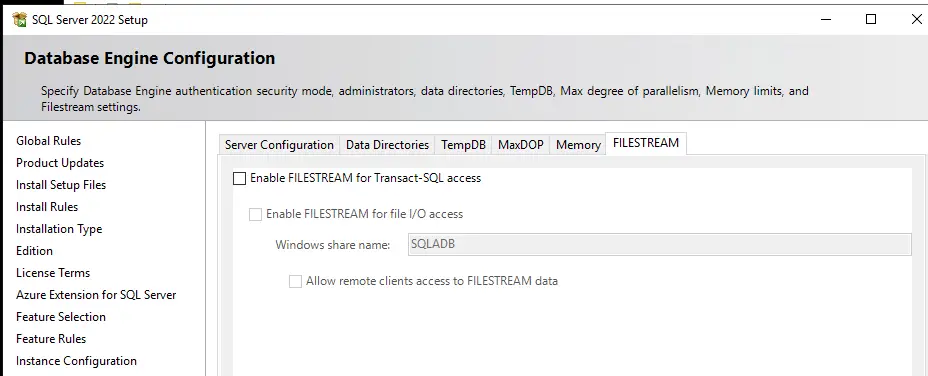
Step 14: You can leave this as default as we are not using most of the time but if you want to learn more about, please click this doc: FILESTREAM (SQL Server) – SQL Server | Microsoft Learn
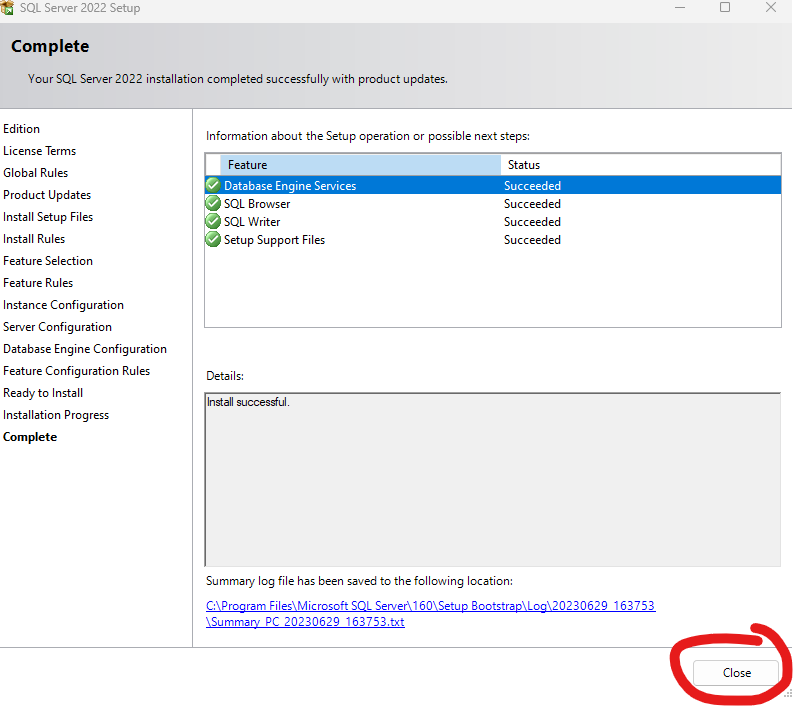
Step 15: The installation is complete, now we can connect and check the SQL Server Instance.

Add Named Instance Cluster To Other Nodes
Step 1: Open and run the setup file to go on installation page and select the option “Add node to a SQL Failover Cluster” to add SQL Server Named Instance.
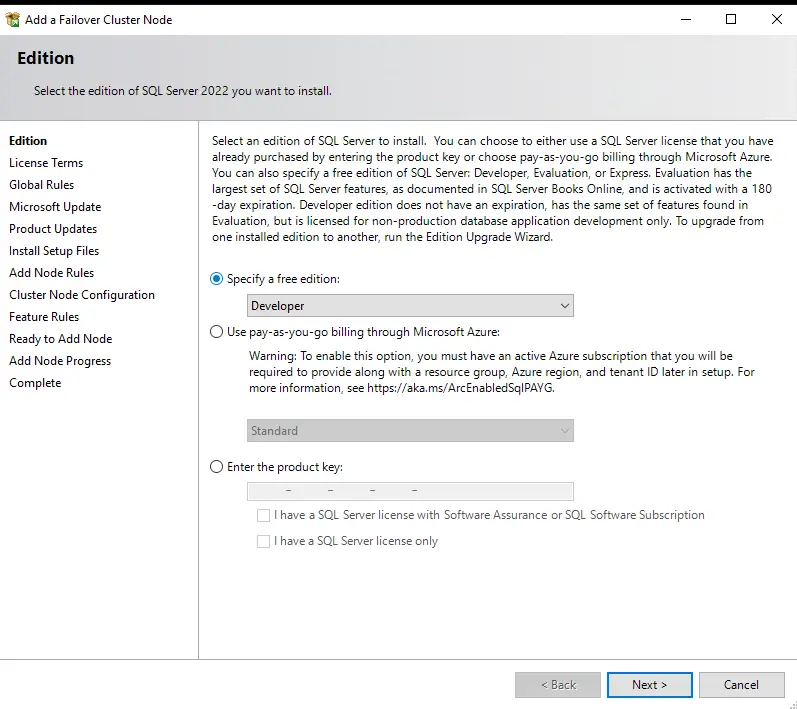
Step 2: Select the license type, I don’t have one so I will go with “Developer“
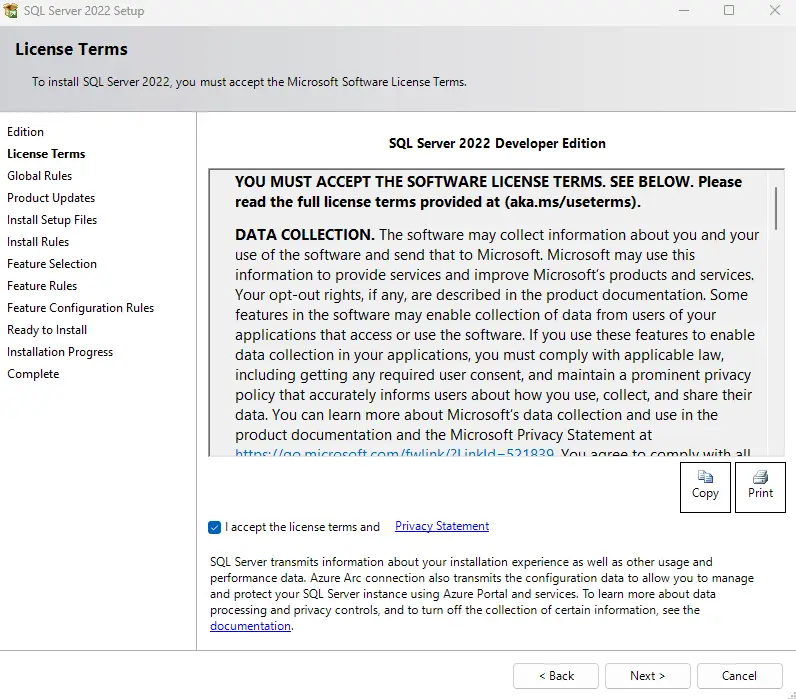
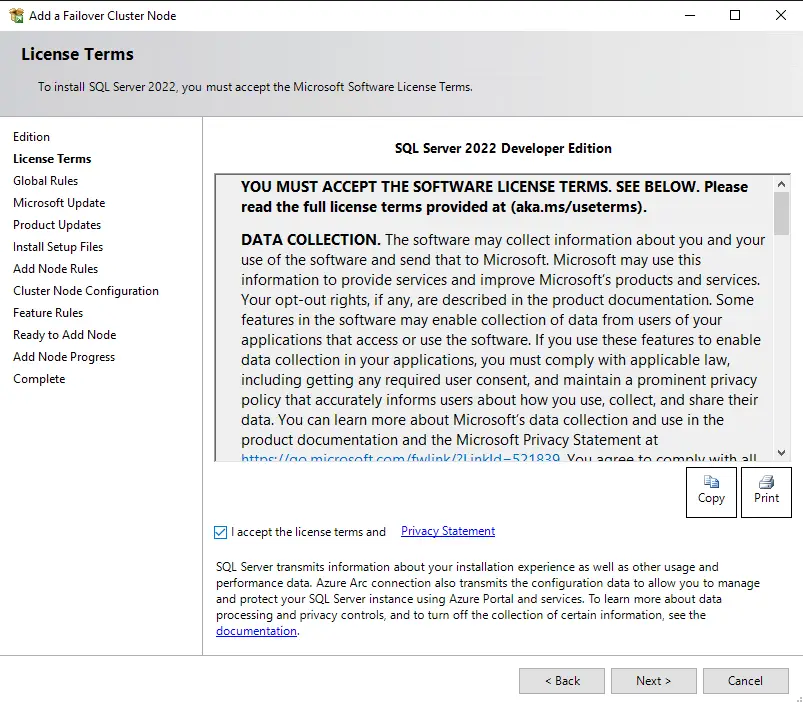
Step 3: Agree to all the terms and conditions of this page.
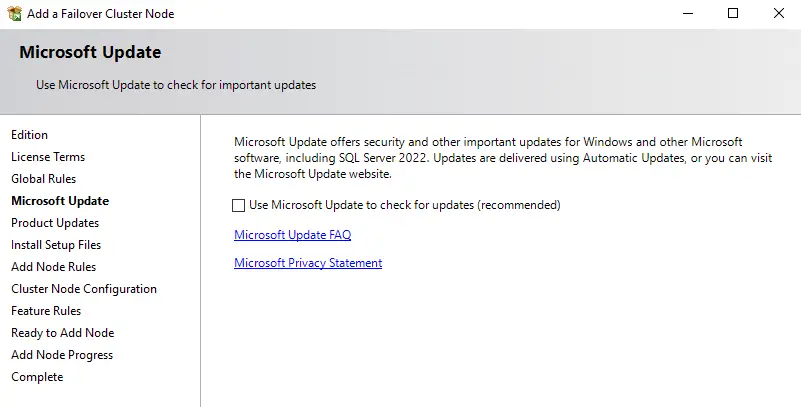
Step 4: Skip the software update if you have downloaded the latest one and hit next.
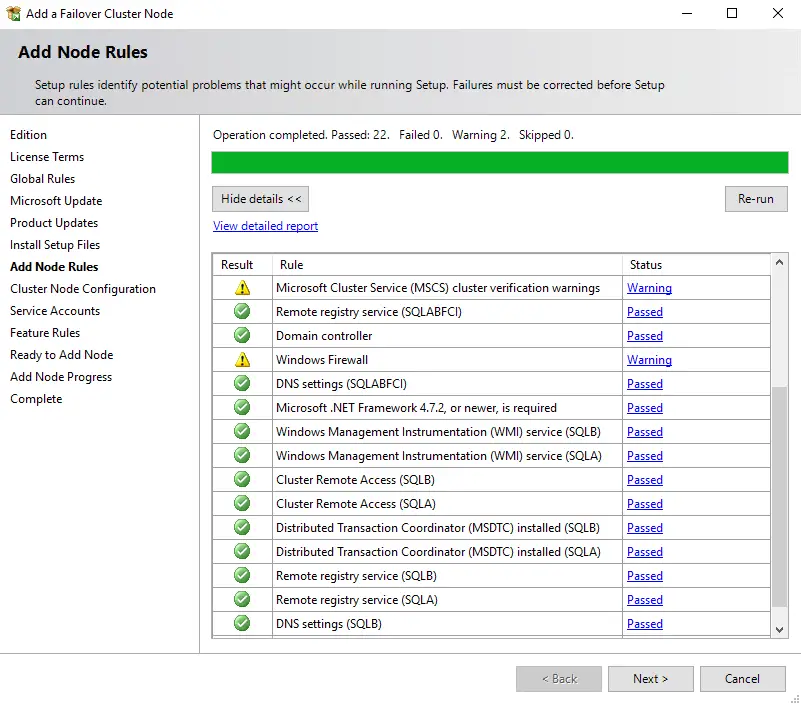
Step 5: All the checks and trust will be performed for any error or exceptions; in my case it looks good so I will hit next!
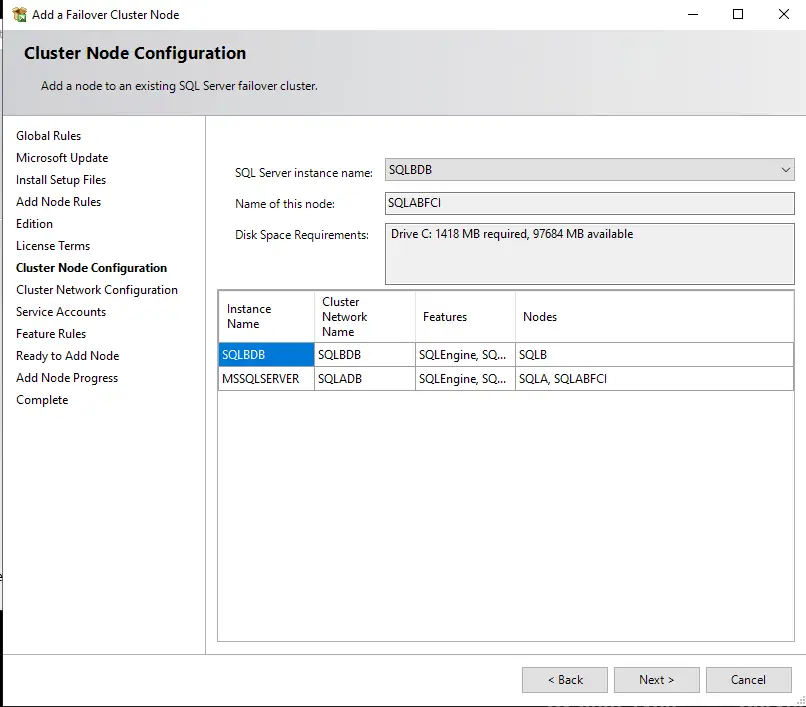
Step 6: Now this is very important to understand, here you will see SQL Server instance name which is “SQLBDB from Node 2 (SQLB)” and Name of the node is “SQLABFCI (SQLABFCI is host name of this node/machine)” so it says that SQLABFCI will be added to SQLB Node as Failover cluster.
Note: I my case the SQLB Node Server is on NAMED instance so you can see this as SQLBDB, if you have installed as DEFAULT instance then you will see “MSSQLSERVER“, which we already we saw in our previous article when we created failover cluster for our first Node (SQLA).
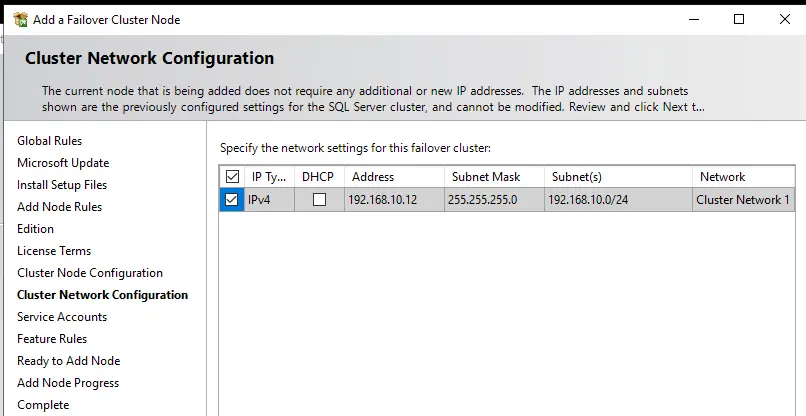
Step 7: The IP will be visible which we have already configured when installing the SQLB Node SQL Server, so you can’t change anything because it is already configured in the cluster, and we are adding this Node 3 (SQLABFCI).
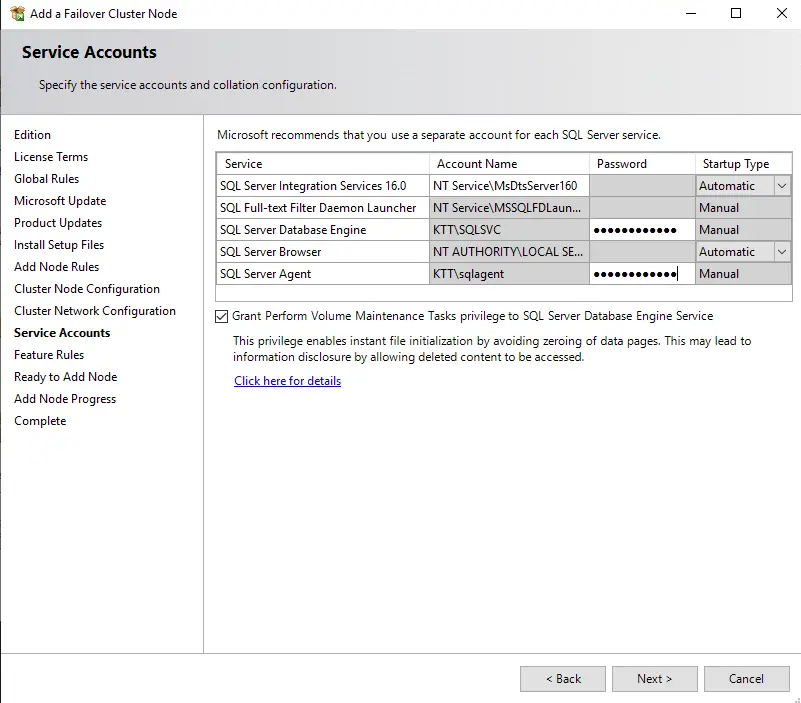
Step 8: The SQL Service account will be configured already as we are adding this node to the cluster, so we have to just specify the password for those accounts.
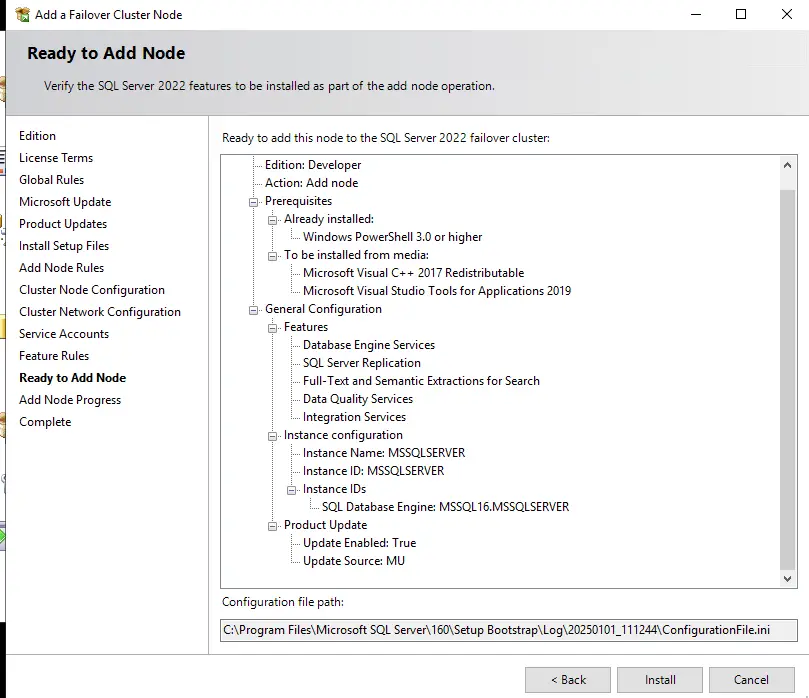
Step 9: All the steps and option we selected will be visible, just hit next and proceed further.
Step 10: Once the installation is done you will see this below message and if you see any kind of error, then this tick box will not be present, and you have to check the logs files for any short of errors and later fix it.
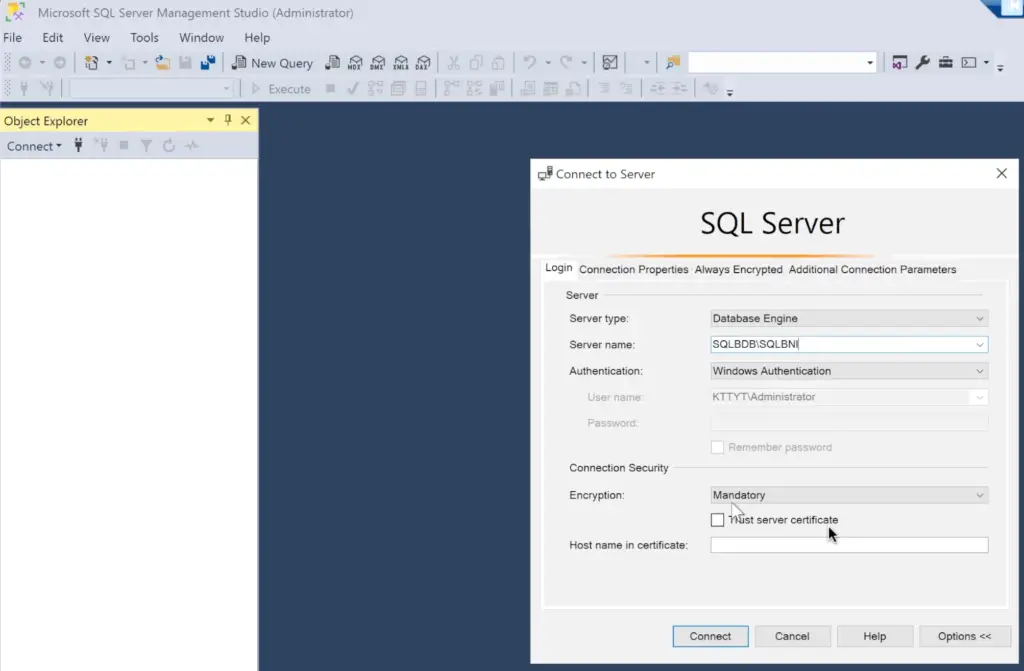
Step 11: Now, I have installed the SSMS in this node as well and I will connect to the SQLBDB cluster which is our SQL Cluster network name.
This time if I type just the SQLB machine/Node name it will not work because it is not defaulting instance hence, we have to specify SQL Server hostname followed by slash and then SQLBDB Cluster Network Name, as show in the below image.
Testing Our Named Instance SQLFCI
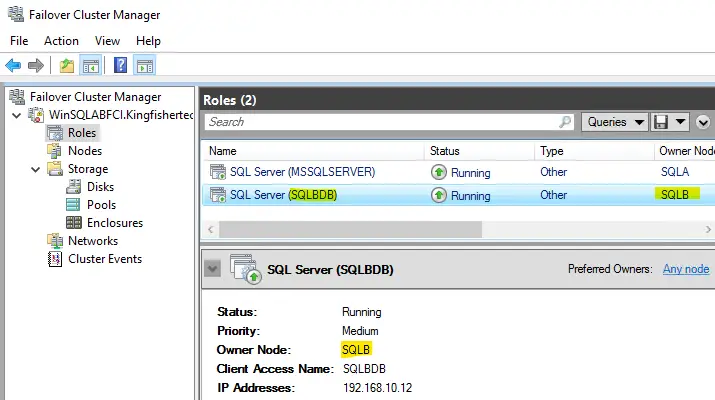
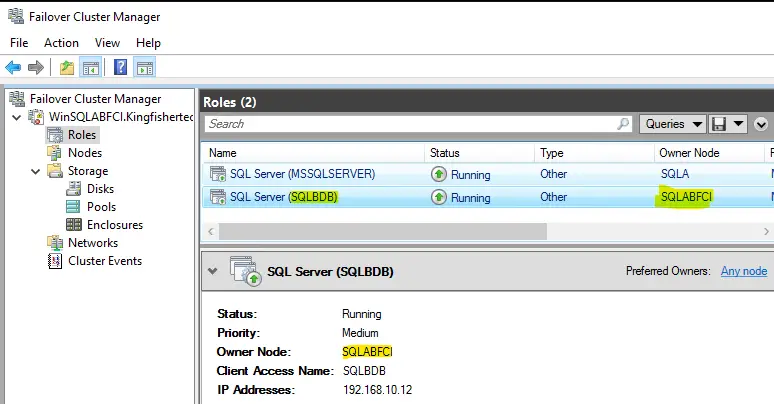
Now we have successfully installed the SQL Server failover cluster, and it is ready to be tested. If you want to test it, then turn off your Node 2 (SQLB) and connect to the SQL Cluster name (SQLBDB) and you will see the owner will change to SQLABFCI in the Failover Cluster Node. For more about SQL FCI click here!
In this below image you can see that when I turned off my SQLB Node it moved the SQLABFCI.
When I again turned on the SQLB Node it moved back to SQLB. This ends the article for Adding SQL Server Named Instance To Failover Cluster.
Connect SQL In SSMS?
Step 1: Go to your browser and type SSMS download and open the first link of Microsoft.
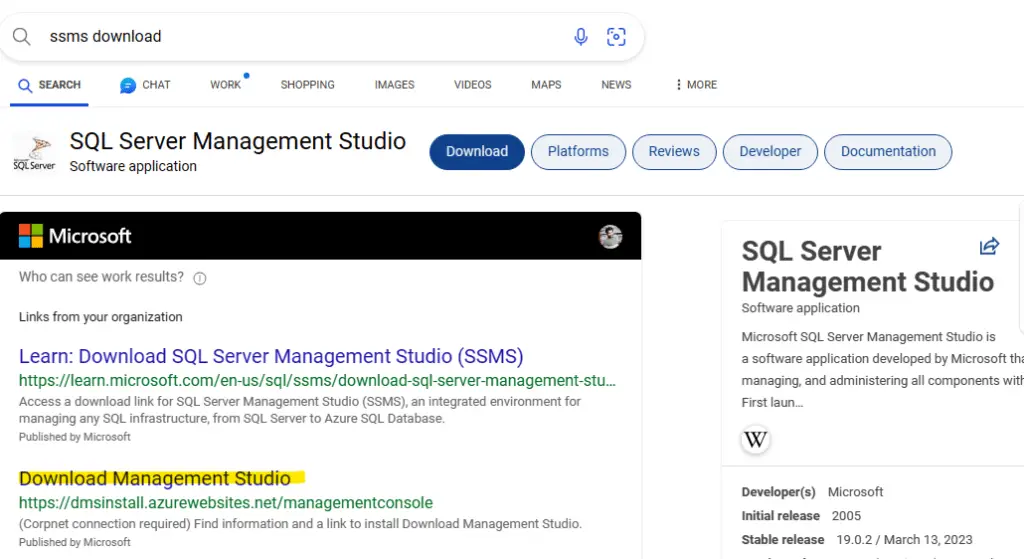
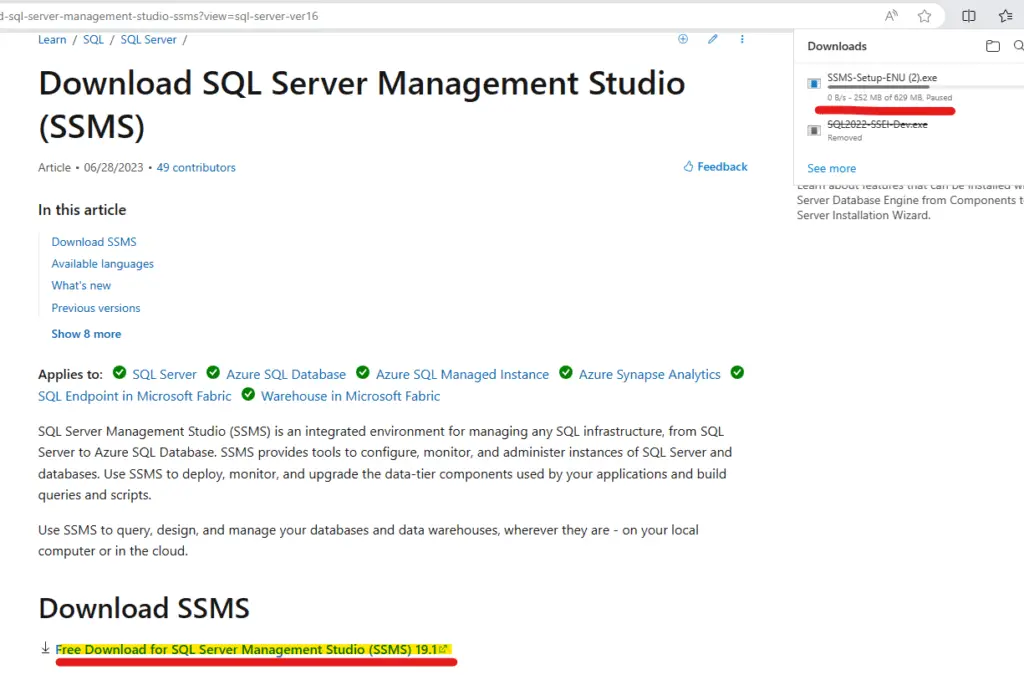
Step 2: Click on the below link and your SSMS will start downloading as you can see in the below image.
Step 3: Open the setup file then install the SSMS and open it and go to the home page after installation.
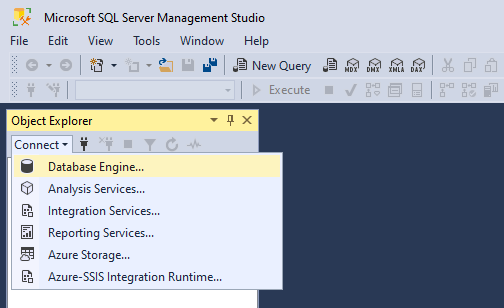
Step 4: In the homepage you can see “Connect” option at the top, just click on that and select SQL Database.
Step 5: Give the instance name followed by your Machine name. (SQLBDB in the cluster network access name and now we have to specify the SQL Named Instance name which we created in step 4 of installation of named instance cluster). Click on “Connect”
Step 6: We have successfully created the SQL Server and connected using SSMS as you can see in the below step.
Watch!
END OF SQL SERVER Failover Cluster For Named Instance
TSG’s
- The Job Failed. Unable To Determine If The Owner (KTTsvc_ssrs19) Of Job
- Port Number For Analysis Services – Find Ports For SSAS? (kingfishertechtips.in)
- SMTP Server In SSRS/PBIRS |Subscribe To Email Problem/Issue (kingfishertechtips.in)
- SQL Server 2022 Download, Install, Connect Using SSMS Tool (kingfishertechtips.in)
- Creating Tabular Project & Deploy Model To Analysis Service (kingfishertechtips.in)
- Deploy Tabular Project To Azure Analysis Service – SSDT Tool (kingfishertechtips.in)
- SSRS/PBIRS – Install And Configure The Report Server On-Prem (kingfishertechtips.in)
- Could Not Load Folder Contents In Portal URLs – SSRSPBIRS (kingfishertechtips.in)
- SSRS/PBIRS – Install And Configure The Report Server On-Prem (kingfishertechtips.in)
- SQL Server 2022 Download, Install, Connect Using SSMS Tool (kingfishertechtips.in)
- Capture Fiddler Trace for Debugging the Network Traffic (kingfishertechtips.in)
- On-Premises Gateway: Configure/Map SQL DB To Power Bi (kingfishertechtips.in)
- Fixed Column/Row Header Make Visible In Any Report (kingfishertechtips.in)
- Self-Signed Certificate: Configure SSRS/PBIRS With SSL (kingfishertechtips.in)
- Create Local User Account/Local Admin User In Windows 10/11 (kingfishertechtips.in)
- Login With AAD/Domain/Microsoft Account To Azure VM’s/RDP (kingfishertechtips.in)
