SQL Server 2022: In this article we will see how to download the SQL Server and run the setup to download the ISO file and then install the SQL Server instance name, post that connecting to SQL Server instance using SSMS Client Tool. Follow all the required steps and you can see that you have successfully managed to install the SQL Server. Also if you have any queries/concern please comment down below.
#1) SQL Server Download?
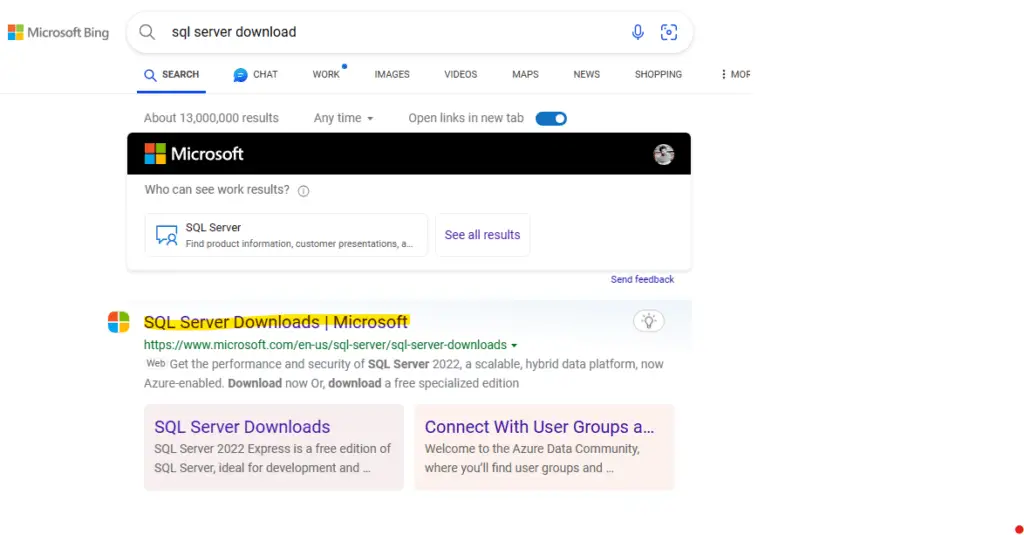
Step 1: Go to your browser and types “SQL Server Download” and you can click the below Microsoft link.
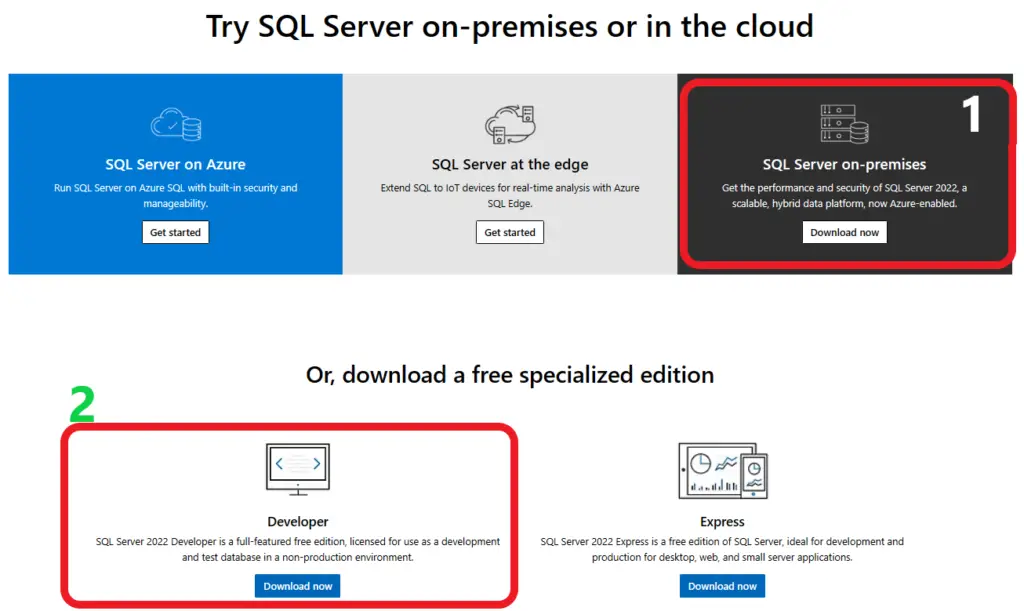
Step 2: Here we can see 2 methods to download the SQL Server 2022, you can select any 1 option and proceed further. I will suggest to go with “Developer” option which is option 2. Link: https://www.microsoft.com/en-us/sql-server/sql-server-downloads
Step 3: Once you download the file it will be saved into your PC, just open it and follow the below steps:
#2) SQL Server ISO file download?
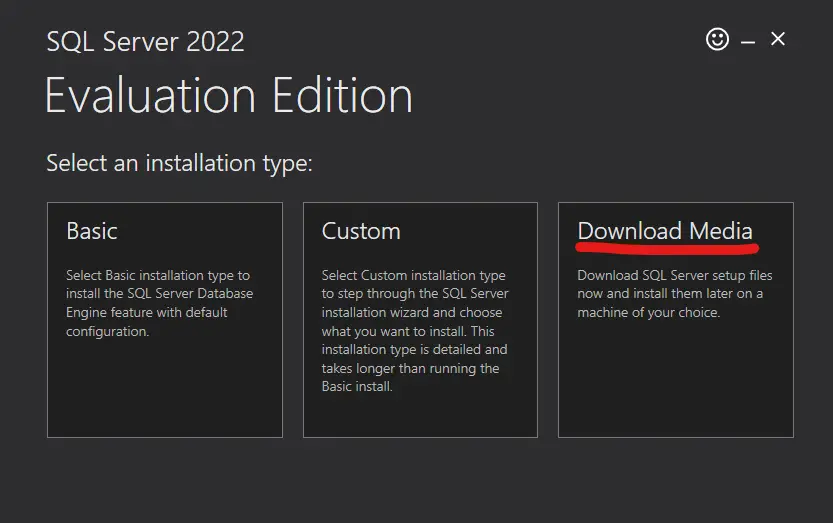
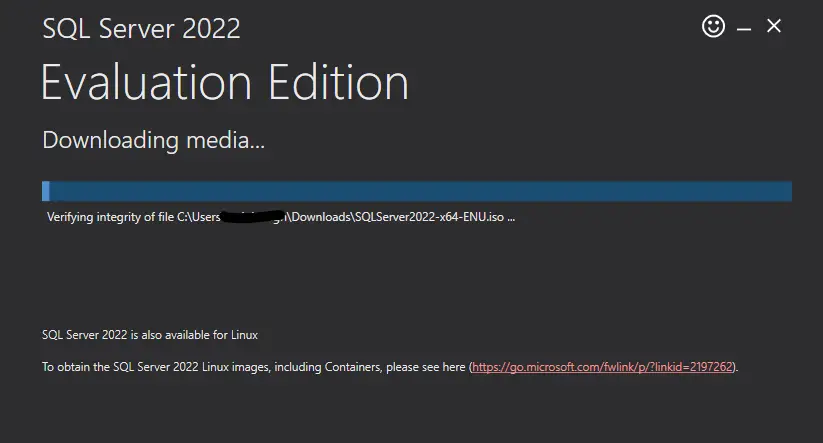
Step 1: If I open the setup file then you can see this below interface. For more control you can download the Media (ISO File), in my case I will go with 3rd option.
Step 2: By default, the ISO will be selected and folder path as well, just change the download folder if you want and click on download below.

Step 3: The file has started to download, now wait until the setup file is completed. Once downloaded move to below steps.
#3) SQL Server Installation?
Step 1: Open the ISO file which you have downloaded in the above step, and you can see the setup file just open it.

Step 2: Now go to “Installation” menu and click on the first option mentioned in the below image.
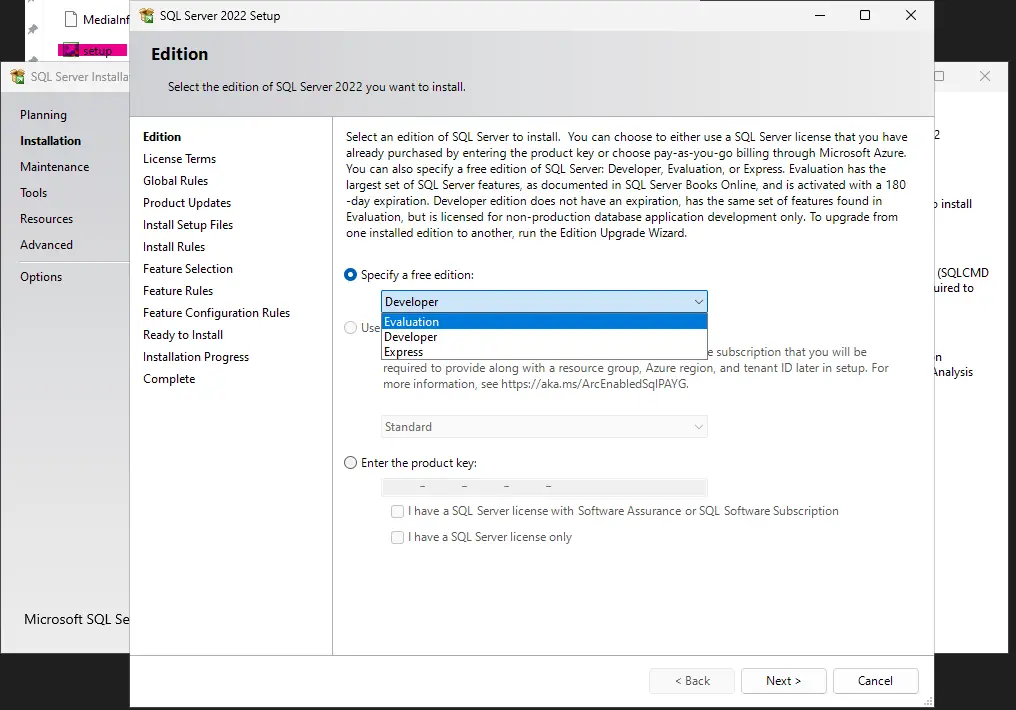
Step 3: In this step we will what edition we will choose, in my case I will go with the Developer version. If you have product key then you can enter in the below option.
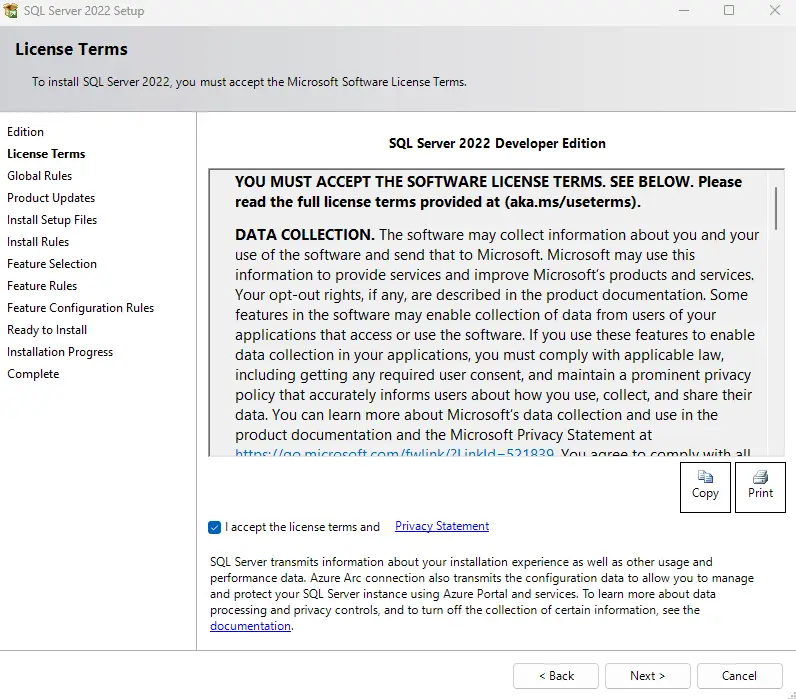
Step 4: Accept the terms and conditions and click on next.
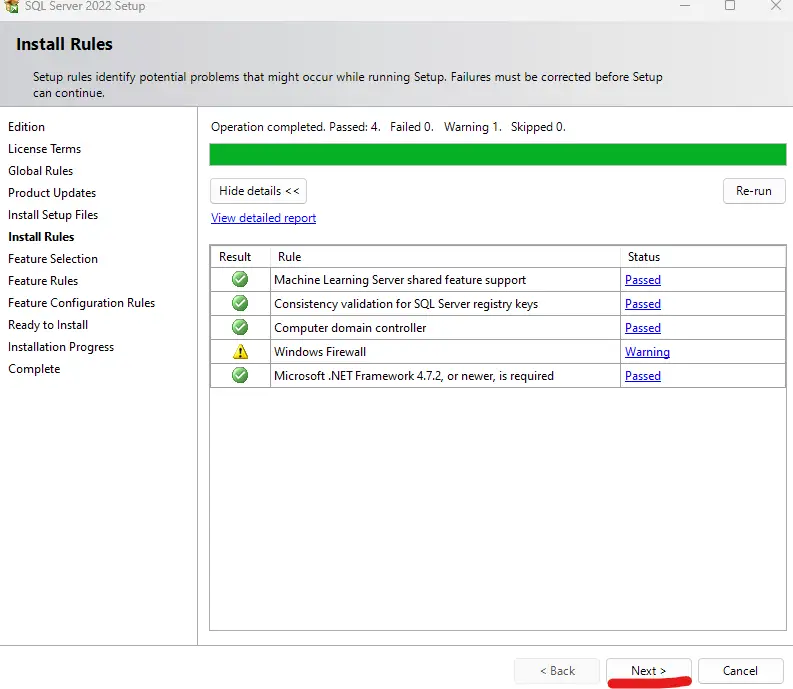
Step 5: In this step you can see that I have passed all the rules, now click on next.
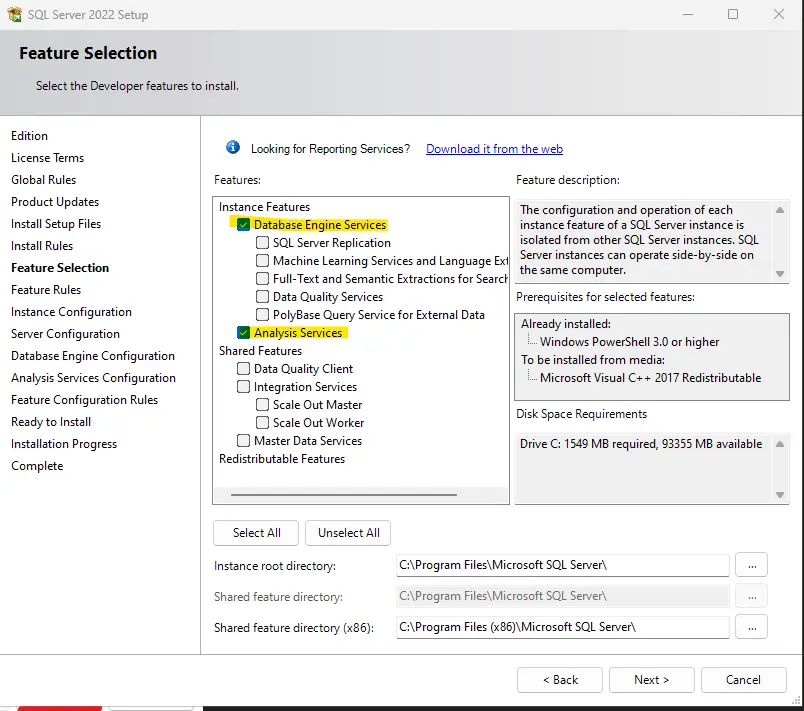
Step 6: This is important step here, in my case I will install both SQL Server and SSAS so I am selecting both here. If you just want to install the SQL Server then tick the first option “Database Engine Services”
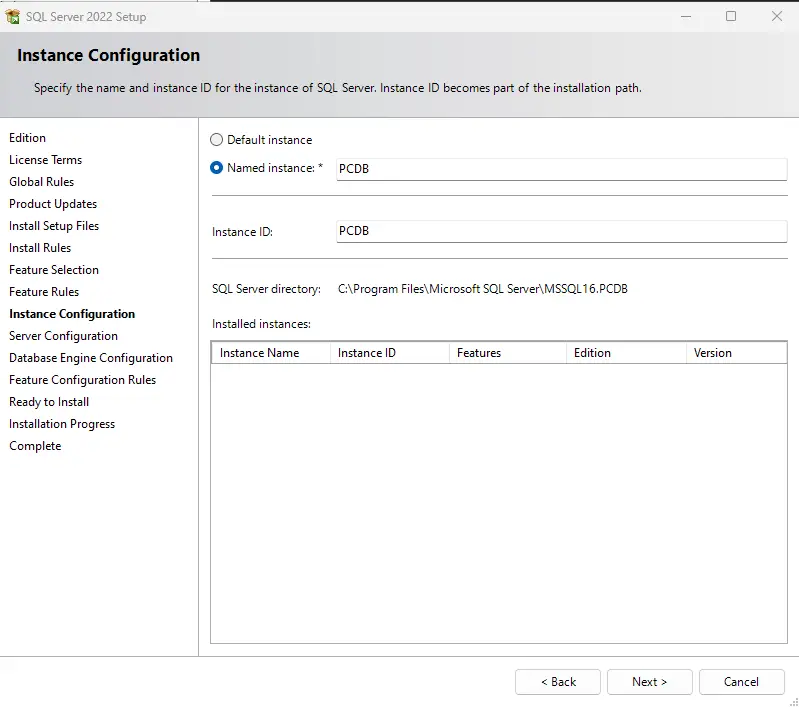
Step 7: Here we will give SQL Server Instance name “PCDB“. If you want, you can use the default instance name. For more convenient I am using separate name here.
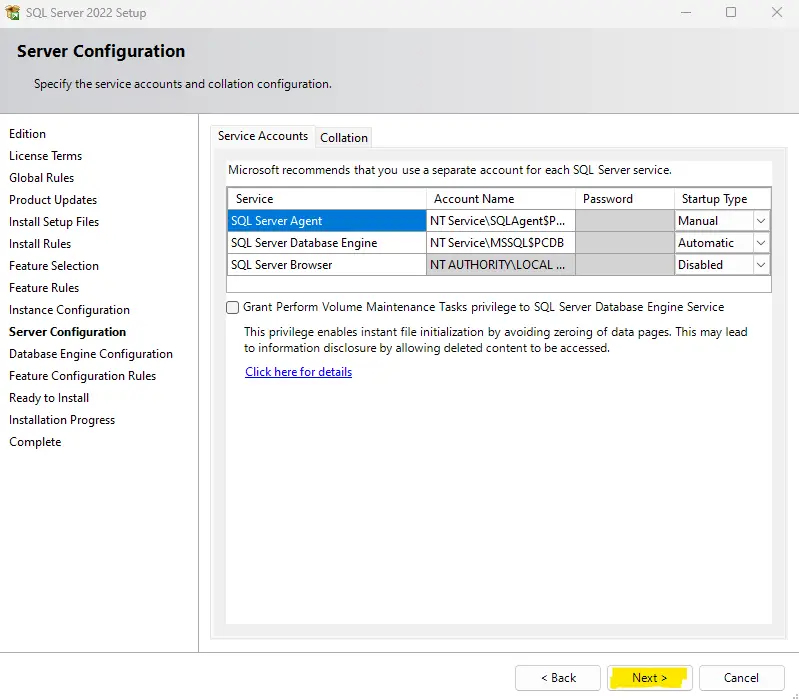
Step 8: Leave default everything here and click on next.
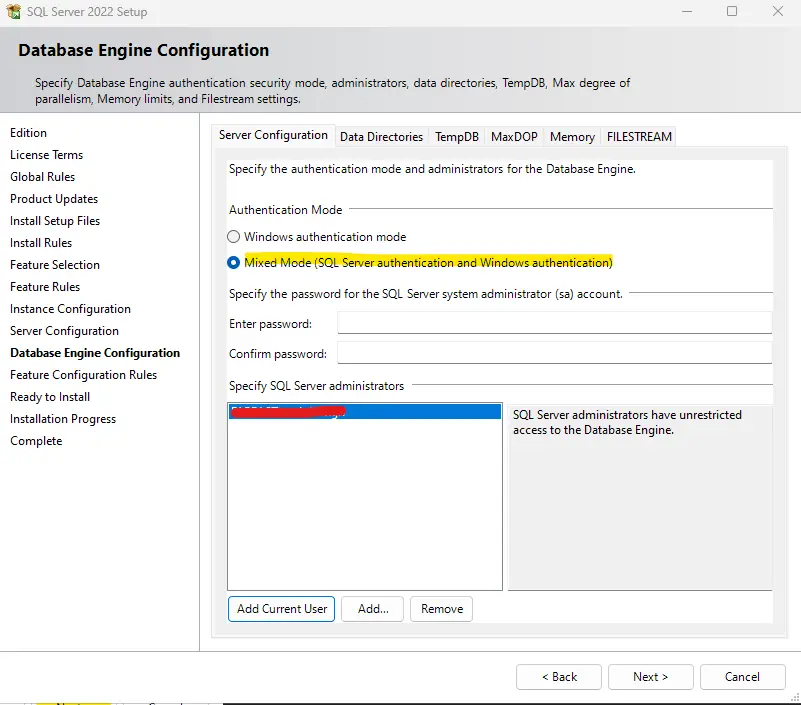
Step 9: Now here we have to select “Authentication Mode“. Let’s understand why use Mixed Mode and Windows authentication. Suppose if we use Windows authentication mode then you can login to SQL Server only in the VM where SQL Server is installed. But Mixed mode uses Windows authentication and SA account where “sa” account will allow users to login outside the VM with in the network. Also I will specify password for this “sa” account.
Note: Don’t forget to add the current user in the bottom box as shown below to enable windows authentication.
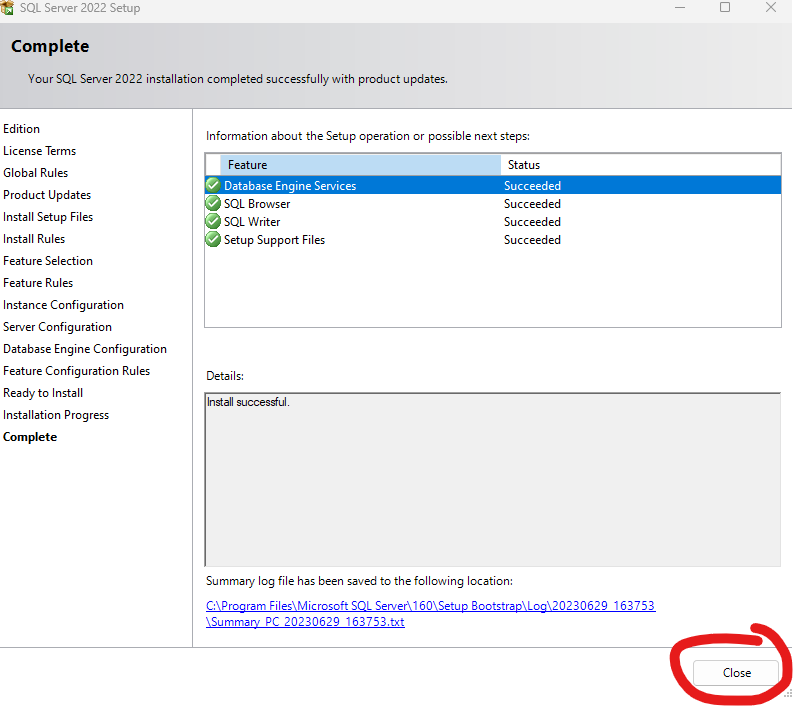
Step 10: Once all the things are installed then you can see that all the steps has been completed. Now, the SQL Server is installed successfully and connect using SSMS in the next step.
#4) Connect SQL In SSMS?
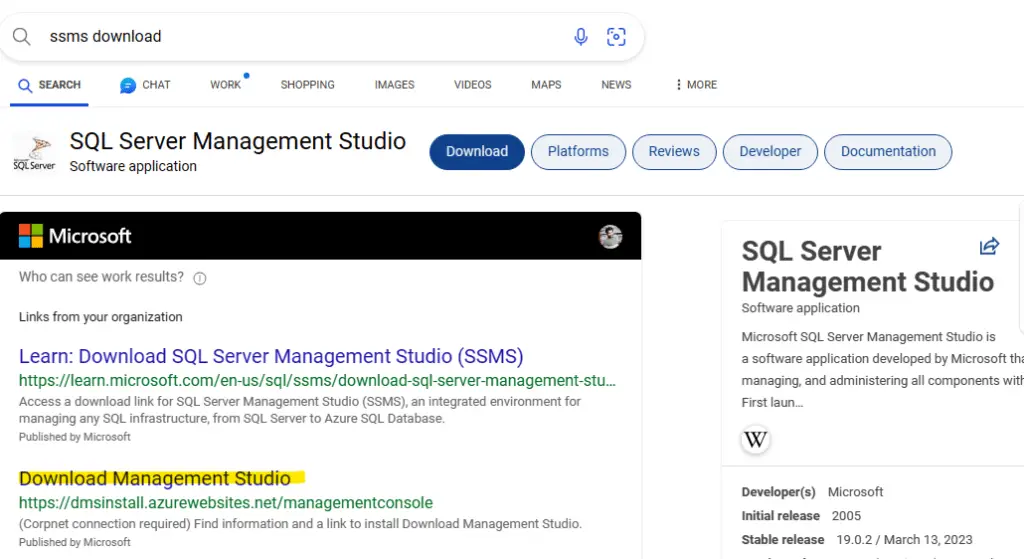
Step 1: Go to your browser and type SSMS download and open the first link of Microsoft.
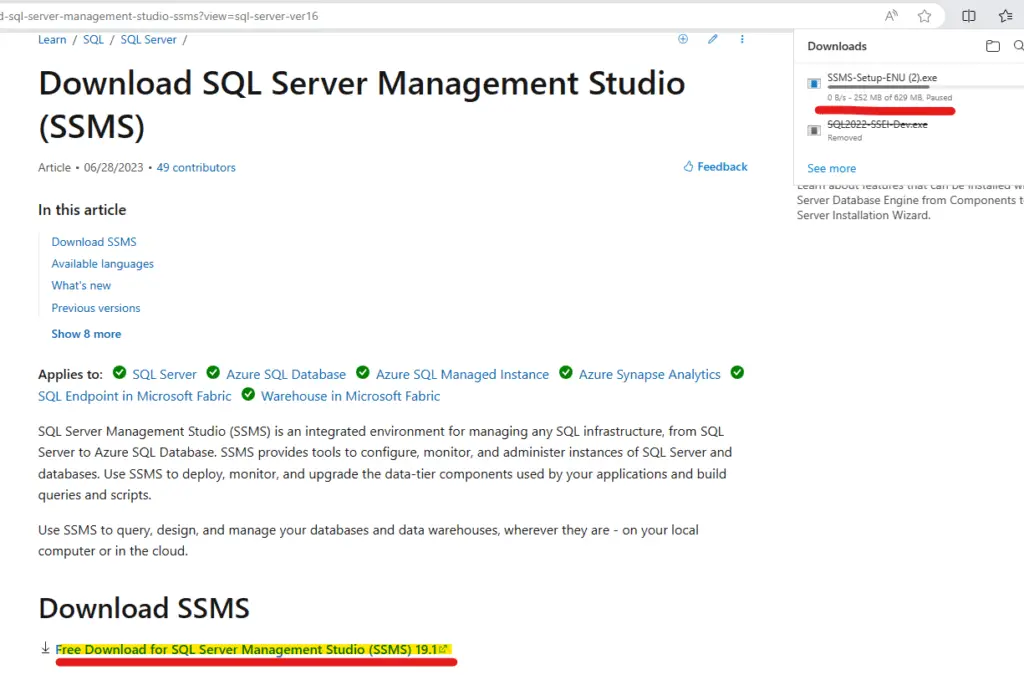
Step 2: Click on the below link and your SSMS will start downloading as you can see in the below image.
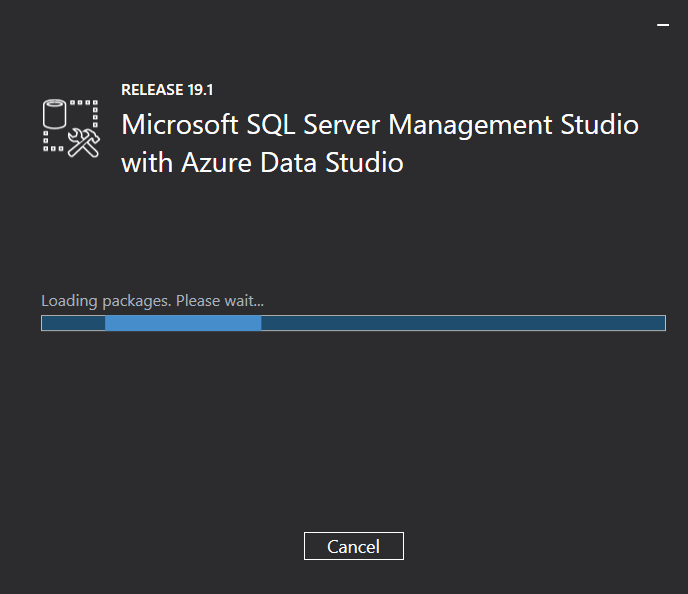
Step 3: Open the setup file then install the SSMS and open it and go to the home page after installation.
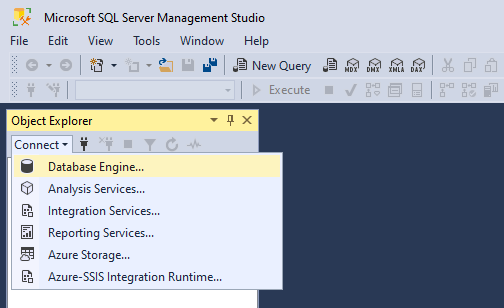
Step 4: In the homepage you can see “Connect” option at the top, just click on that and select SQL Database.
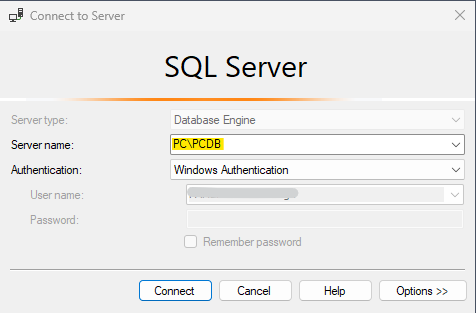
Step 5: Give the instance name followed by your Machine name. (PC is my VM name and PCDB is the SQL Server which we created in the above steps). Click on “Connect”
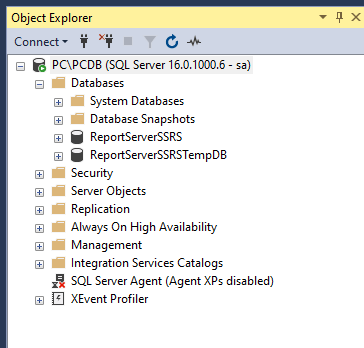
Step 6: We have successfully created the SQL Server and connected using SSMS as you can see in the below step.
Watch Video
Conclusion:
We have seen all the above-mentioned steps, on how to download, install and configure SQL Server. I have some other links as well on SQL Bi, if you want you can check out the below links. Also comment down for any queries\concern.
SQL Bi Links:
- Could Not Load Folder Contents In Portal URLs – SSRSPBIRS (kingfishertechtips.in)
- Capture Fiddler Trace for Debugging the Network Traffic (kingfishertechtips.in)
- On-Premises Gateway: Configure/Map SQL DB To Power Bi (kingfishertechtips.in)
- Fixed Column/Row Header Make Visible In Any Report (kingfishertechtips.in)
- Self-Signed Certificate: Configure SSRS/PBIRS With SSL (kingfishertechtips.in)
- Run As Different User Option Not Showing, Enable In Windows (kingfishertechtips.in)
- Create Local User Account/Local Admin User In Windows 10/11 (kingfishertechtips.in)
- Login With AAD/Domain/Microsoft Account To Azure VM’s/RDP (kingfishertechtips.in)
