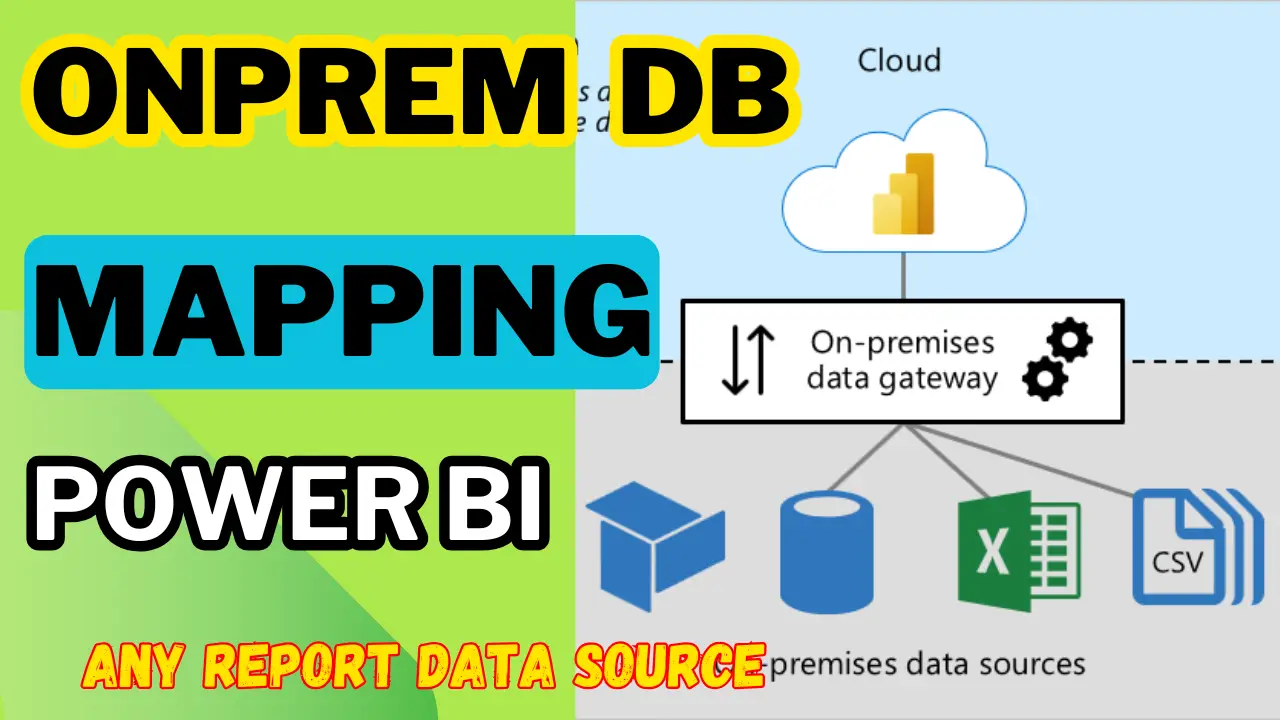
On-Premise Gateway: In this article/post we will see how we should configure the data source for a particular report hosted in power bi service.
On-Premise Gateway Works?
Works? Suppose you have created Paginated/RDL Reports in Power BI Report builder or Microsoft Report Builder, after creating the reports you will manually or directly upload it to Power BI service (cloud).
But if you do so, then the reports will get uploaded to the Power BI Service (cloud), but the data source which is associated with that particular reports will not get upload or mapped in the Power BI Service. So, Microsoft has come up with On-Prem Gateway where we have to manually map the required data source to the report so that it should fetch all data embedded in the reports using On-Prem gateway.
SQL/SSAS Reports?
Now I will create one report with my SQL Server DB and will show you how to map data source’s in that Report when we publish to Power BI service.
Step 1: I have created one rdl report with “My_City_DB“, now if I run this report the data will get fetched from SQL Server, because the data is coming from SQL DB if you could see in the Step 2.
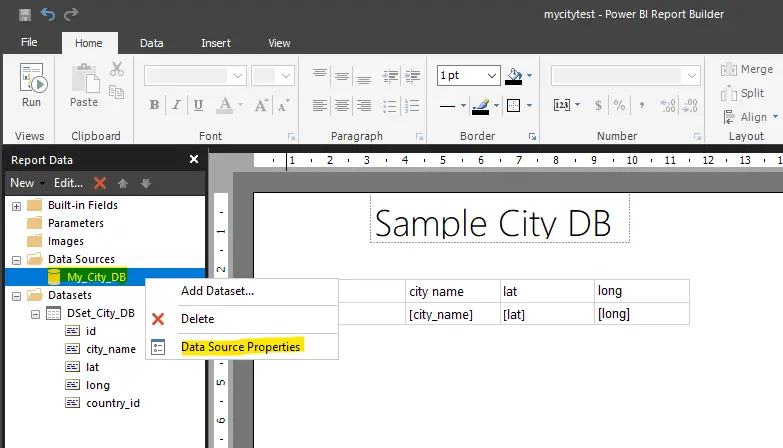
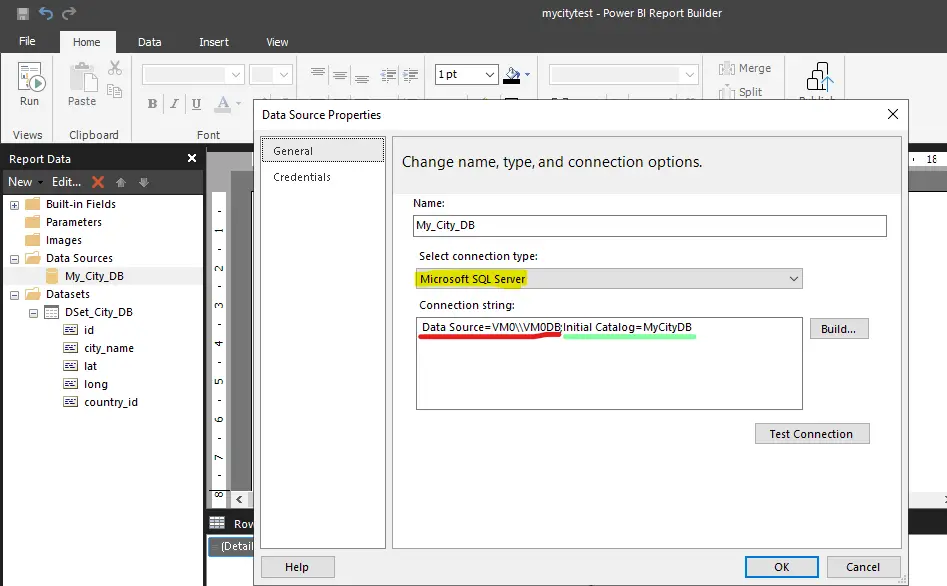
Step 2: Now, if I click on the “Data Source Properties” then you can the details server and database from where the data is coming in this report. I will show you my SQL Server by connecting it to SSMS for confirmation and you can see the details below in Note.
Step 3: Now once the report is running fine in report builder, our next step will be to publish it to Power BI Service (either manually or directly uploading it) as you can see in my case in the below image.
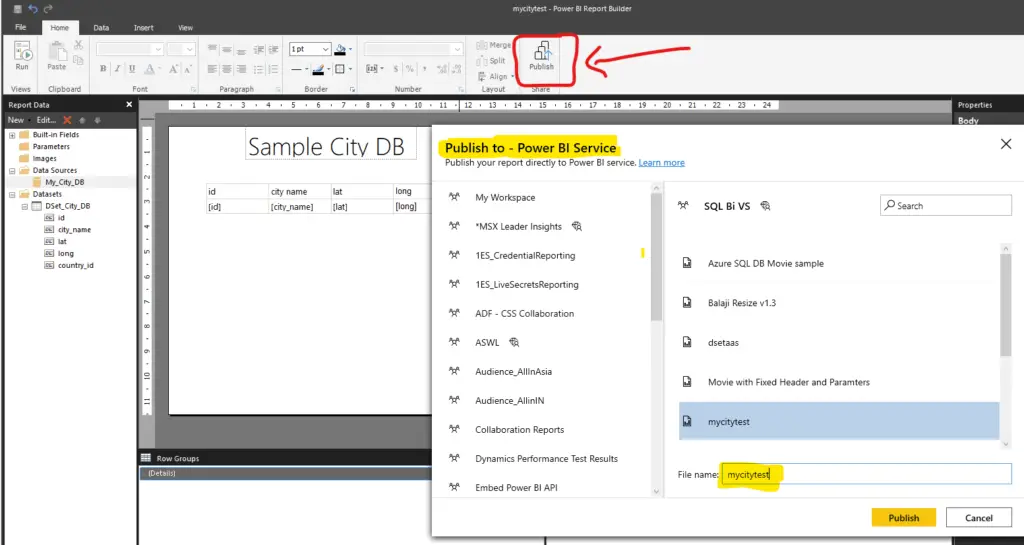
Note: In Microsoft Report Builder you can manually save the report in your local machine and upload it to Power BI Service.
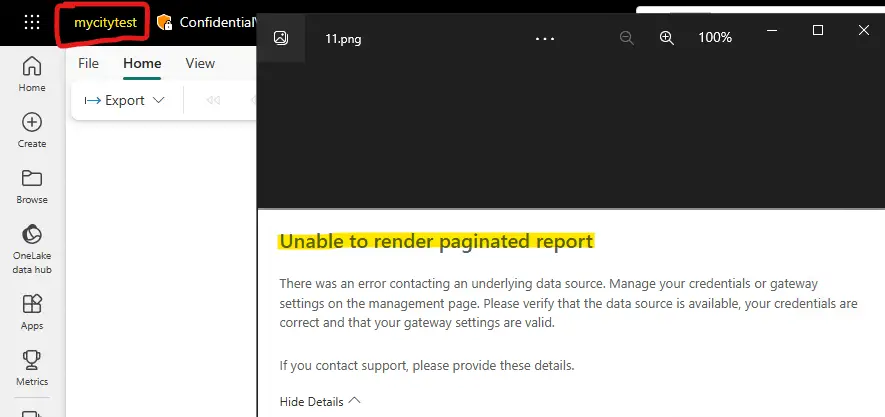
Step 4: Now we will open our Power BI service and open the report which we just uploaded, if you can see that I am getting the below error that “error contacting to data source”. Now we will map the data source to this report.
On-Premise Gateway – Power BI?
Step 5: Now to link/map the data source to the report we will follow the below steps, but before this make sure that On-Prem Gateway is installed in the SQL Server VM, to make it work properly.
On-Premise Data Source: In this article we will see how to install and configure the gateway for required data source. Now, there are 2 kinds of gateway Microsoft provides us (Personal & Standard).
I will recommend you to go with Standard one. If you want more info about it, check out this link: https://learn.microsoft.com/en-us/data-integration/gateway/service-gateway-install. Follow this document and do all the configuration mentioned in the document as mentioned.
Prerequisite:
Note 1: The gateway runs on a particular VM/Machine that you will install and configure it on, make sure that you install it on PC which is always turned on to make sure it has better performance and reliability overall, also I will suggest you to use the Network which is wired, not the wireless one.
Note 2: Please use the same username/user-id/domain account, which you have used to purchased Power BI Service License. If not make sure that the user you will use, to configure the Gateway has Admin rights.
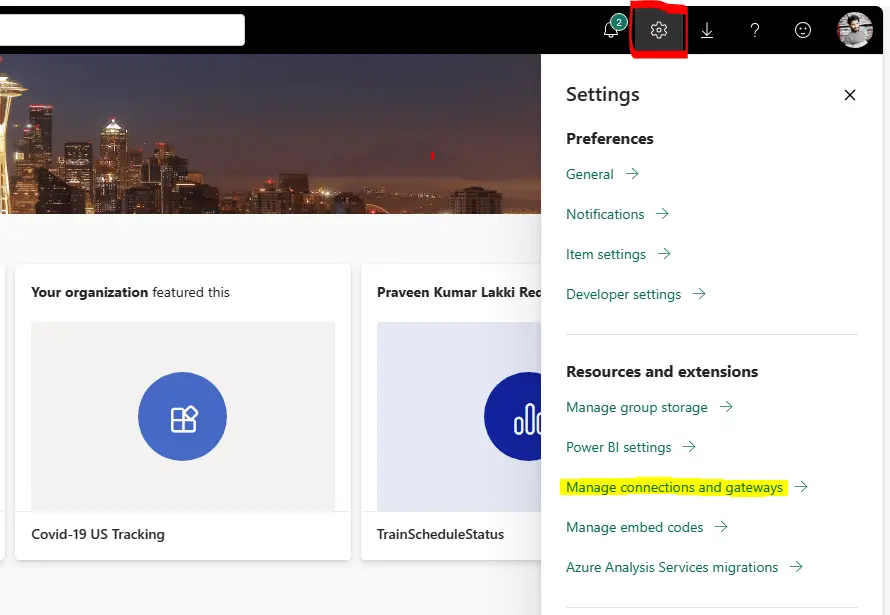
Step 6: At the home page, click on the gear icon at the top and select the “Manage connections and gateways” options.
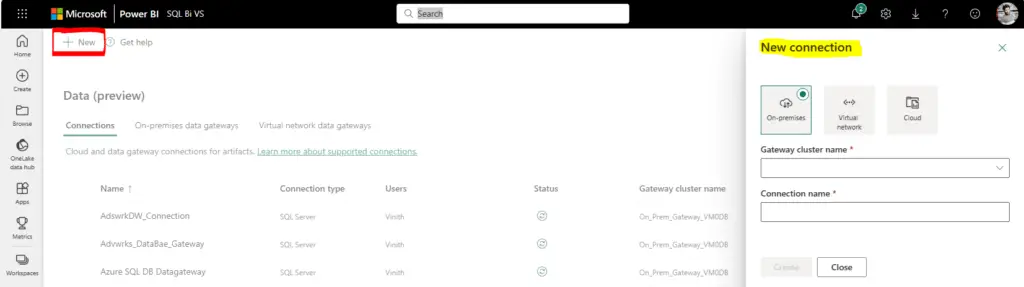
Step 7: Now here click on New at the top and you will find New Connection option at the right.
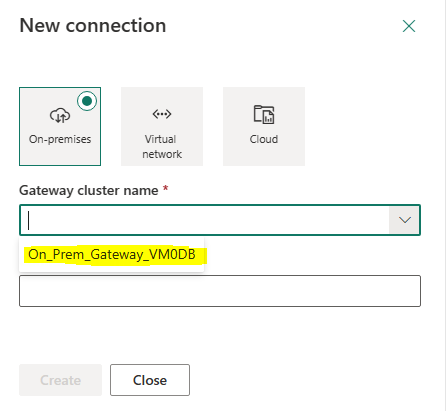
Step 8: Now here if I drag this “Gateway cluster name” then you can see that, in my case I have configured the gateway on my VM0 (PC) with the same Power BI id and it is reflecting here automatically! Now I will select the gateway and proceed further.
Step 9: This is very important and crucial to understand so please check and read carefully all the following details clearly.

- On_Prem_Gateway_VM0DB: This is the gateway which I have configured in my VM, so this name you will get it when you install and configure the gateway.
- Citydb: It is connection name which is used to recognized the DB name on SQL Server (you can give any name).
- Connection Type: Coming to options it has all kind of data source supported in the gateway’s. If you drop down, then you can find all different option which is supported.
- VM0\VM0DB: In my case VM0 is the PC name where the server is installed, and VM0DB is the SQL Server name (for confirmation you can see the Step 2 Note which is mentioned above.
- MyCityDB: This is the database name which is hosted on the SQL Server (you can check the Step 2 note)
- Authentication: Here you will see multiple options types of authentication mainly I will focus on Basic and Windows.
- 6a). Basic: If you want to use SQL logins then you can use Basic Authentication.
- 6b). Windows: In my case you can see that I am using windows Authentication, you can see I have mentioned in above image.
Step 10: Now go back to the report which we have uploaded to Power BI Service in step 4 and browse the report options and click on “Manage” Options.
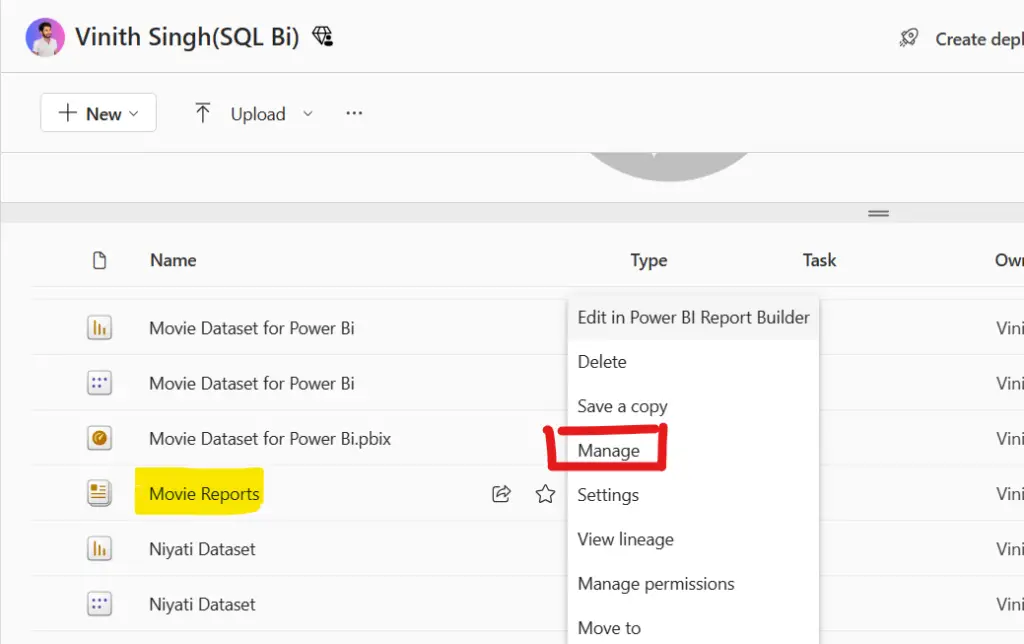
Step 11: Select the gateway name which we have created in step 8 and hit apply. That’s it we are good to browse the reports now.
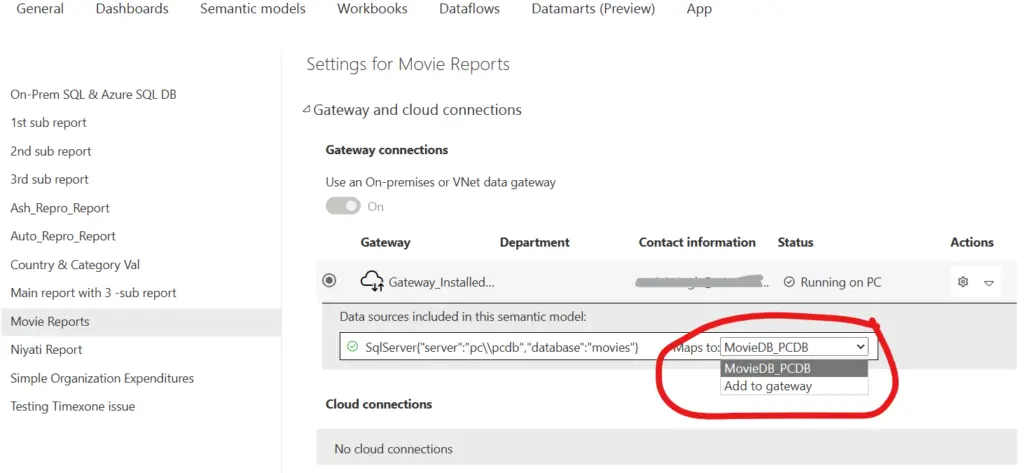
This is preety much we have to do to configure our report data source in Power BI service. Now if we refresh the portal or Power BI url then, the report will work without any issue.
Watch!
Conclusion
In this article I have mentioned all the points when it comes to mapping the data source to the required field, if you have any Dout or concern please comment down below so that we can help you if anything is required. Also, all the required images which is highlighted is mentioned in this blog post. Also you can see the others articles I have written on SQL Bi in the below links.
Related Posts!
- Run as Different User option, then you can follow this article below.
- Create Local Admin Account in any windows, follow the below article!
- Could not load folder content in SSRS/PBIRS
- Capture Fiddler Traces

Neu anh em dang tim kiem mot nha cai truc tuyen uy tin de tham gia ca cuoc, thi xo88chinh la lua chon ly tuong. Day la nen tang ca cuoc hang dau mang den trai nghiem chuyen nghiep va chat luong cao voi hang loat tro choi da dang, hap dan. xo88.name