
Deploy Tabular Project: In this article we will see what process is to CREATE Tabular Model by using the data source as Azure SQL Database and finally publish it to Azure Analysis Services from Visual Studio. Follow each steps easily by referring the images mentioned with all the steps and deploy your model to AAS.
Perquisites:
- Azure SQL Data Base: Create a single database – Azure SQL Database | Microsoft Learn
- Azure Analysis Services (AAS): Create an Analysis Services server in Azure portal | Microsoft Learn
- Visual Studio with SSDT Tools: SSDT Tools (Reports, Tabular & Cubes Model) Installation (kingfishertechtips.in)
Create Tabular Project:
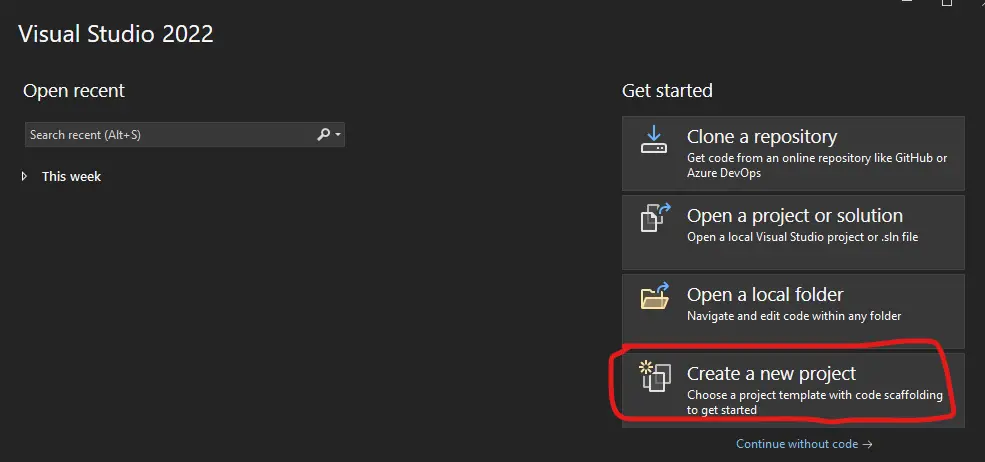
Step 1: Open Visual Studio and click on “Create a new project“. If you have not installed Visual Studio, then you can follow the below document to install.
Link: SSDT Tools (Reports, Tabular & Cubes Model) Installation (kingfishertechtips.in)
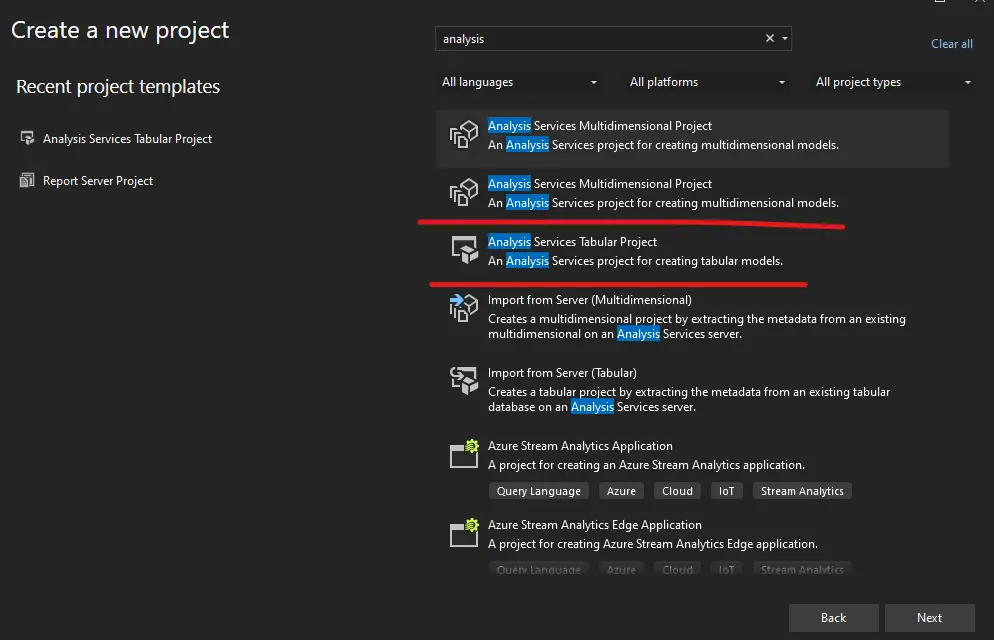
Step 2: Search for “Analysis Tabular Project” and you can see that below this option will be populated and selected the highlighted one mentioned in the below image.
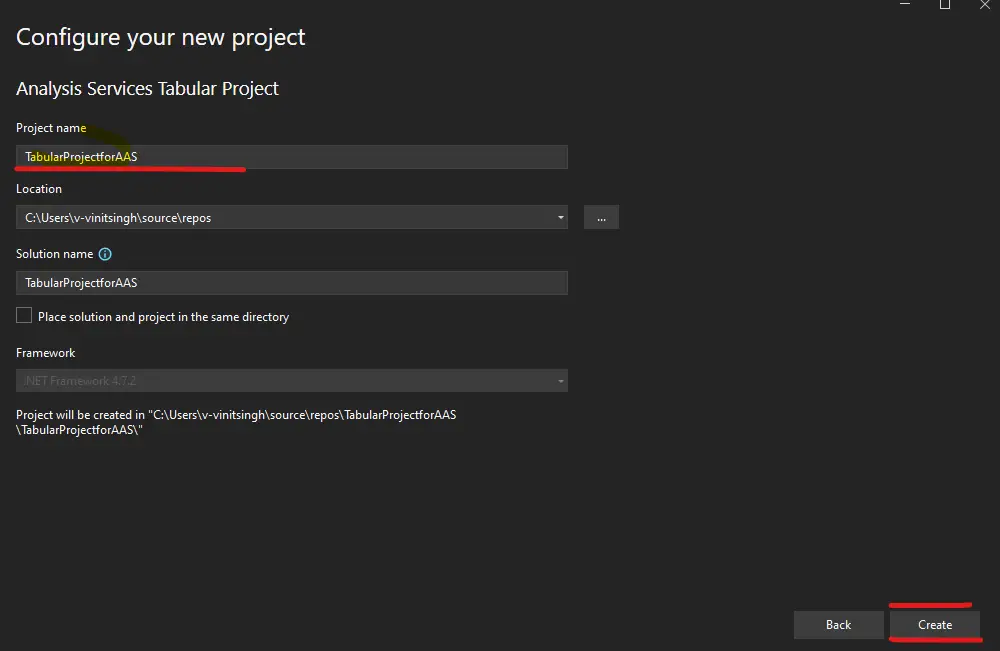
Step 3: Give a Project name to this, as you can I have mentioned as “TabularProjectAAS” and then click on “Create”
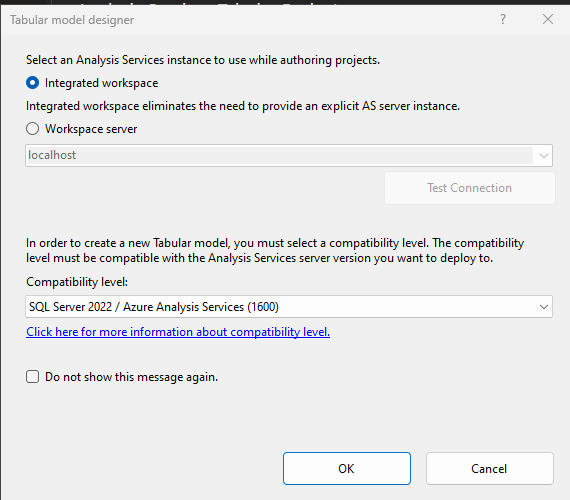
Step 4: Now here select the option depending on the requirement, in my case I will go with “Integrated workspace” and select the highest compatibility level and click on OK.
Build Tabular Project:
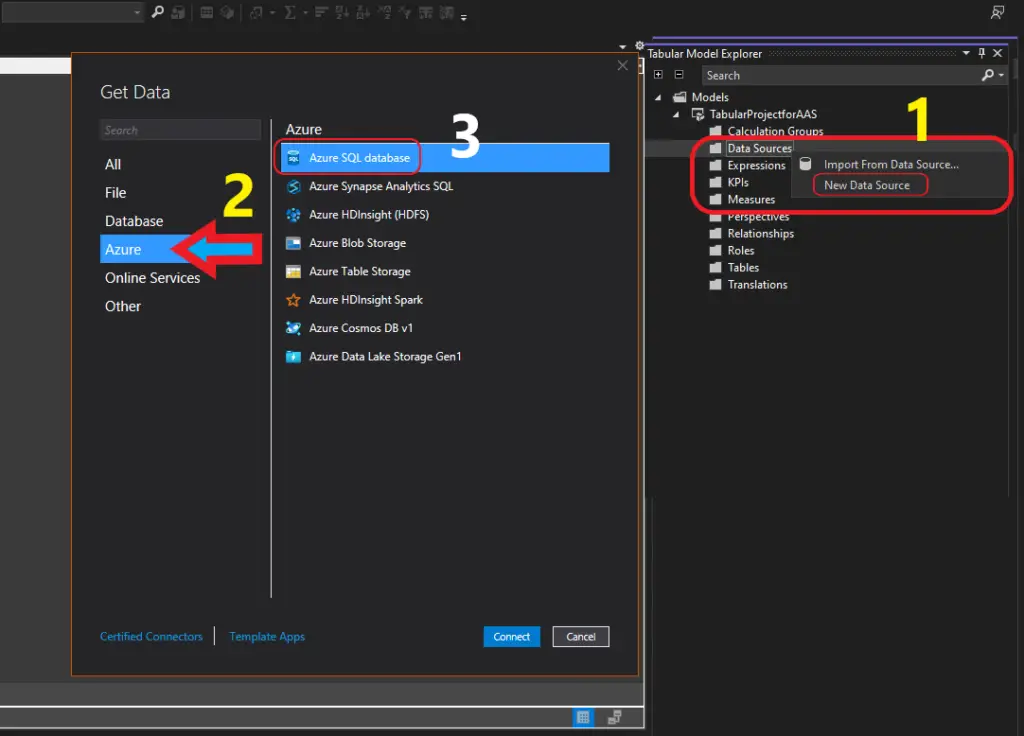
Step 5: Once done you will land on this the homepage, In the right side “Tabular Model Explore” will be there, now here we need one data source so I will >>right click on the “Data Source” >> click on “New Data Source“. Here I will use Azure SQL Data Base, so click on “Azure” >> then “select Azure SQL database” and click on “Connect”
Step 6: Give you “Azure SQL Server” name, you can copy the server name from Azure Portal and click on OK.

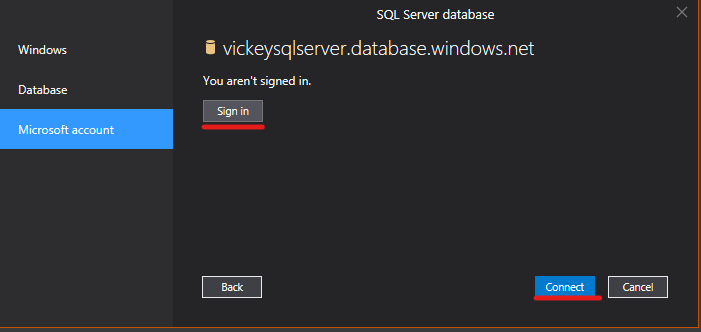
Step 7: Here I am using AAD MFA Authentication so I will select Microsoft account to Sign in. Once done click on sign in and then Connect.
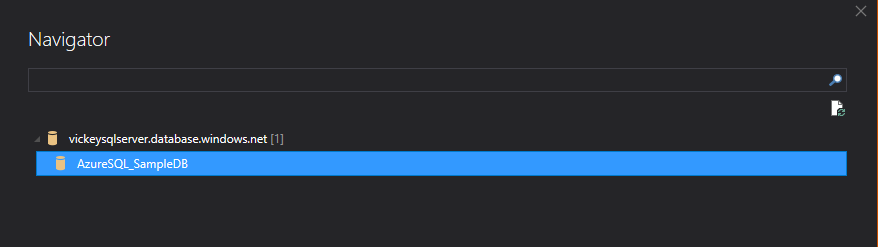
Step 8: Now select the “DATABASE ” you want to use to create the Tabular model. In my case you can see that I have selected the database, currently I have only 1 Database.
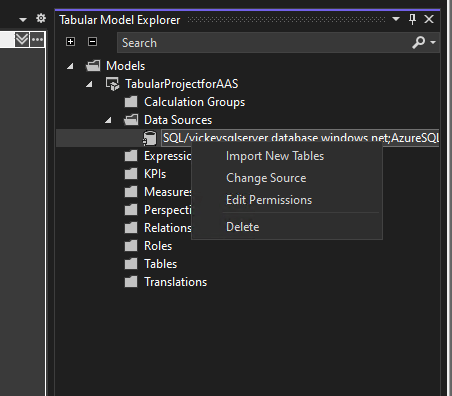
Step 9: Once done, again right click on the “DATASOURCE” and click on “Import New Table“
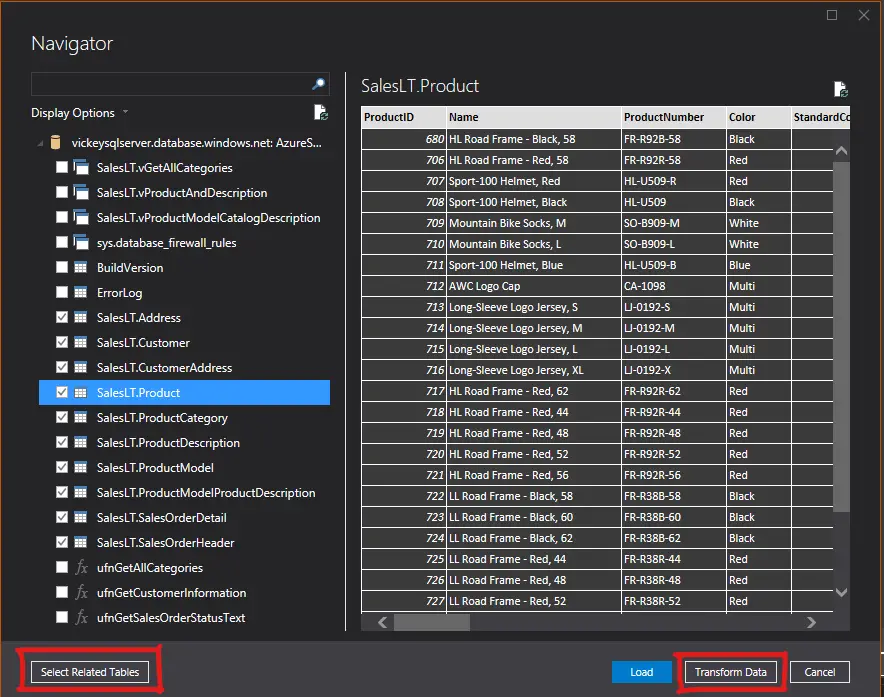
Step 10: Now all the Tables will be visible here as you can see, but I will select by clicking “Select Related Tables” and then click on “Transform Data“
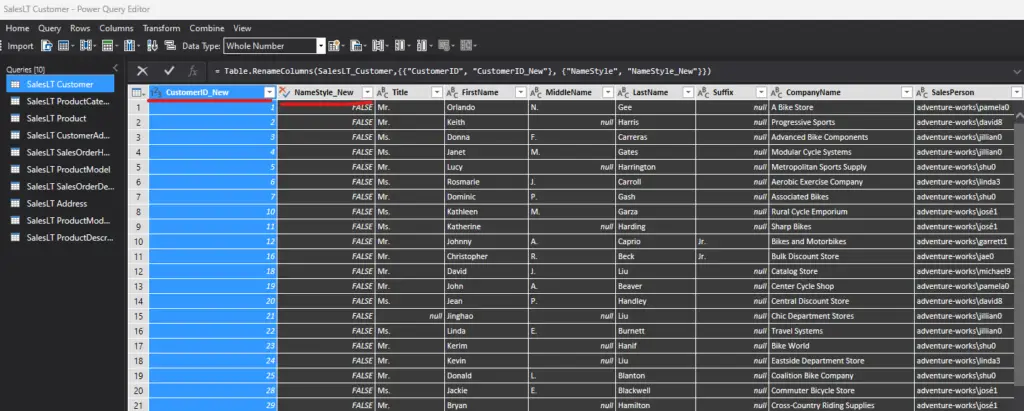
Step 11: Here I will make some changes in the table just to confirm it should not be same. As you can see that I have changed “CustomerID” into “CustomerID_New”, also I have made some other changes here by changing the column header name.
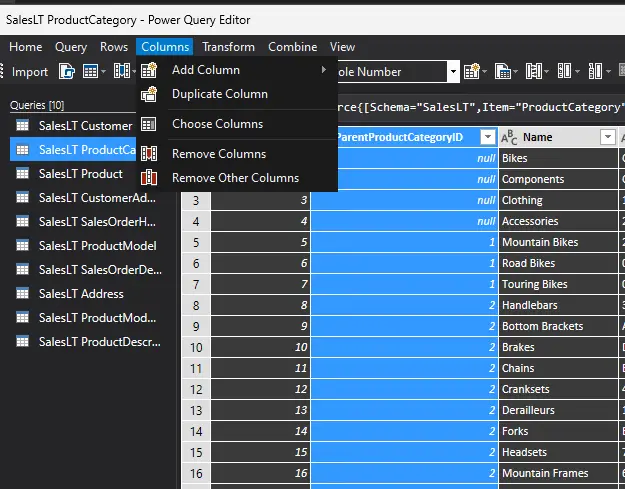
Step 12: I will make one more changed here by deleting the “ParentProductCategoryID” as you can see it is selected and then go to “Column” click on “Remove Column”.
Note: I making just minor changes in this Project just to show the how this SSDT tools works.
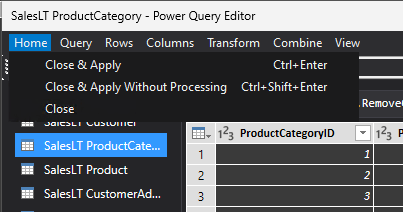
Step 13: Once all changed are made just go to “Home” click on “Close & Apply“
Step 14: All the changes will take effect and at the right side you can see that my tables are procced and it is visible, now click on “Close“
Step 15: If you want to link one table to other, then click on the below “Diagram” icon then you will see the flow of the tables. Now we are good to deploy the model to AAS.

Deploy Tabular Project:
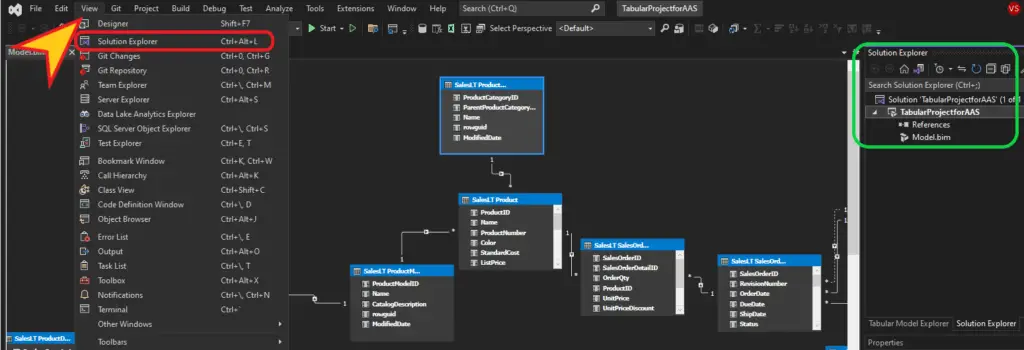
Step 16: To deploy first we have to go to “Solution Explorer” by default it will be there, but if it not showing then you can go to “View Option” at the top and click on “Solution Explorer” then it will appear at the right side.
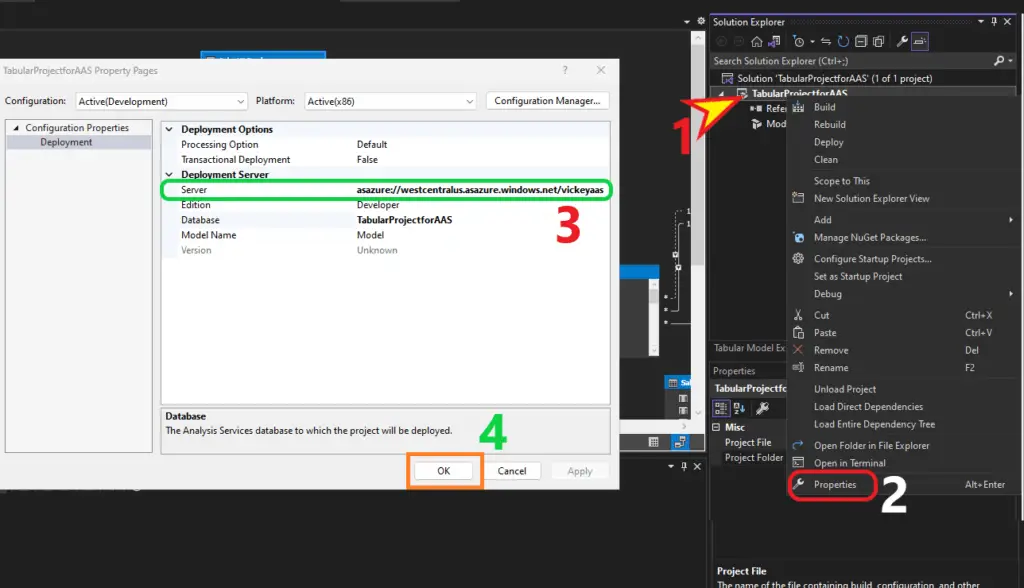
Step 17: Right click on the “Project Name” and then click on “Properties” at the right side one Dialog box will appear. In this box under “SERVER” specify the AAS server name, as you can see that I have specified. Now once done click on OK.
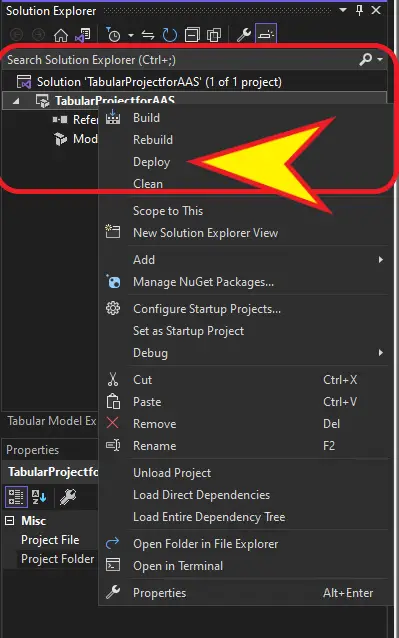
Step 18: Again Right click on the “Project Name” and then click on “Deploy“, then it will prompt you for authentication of the AAS Server which you specified in step 17.
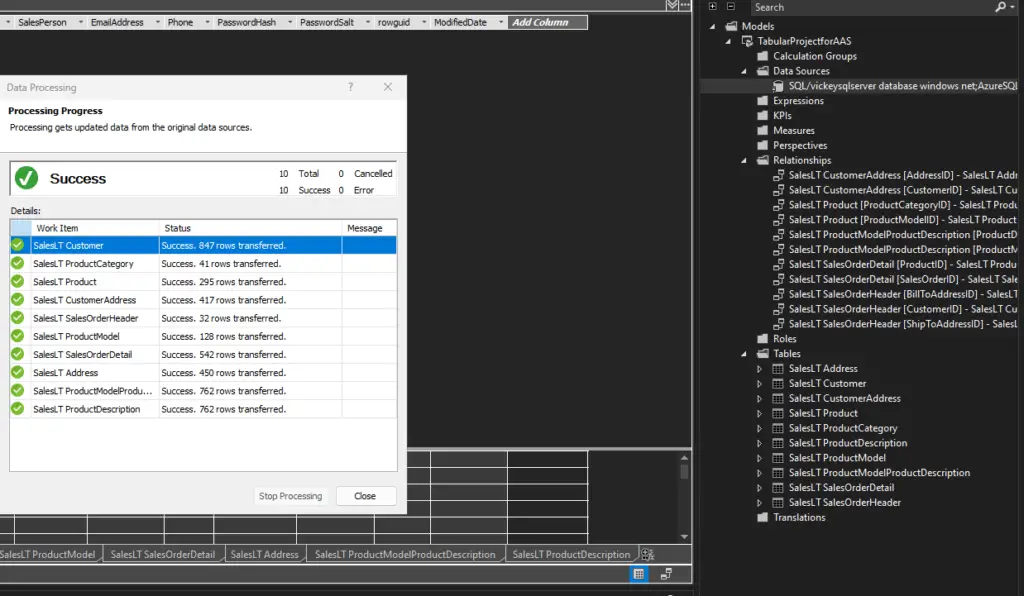
Step 19: Once done the deployment process will start and it will take some time to succussed. Once done you will get this SUCCESS notification as you can see in the below image. Also, if you see in the below output the time and deployment is mentioned.

Connect to ASS:
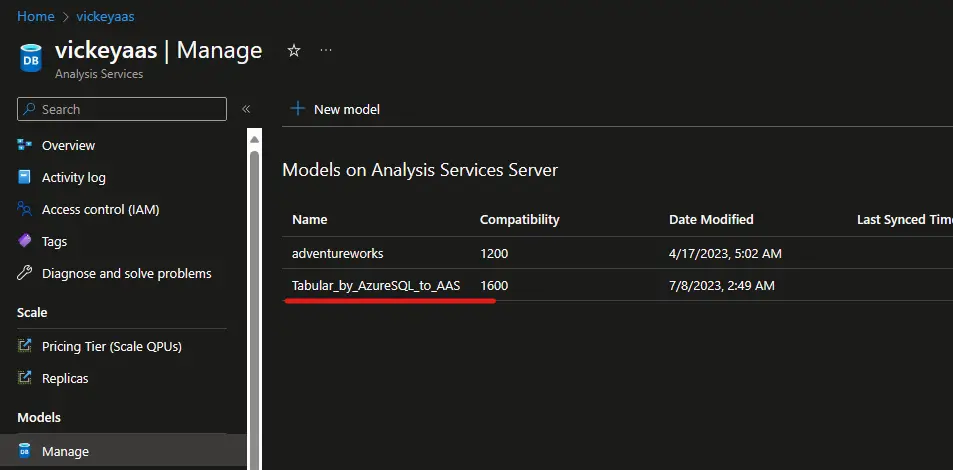
Step 20: Now I have logged in to my Azure Portal and you can see the Model which I have just Deployed into AAS.
Conclusion:
As we have seen in all the above steps on how to create Tabular Model and Deploy it to AAS Server. Here we have seen only for AAS, but if you want to do other Server then you have to follow the same steps at last just mention the server’s name to deploy it on particular server if you don’t want to deploy it on AAS. Any concern please comment down below for more Info.
SQL Bi Links:
- SQL Server 2022 Download, Install, Connect Using SSMS Tool (kingfishertechtips.in)
- SSRS/PBIRS – Install And Configure The Report Server On-Prem (kingfishertechtips.in)
- Could Not Load Folder Contents In Portal URLs – SSRSPBIRS (kingfishertechtips.in)
- SSRS/PBIRS – Install And Configure The Report Server On-Prem (kingfishertechtips.in)
- SQL Server 2022 Download, Install, Connect Using SSMS Tool (kingfishertechtips.in)
- Capture Fiddler Trace for Debugging the Network Traffic (kingfishertechtips.in)
- On-Premises Gateway: Configure/Map SQL DB To Power Bi (kingfishertechtips.in)
- Fixed Column/Row Header Make Visible In Any Report (kingfishertechtips.in)
- Self-Signed Certificate: Configure SSRS/PBIRS With SSL (kingfishertechtips.in)
- Create Local User Account/Local Admin User In Windows 10/11 (kingfishertechtips.in)
- Login With AAD/Domain/Microsoft Account To Azure VM’s/RDP (kingfishertechtips.in)
