Azure Analysis Services: In this activity you will create resources in Azure, installing and configuring gateway to connect to your previously installed Analysis Services, and creating a service principal to access Azure Analysis Services using username/password from SQL Server Management Studio (SSMS). Additionally, you will be performing backup and restore of the sample model used in previous activity.
Prerequisites
- Get approvals for $200 credit to Azure portal (Remember your subscription name!)
- Download and install Visual Studio 2019, choose “Data storage and processing” package (can be found from Microsoft Store)
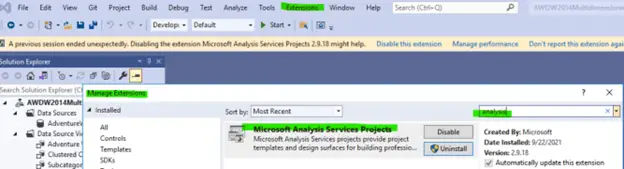
- Install Analysis Services Project extension in VS2019 (can be found within VS2019 Extensions menu > Manage Extensions, search for analysis)
Creating Azure Analysis Services
- Important things to keep in mind while performing this activity: always use your @domain.com to sign-in to any services.
- Logon to Azure portal.
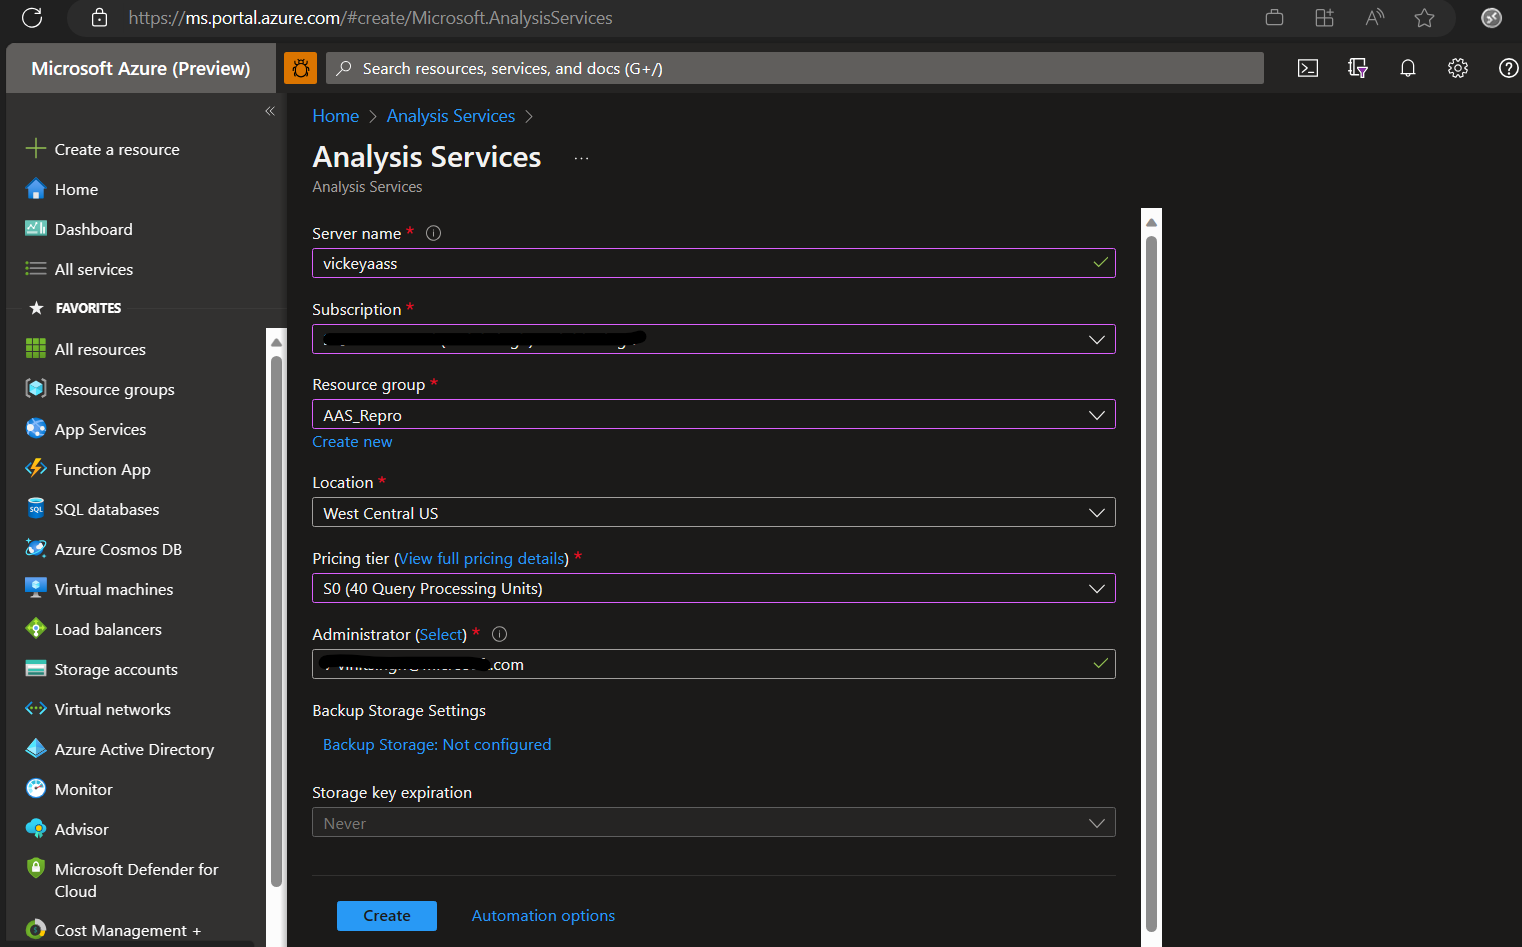
- Create a resource > Analytics > Analysis Services.
- Enter a Server name (must be all lowercase and no special characters).
- Choose your Subscription name.
- Choose a Resource group, if you do not have one, click Create New in the link directly below the drop down.
- Choose the Location (aka Region, remember this!).
- Choose S0 for Pricing tier. S level gives enterprise functionalities that customers will be using.
- Click on Backup Storage Settings to create a new Storage Account.
- Click on + Storage account and give it a name.
- Click OK and wait for Validation.
- Select your new Storage account and create a new Container.
- Click on + Container and give it a name.
- Click Create.
- Select your new Container and click Select button.
- Back in the Analysis Services page, click Create and wait for deployment.
Connecting using gateway
- Open Install and configure an on-premises data gateway, download and install gateway.
- Choose the recommended options and sign in using @domain.com alias.
- When registering the gateway, ensure to select your default region (this will be used later on for Power BI, as Power BI data gateway will not work unless it is the default).
- Follow the steps in Azure portal to create an On-premises data gateway resource and connect Analysis Services to your gateway (it is OK if your Azure Analysis Services is in a different region than your On-premises date gateway since we are only testing, for customers it would be preferred to be in the same region due to network latency/performance issues).
Creating DB & Upload To Azure Analysis Services
- Open Visual Studio 2019, go to File > New > Project.
- Search for analysis and choose Analysis Services Tabular Project, click Next.
- Give it a Project name, click Create.
- Choose Integrated Workspace, and SQL Server 2019 / Azure Analysis Services (1500) for Compatibility level, click OK.
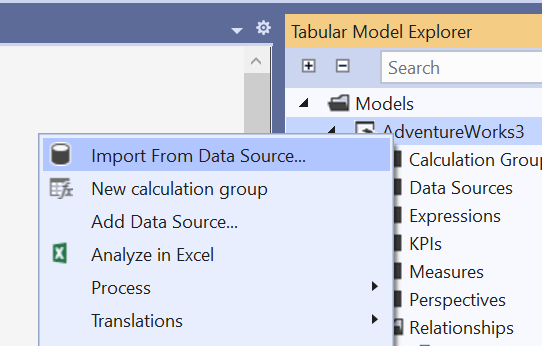
- Under Tabular Model Explorer view, right click on the project name, choose Import from Data Source.
- Choose Database > SQL Server database, click Connect.
- Enter the SQL Server instance under Server that you wish to connect (Hostname\Instance). If you only have one SQL Server instance running on your computer, type in localhost to connect.
- Logon to SSMS using Database Engine.
- Right click on the Database instance > Properties.

- Go to Security, ensure Server authentication is set to SQL Server and Windows Authentication mode. If you changed this option, you would need to restart your SQL Server services for it to take effect, then come back to this step.
- Under database instance, go to Security > Logins, right click on Logins and choose New Login.
- Give it a user name, choose SQL Server authentication, give it a password (twice), and uncheck Enforce password policy.
- Under User Mappings, assign db_datareader and db_datawriter to the databases you have restored in previous activity, then click OK.
- Back in Visual Studio, choose Database, enter your SQL Server user credentials.
- You will receive a warning regarding Encryption, ignore and click OK.
- Choose any AdventureWorksDW database, click OK.
- Find the table FactResellerSales, check the box, then click Select Related Tables button.
- Other tables related to this one will be selected automatically, click Transform Data button.
- In the Power Query Editor window, rename the Tables to have friendly names (i.e., remove Fact or Dim from the beginning, add space between words).
- Select the previously named FactResellerSales table, in the data preview, find and select the columns SalesAmount, TaxAmt, and Freight (using Ctrl key).
- Go to Columns menu > Remove Columns.
- Click View menu > Advanced Editor, this is the query that the Power Query Editor created for your previous action.
- Select the previously named DimEmployee table, find and select FirstName and LastName columns.
- Go to Columns menu > Add Column > Custom Column.
- Enter Full Name for New column name.
- In the formula text box, enter the following and click OK:
= [FirstName] & " " & [LastName] - Click View menu > Advanced Editor, this is the query that the Power Query Editor created for your previous action.
- Click Home menu > Close & Apply.
- When the Data Processing window appears and finishes processing, click Close button.
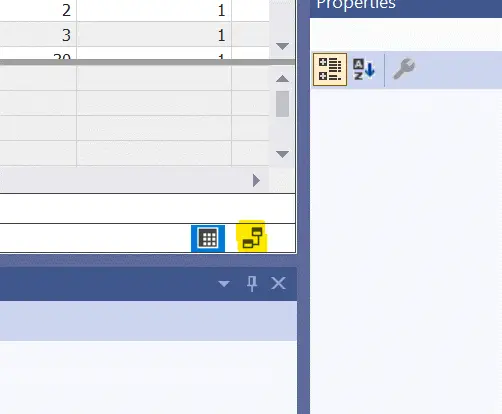
- Change to Diagram view. Look at the relationship between the tables.
- Change to Solution Explorer view, right click on your project > Properties.
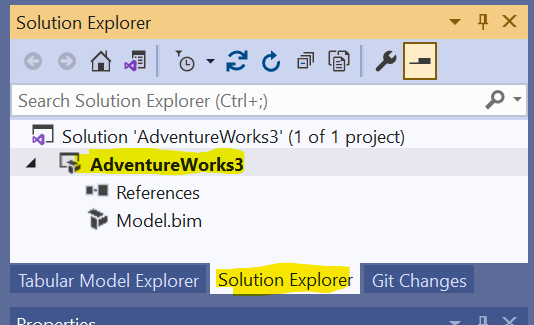
- Under Deployment Server, change Server to your Azure Analysis Services URI. To find it, go to Azure Portal Home, click top left menu, choose Resource group. Click on the Analysis Services from the list of resources. Look for “Management Server Name” and copy it. Back in Visual Studio, paste it in Server field, click OK.
- Under Solution Explorer view, right click on your project > Deploy.
- Choose your @microsoft.com alias if prompted.
- Click Close when Deployment is successful.
Connecting to Azure Analysis Services from SSMS
- In Azure portal, go to your Analysis Services you have created above. There are many ways to find this. One way is to go to Home, click top left menu, choose Resource group. Click on the Analysis Services from the list of resources.
- Look for Management Server Name and copy it.
- In SSMS, connect using Analysis Services as Server type.
- Under Server name, paste the Management Server Name and choose Azure Active Directory – Universal with MFA for Authentication.
- Enter your @domain.com alias under User name and click Connect.
- Authenticate using your Authenticator.
- Expand Databases and you should see the previous project that you have deployed.
- Find “Adventure Works Internet Sales Tabular Sample Database” that you downloaded previously, make a copy of the ABF file. Rename the file to AdventureWorksLab.abf to prepare for upload.
- Back to Azure portal, go to your Storage container (through your Storage Account > Containers).
- Click + Upload and choose AdventureWorksLab.abf that you have renamed earlier, click Upload button.
- Back in SSMS, right click on Databases > Restore.
- Click Browse and expand the Azure Analysis Services.
- Select the ABF file you have just uploaded, click OK. Click OK again to finish.
- You may need to Refresh Databases for Adventure Works Internet Sales database to appear.
Creating service principal and connecting using SSMS
- In Azure portal, go to Azure Active Directory.
- Select App registrations and select + New registration.
- Give it a name, leave everything at default (single tenant), and click Register button.
- Click on the app that you have just created.
- Copy your application (client) ID and Directory (tenant) ID for usage later.
- Go to Certificates & secrets.
- Click on + New client secret.
- Give it a description that is meaningful, you can change the Expires period to longer if you wish. Click Add button.
- Copy and keep the new secret value somewhere safe! You will not be shown this value again later!
- Go back to Azure home portal, go to your Azure subscription.
- Select Access control (IAM).
- Select + Add and choose Add role assignment.
- Click on Members tab and select + Select members.
- Search for your app that you created earlier, having the exact name will be helpful since you will get many results here. Select it and click on Select button.
- Click on Role tab and search for Contributor role. Select it and click on Review + assign button. Click on Review + assign button again to finish.
- In SSMS, connect using Analysis Services as Server type.
- Under Server name, paste the Management Server Name and choose Azure Active Directory – Universal with MFA for Authentication.
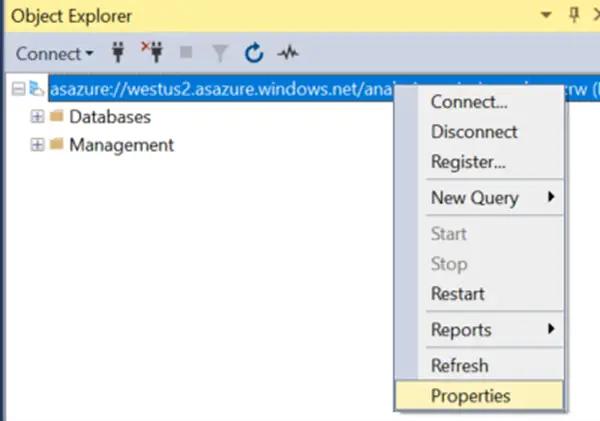
- Once logged in, right click on the connection and go to Properties.
- Go to Security, click Add button.
- Under Manual Entry, enter the following format:
app:<Application (client) ID>@<Directory (tenant) ID> - Click OK to save and disconnect from the connection.
- Connect again using Analysis Services.
- Under Server name, paste the “Management Server Name” and choose Azure Active Directory – Password for Authentication.
- User name will be the following format:
app:<Application (client) ID>@<Directory (tenant) ID> - Password is the secret you have created earlier.
- Click OK to connect.
SQL Bi Links:
- Could Not Load Folder Contents In Portal URLs – SSRSPBIRS (kingfishertechtips.in)
- Capture Fiddler Trace for Debugging the Network Traffic (kingfishertechtips.in)
- On-Premises Gateway: Configure/Map SQL DB To Power Bi (kingfishertechtips.in)
- Fixed Column/Row Header Make Visible In Any Report (kingfishertechtips.in)
- Self-Signed Certificate: Configure SSRS/PBIRS With SSL (kingfishertechtips.in)
- Run As Different User Option Not Showing, Enable In Windows (kingfishertechtips.in)
- Create Local User Account/Local Admin User In Windows 10/11 (kingfishertechtips.in)

I have been exploring for a little bit for any high
quality articles or blog posts in this kind of house .
Exploring in Yahoo I finally stumbled upon this site. Reading this
information So i am satisfied to exhibit that I’ve
an incredibly excellent uncanny feeling I discovered
exactly what I needed. I such a lot without a doubt will make sure to don?t fail
to remember this web site and give it a look regularly.
Hi there, just became alert to your blog through Google, and
found that it’s really informative. I’m gonna watch out for brussels.
I’ll be grateful if you continue this in future.
Many people will be benefited from your writing. Cheers!
my web page; googletest
Stunning quest there. What occurred after? Take care!
Visit my website … Hockey Jargon
Good relationships alone without real powers are also weak power.
We must not forget about the formal side.
The best site about Power business relationship
[url=http://happyfamilystorerx.online/]offshore pharmacy no prescription[/url]
[url=http://azithromycinhq.com/]how can i get zithromax[/url]
[url=https://valtrexmedication.online/]buy valtrex online prescription[/url]
[url=https://valtrexmedication.online/]price of valtrex in canada[/url]
[url=http://happyfamilymedicalstore.online/]good pill pharmacy[/url]
[url=https://happyfamilymedicalstore.online/]canada drugstore pharmacy rx[/url]
[url=http://ezithromycin.online/]azithromycin buy online india[/url]
[url=https://valtrexbt.online/]order generic valtrex online[/url]
[url=https://valtrexv.com/]valtrex medication cost[/url]
[url=https://happyfamilymedicalstore.online/]best online thai pharmacy[/url]
[url=http://happyfamilymedicalstore.online/]canadian pharmacy viagra 50 mg[/url]
[url=http://oazithromycin.online/]zithromax discount[/url]
[url=http://ciprocfx.com/]cipro online pharmacy[/url]
[url=https://dexamethasoneff.com/]dexamethasone cream otc[/url]
[url=https://modafinilmip.online/]provigil 2017[/url]
[url=https://odiflucan.com/]where can i buy diflucan tablets over the counter[/url]
[url=http://azithromycinmds.online/]buy azithromycin online cheap[/url]
[url=https://bactrim.company/]discount bactrim[/url]
[url=https://dexamethasoneff.com/]dexamethasone sale[/url]
Can you be more specific about the content of your article? After reading it, I still have some doubts. Hope you can help me.
Medikamente in Europa problemlos kaufen kern pharma Spreitenbach Erfahrungen mit dem Kauf von Medikamente online
Feel free to surf to my blog post … medicijnen bestellen met gegarandeerde kwaliteit Sun Marcq-en-Barœul
Can you be more specific about the content of your article? After reading it, I still have some doubts. Hope you can help me.
Hello,
for your website do be displayed in searches your domain needs to be indexed in the Google Search Index.
To add your domain to Google Search Index now, please visit
https://searchregistry.net/
Hello,
for your website do be displayed in searches your domain needs to be indexed in the Google Search Index.
To add your domain to Google Search Index now, please visit
https://searchregister.info/