
SSAS/SQL: In this activity you will install SQL Server, SQL Server Management Studio, and Analysis Server plugins for use in future activities. Additionally, you will be restoring a demo database server from backups and linking analysis services to the data for a data refresh.
Download & Installation SSAS/SQL
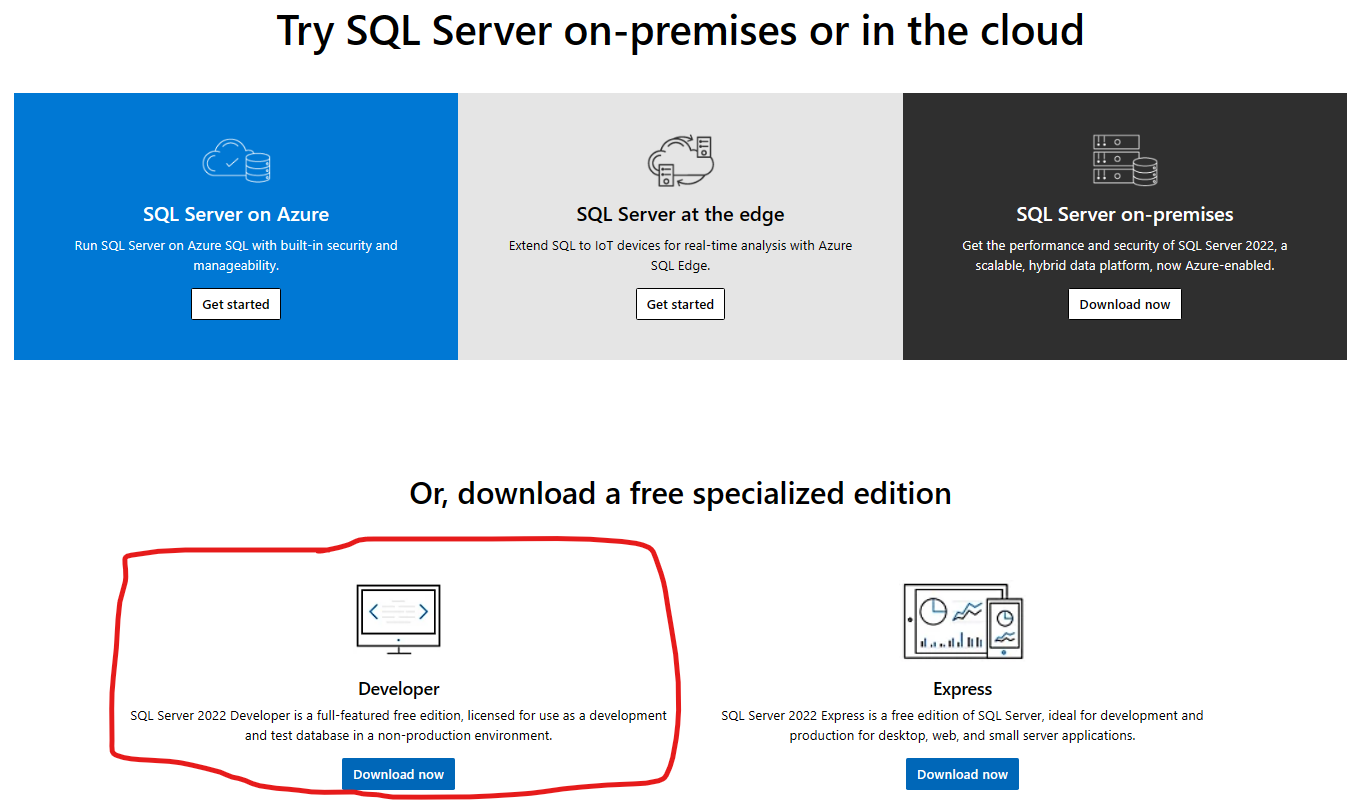
- Navigate to SQL Server Downloads | Microsoft and click on “Download now” under the Developer section.
- Select the Basic installation option
- Accept terms and select where you would like to install it (default location is fine)
- While this is installing, download the following files to use for the database restores:
- AdventureWorksDW2019.bak
- AdventureWorksDW2016_EXT.bak
- adventure-works-tabular-model-1200-full-database-backup.zip
- You will need to unzip and grab just the .abf file – rename it to AdventureWorks1200.abf when extracted
- Note: Where to place them will be noted later, for now you can leave them in Downloads
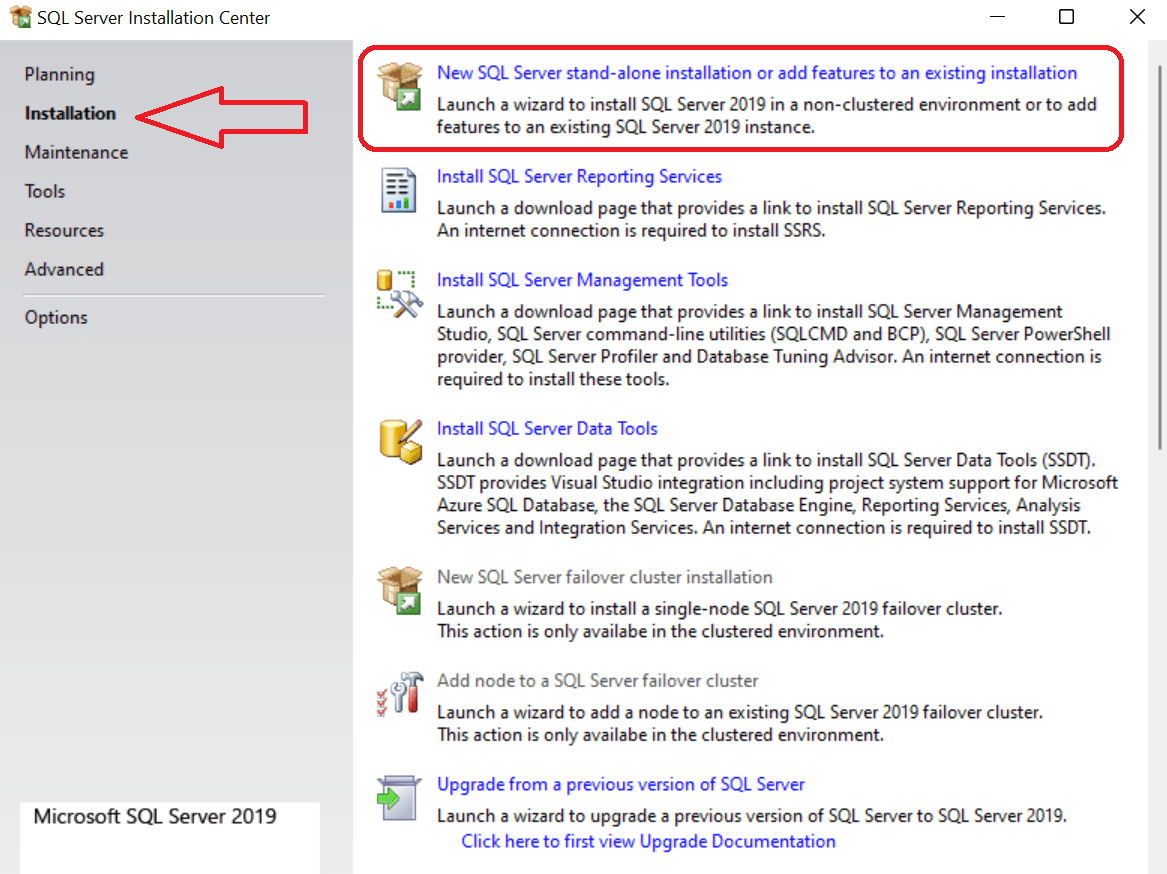
- Once installation is complete launch SQL Server 2019 Installation Center (Start > Microsoft SQL Server 2019 > SQL Server 2019 Installation Center)
- Select Installation from the left side menu and choose the first option on the right.
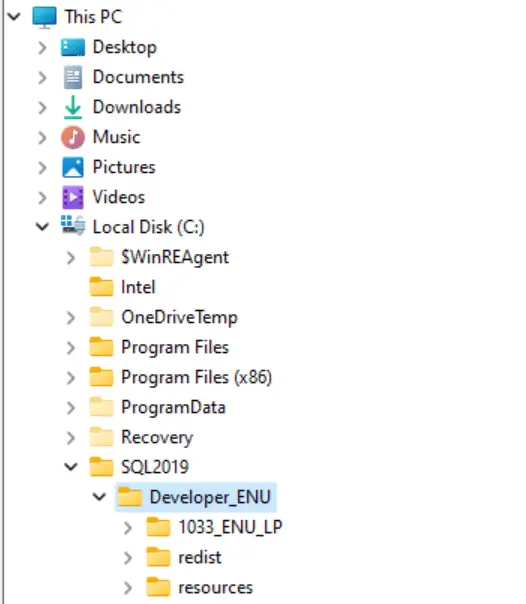
- Select the “Developer_ENU” folder from where you installed the server [Default location is C:\SQL2019] and hit OK.
- Note: You will likely get a pop-up that tells you that you need to restart. If needed, start from step 5 when back online
- Note: You will likely get a pop-up that tells you that you need to restart. If needed, start from step 5 when back online
- Installation Type: Perform a new installation of SQL Server 2019
- Product Key: Select “Developer” from the free edition drop-down
- Feature Selection: Select Database Engine Services and Analysis Services
- Instance Configuration: Select “Named instance:” and provide a name (Instance ID can be left as default after filling the name field)
- Database Engine Configuration: Select “Mixed Mode” then fill out a password and hit “Add Current User”
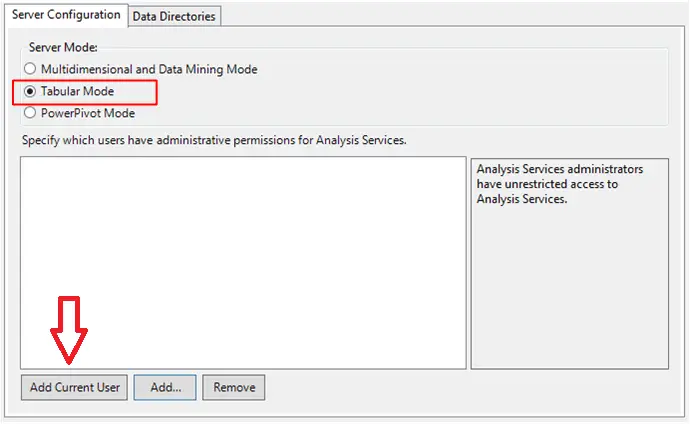
- Analysis Services Configuration: Select “Tabular Mode” and hit “Add Current User”
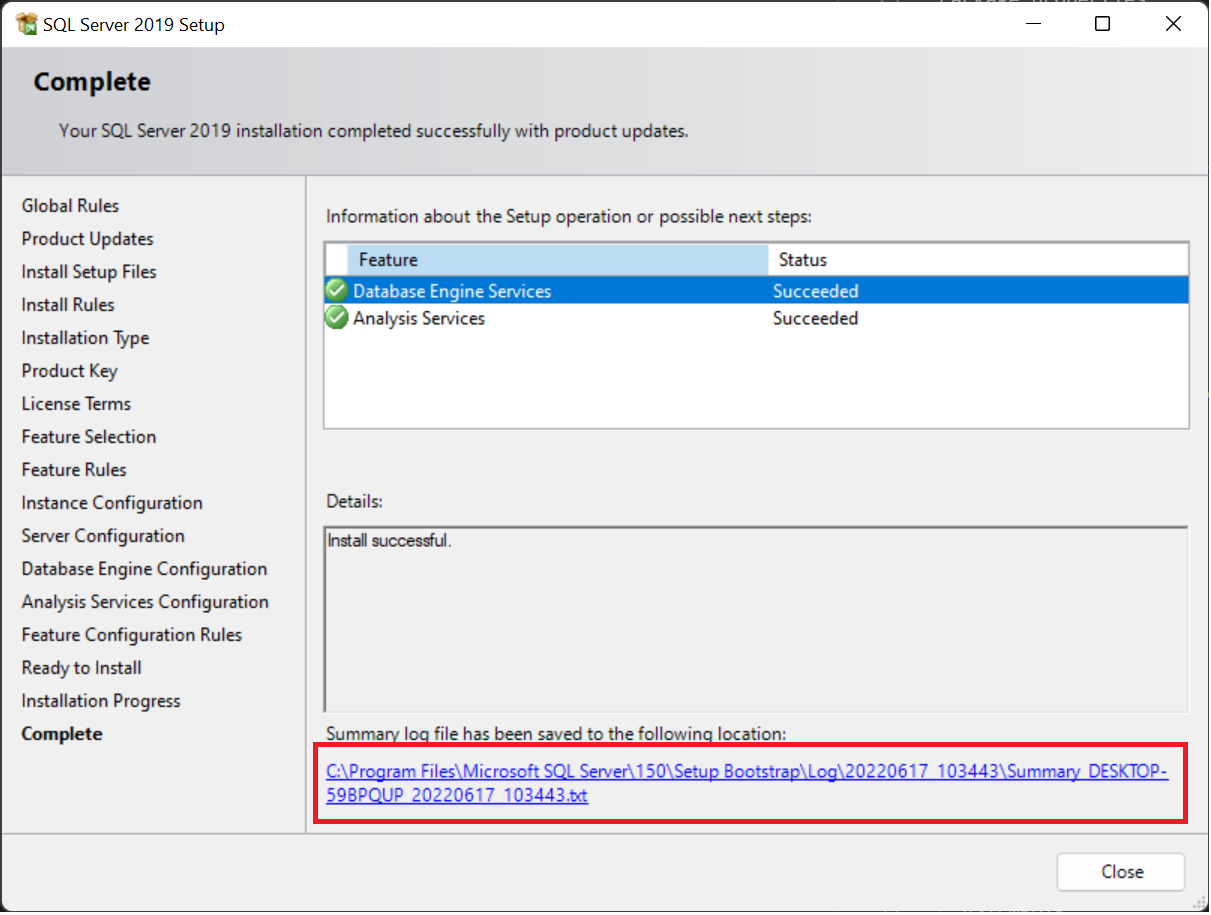
- Complete installation for SQL Server
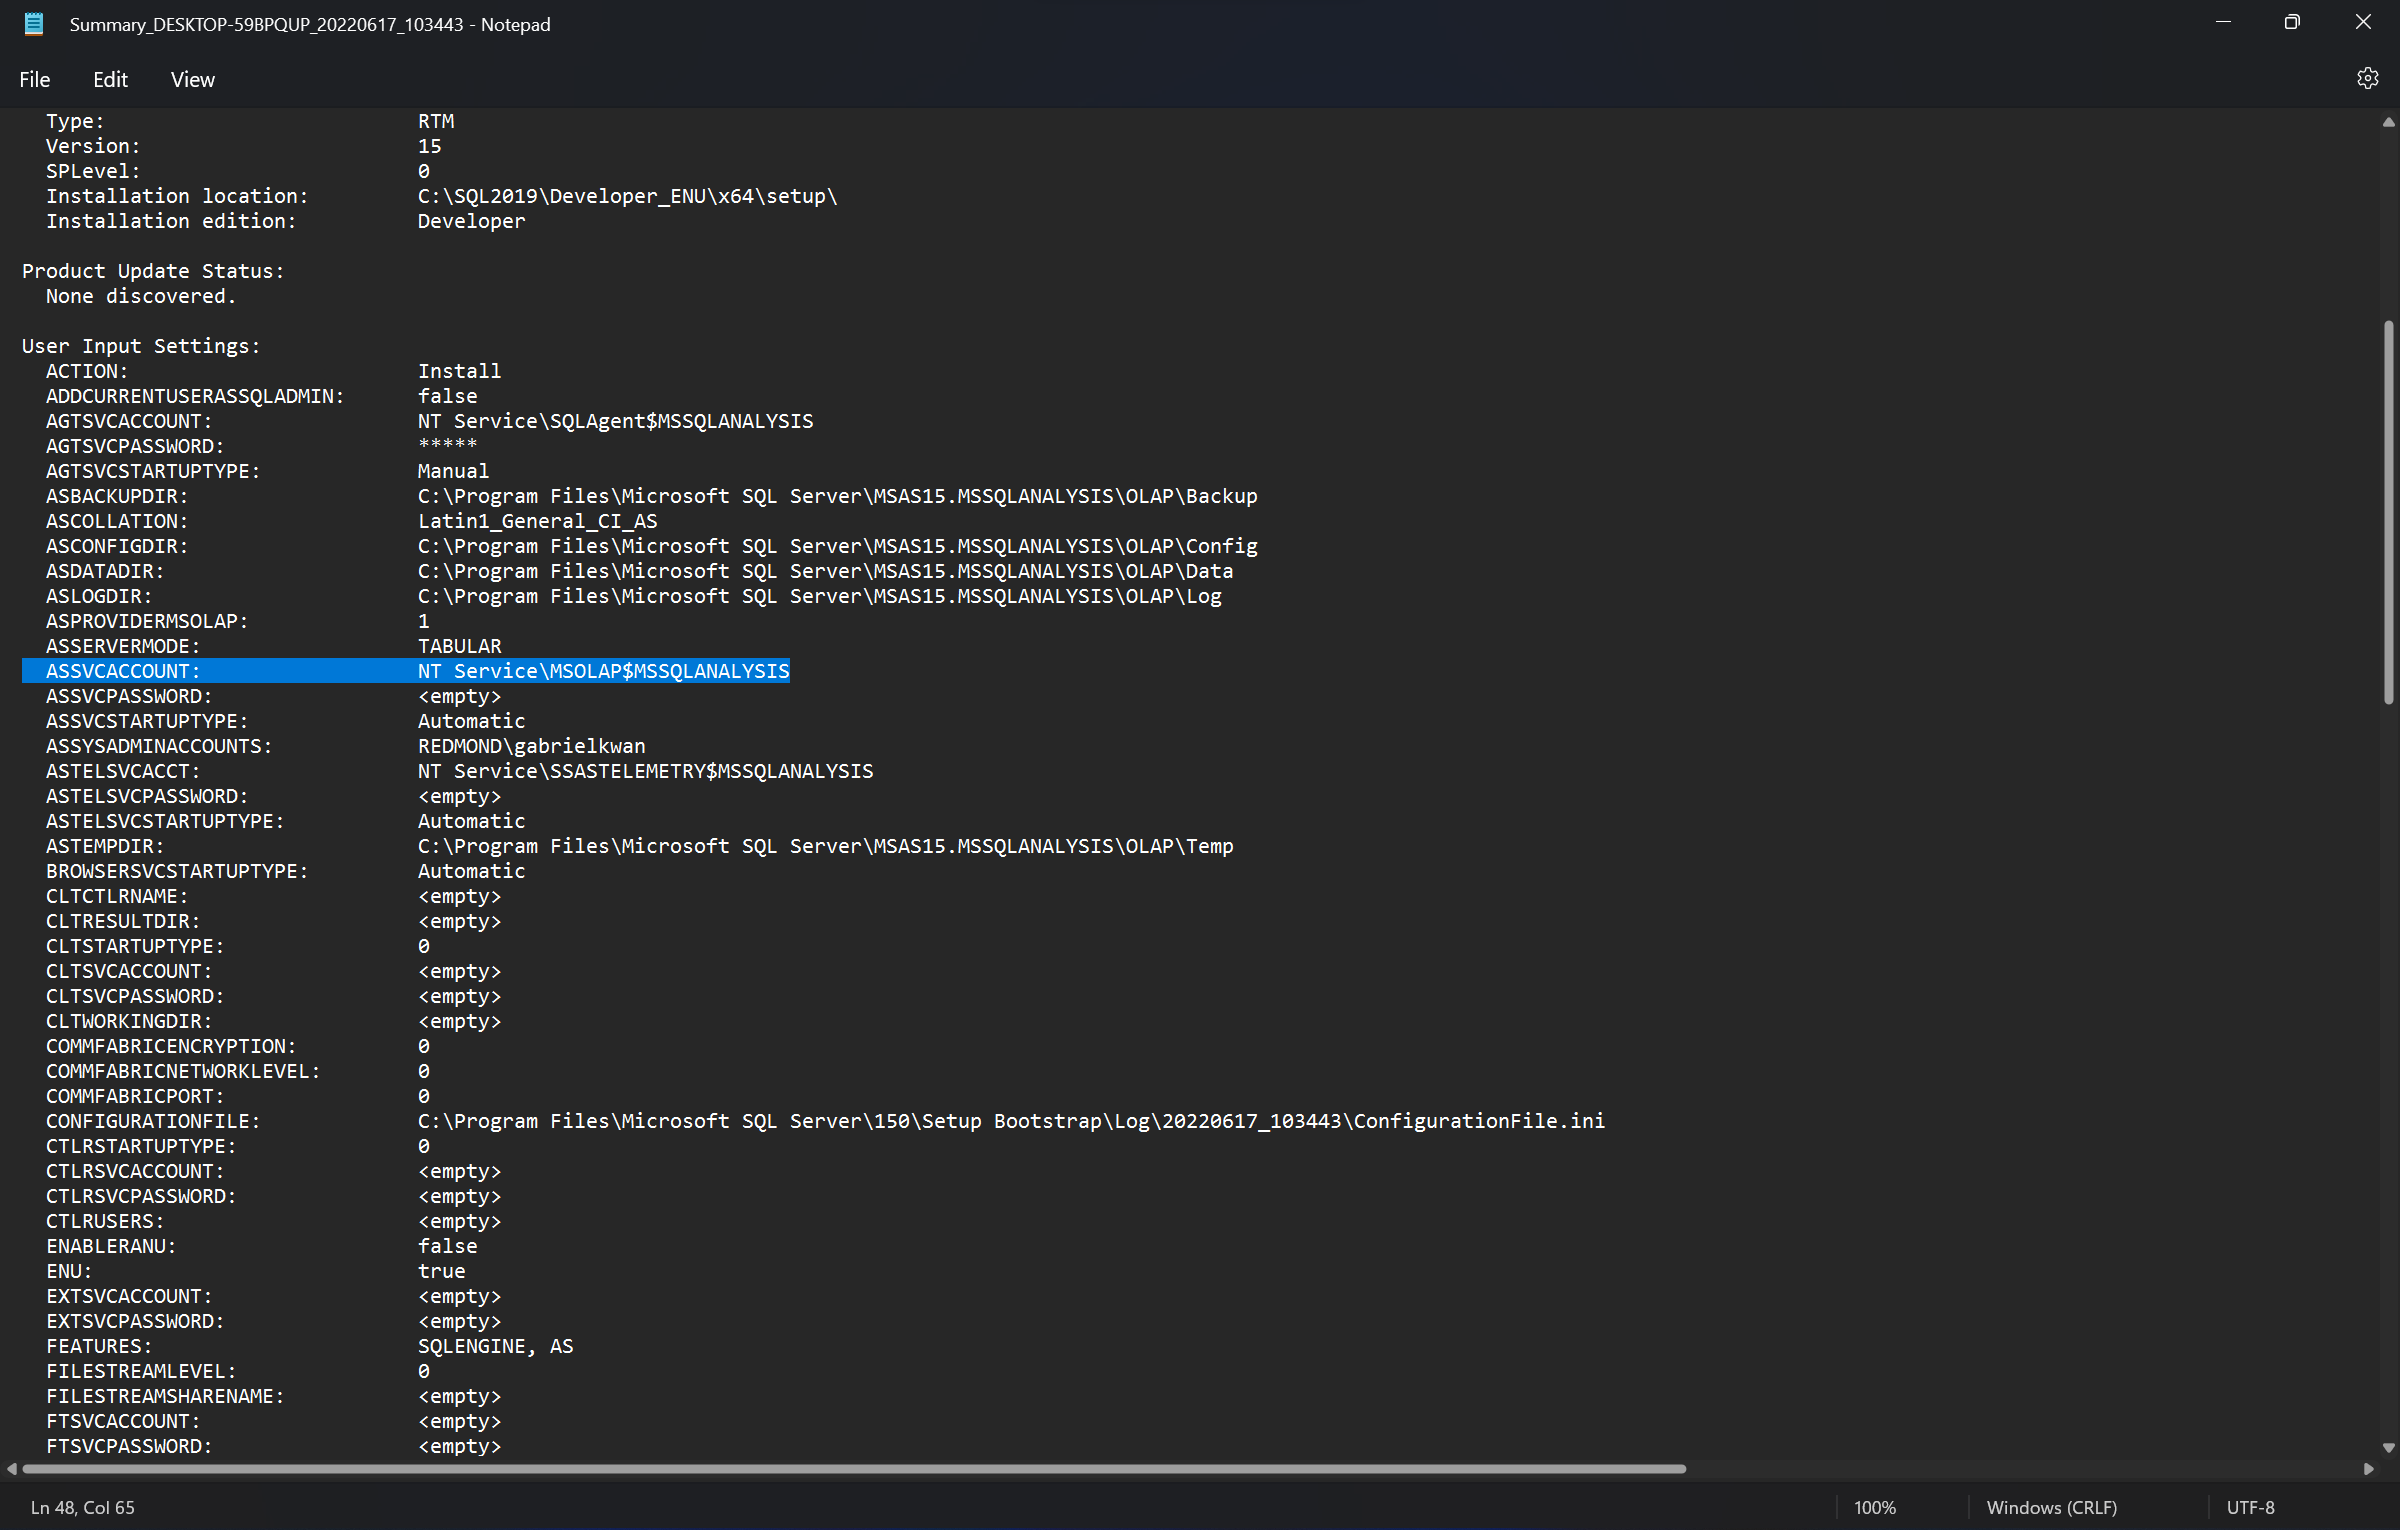
- Once you reach the complete page, open the install summary via the link, and note the service account for analysis server
- Navigate to Download Microsoft SQL Server 2019 Reporting Services from Official Microsoft Download Center to download and install Reporting Service for your reports.
Restore in SSAS/SQL
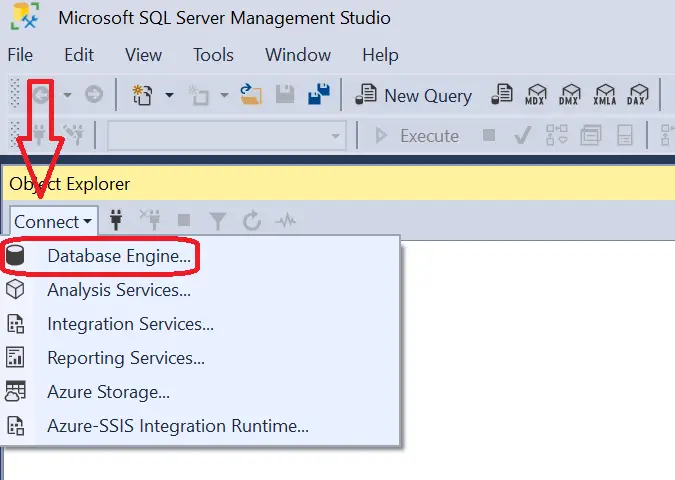
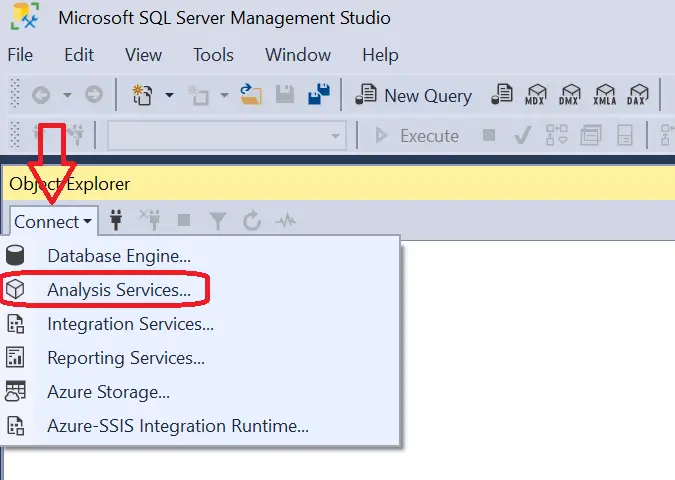
- Connect to the Database Engine and Analysis Services (one at a time) searching for the server you created during installation
- “File > Connect Object Explorer” OR if you have the Object Explorer side bar showing (on by default), just hit Connect in the top left corner of that side bar
- Authenticate using Windows Authentication
- “File > Connect Object Explorer” OR if you have the Object Explorer side bar showing (on by default), just hit Connect in the top left corner of that side bar
- Copy the backup files from earlier into the SQL backup locations
- For the two Data Warehouse (DW) .bak files, place them in the following location:
- C:\Program Files\Microsoft SQL Server\MSSQL15.<YOURSERVERNAME>\MSSQL\Backup\
- For the Tabular Model .abf file, place it in the following location:
- C:\Program Files\Microsoft SQL Server\MSAS15.<YOURSERVERNAME>\OLAP\Backup\
- For the two Data Warehouse (DW) .bak files, place them in the following location:
- Right-click on “Databases” under the Database Engine and select “Restore Database…”
- Select the “Device” radio button and click the “…” button that is now available
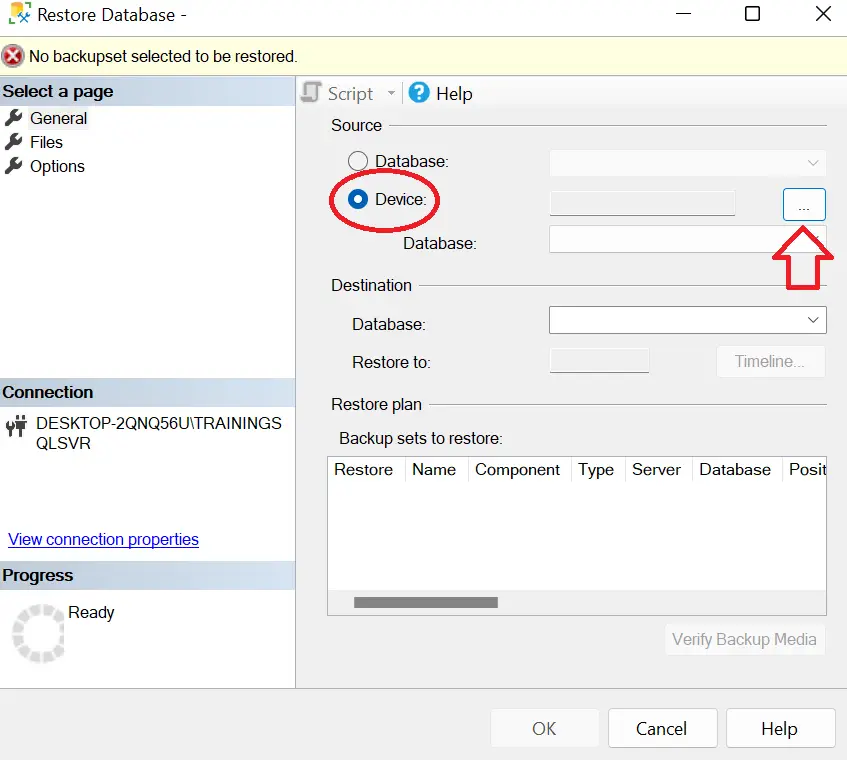
- Click on “Add”
- Navigate to the folder you placed the .bak files into and select one of the files and complete the restore by hitting OK on the two windows
- Repeat steps 3-6 on the second .bak file
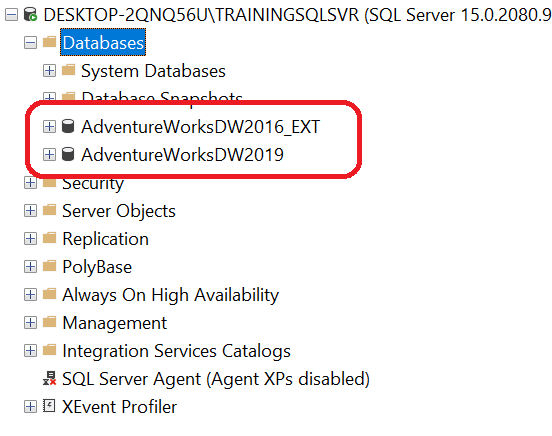
- Confirm both files are uploaded by expanding the Databases section
- Right-click on “Databases” under the Analysis Services and select “Restore…”
- Under “Restore Source” hit “Browse” expand the folder that you stored the .abf file in
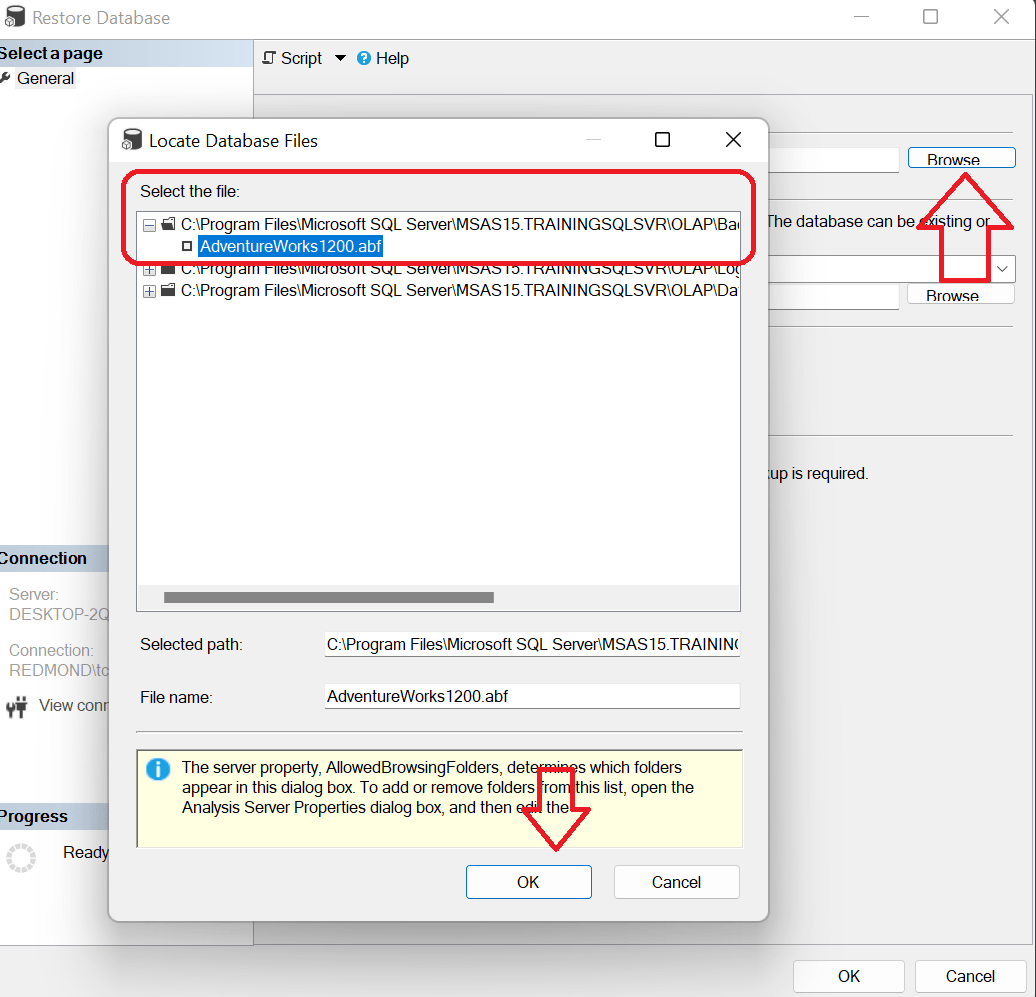
- Complete the restore.
Analysis Services Data Refresh
- Expand Databases, then click on Connections and Tables
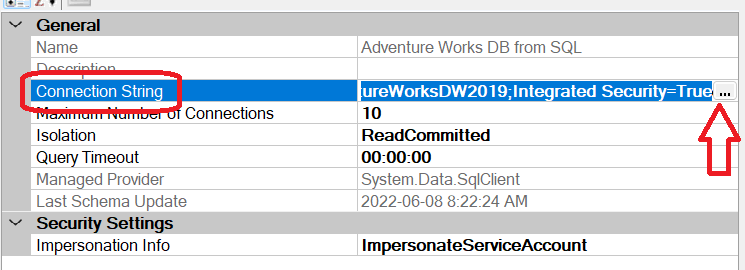
- Double-click on the file under the Connections section
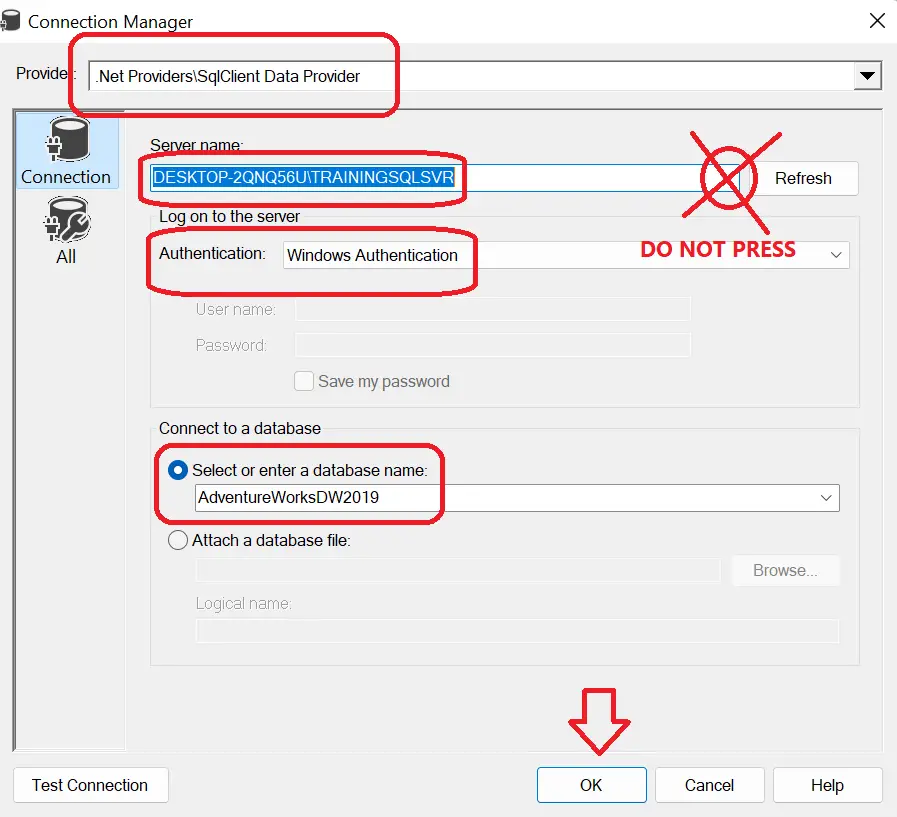
- Click on “Connection String” and then the “…” that has now appeared at the end of the line
- Select SqlClient Data Provider with the “Provider” drop-down
- Paste your server name into the “Server name:” field (Do not hit the arrow to search as this will scan the whole network for available servers)
- Make sure “Windows Authentication” is selected in the log on section
- Select the AdventureWorksDW2019 database from the drop-down
- Click on “Impersonation Info” and then the “…” that has now appeared at the end of the line

- Select the “Use the service account” radio button
- Hit OK to commit the changesYou will now need to add the service account to the logins for the server/database and provide the account appropriate permissions to enable the refresh via the service account – See Step 15 Under Download and Installation or Potential Issues section for details
- Expand the Security tab under the Database Engine and right-click on Logins then select “New Login…”
- Paste the name of service account into the “Login Name:” field
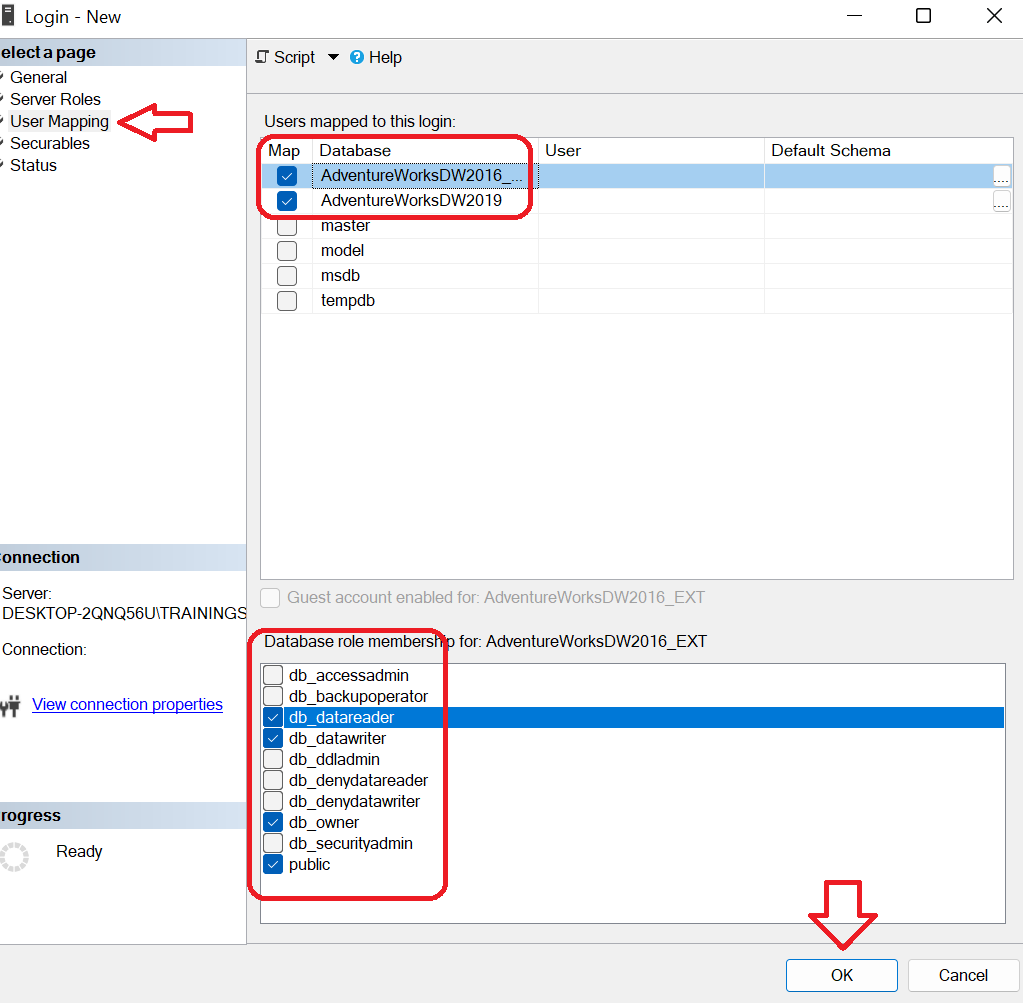
- Select “User Mapping” on the left-hand menu
- Check off both AdventureWorks databases
- Highlight the first database and then check off “db_datareader” and “db_datawriter” in the bottom pane. Repeat for the second database the refresh
 You can now complete
 - In the previously expanded Tables section, right-click the first table (most like Customer) and select “Process Table”
- Make sure all boxes are checked and change the Mode to “Process Full” then hit OK.
Other Posts!
- Could Not Load Folder Contents In Portal URLs – SSRSPBIRS (kingfishertechtips.in)
- Capture Fiddler Trace for Debugging the Network Traffic (kingfishertechtips.in)
- On-Premises Gateway: Configure/Map SQL DB To Power Bi (kingfishertechtips.in)
- Fixed Column/Row Header Make Visible In Any Report (kingfishertechtips.in)
- Self-Signed Certificate: Configure SSRS/PBIRS With SSL (kingfishertechtips.in)
- Run As Different User Option Not Showing, Enable In Windows (kingfishertechtips.in)
- Create Local User Account/Local Admin User In Windows 10/11 (kingfishertechtips.in)
