Azure Automation To Do AAS Model Refresh: In this article we will see how to do “FULL” process for Azure Analysis Services (AAS). The first option will be with PowerShell (Azure/Windows) and the Second will be using Azure Automation.
Prerequisites:
#1) Create Service Principal (SP)?
Create Service Principal using App Registration option from Azure portal by following these below steps.
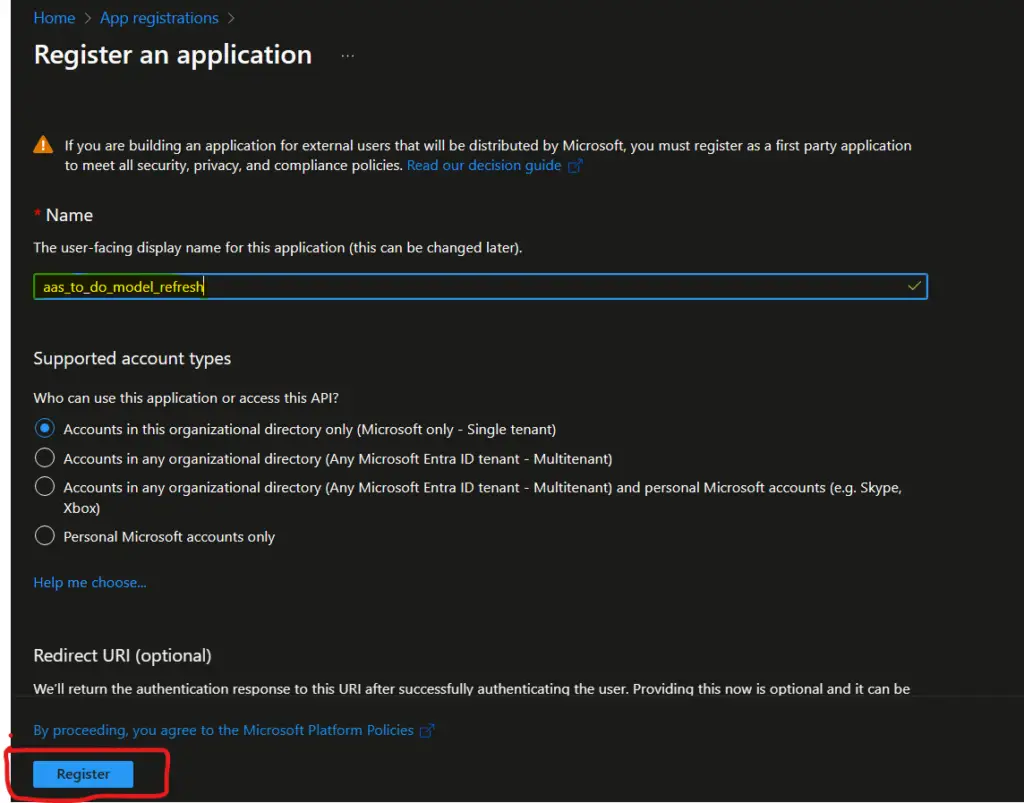
Step 1: Go to azure portal and search for “App Registration” and give the name to your App (SP) and click on register as shown in below image.
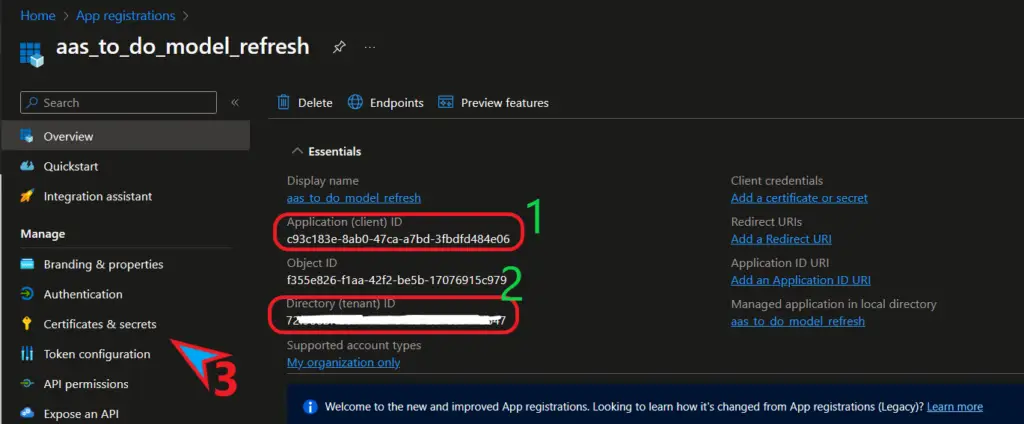
Step 2: Get these below details such as AppID and TenentID from this below image and then go to “Certificates & Secrets” to get the Value (Password).
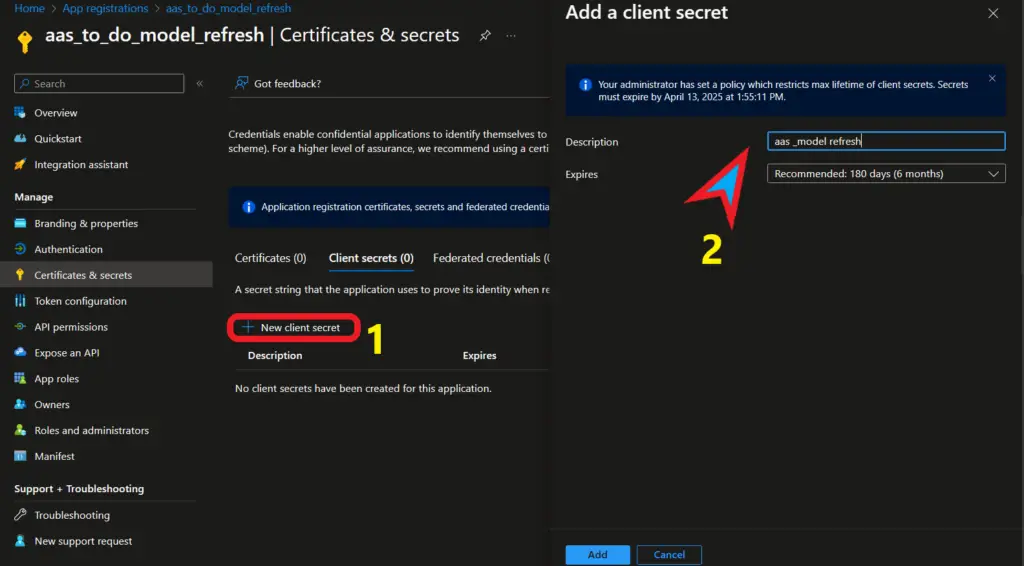
Step 3: Click on New client secret and give description (name) to it and hit add.
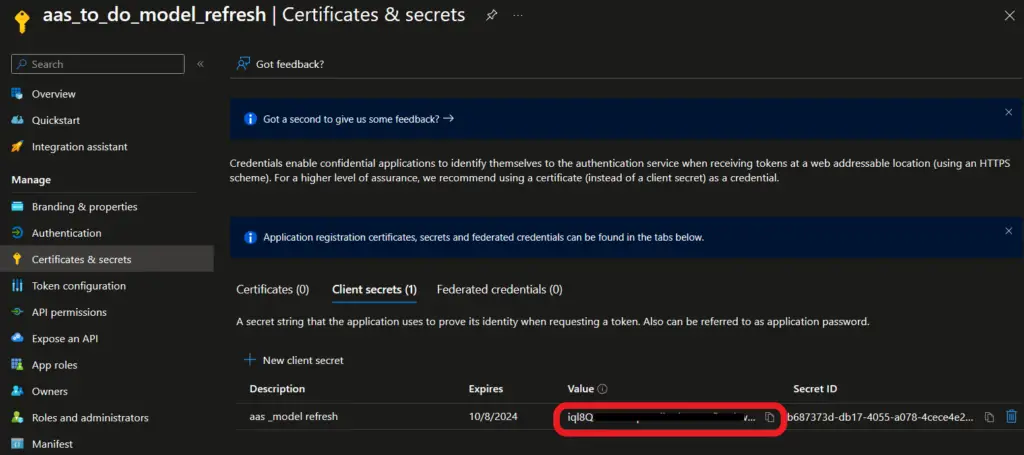
Step 4: Now, we have Value, and it will be visible ONLY once and this will act as your password so copy and paste it somewhere.
Note: I got these below details from above mentioned 4-steps and if you need more information please visit this doc: Create a Microsoft Entra app and service principal in the portal – Microsoft identity platform | Microsoft Learn
Service Principal (Details)
App ID (Client ID): 5a13e5bd-b6bf-4220-a1e0-e1843d57c445
Tenent ID: 72f988hg-76g7-41ab-97ab-2d7cd077db47
Secret Value: aQs8Q~JcTHYrtRDvcs-ON.pt~ythfgdRTGB6Zc4p (It will be visible only one time)
#2) Assign SP As AAS Admin?
Once You have created (SP), now we have made that SP as Admin on AAS to perform any kind of refresh. Now, here we have 2-method to add AAS Admins (SSMS & AAS Admins)
Note: The Service Principal can’t authenticate by using AppID or TenentID, so we have to give our username in this below format. More details, follow this doc: https://learn.microsoft.com/en-us/azure/analysis-services/analysis-services-addservprinc-admins
Follow this format to assign SP as AAS Admin: app:{service-principal-client-id}@{azure-ad-tenant-id}Below are my SP details which I will use to assign AAS Admin role:
UserID: app:5a13e5bd-b6bf-4220-a1e0-e1843d57c445@727363bf-862-41af-91hy-2d7hg022db47
Password: aQs8Q~JhghgJgC-ON.pt~rWHGVfJkijKSM6Zc4p (SP Secret Value)
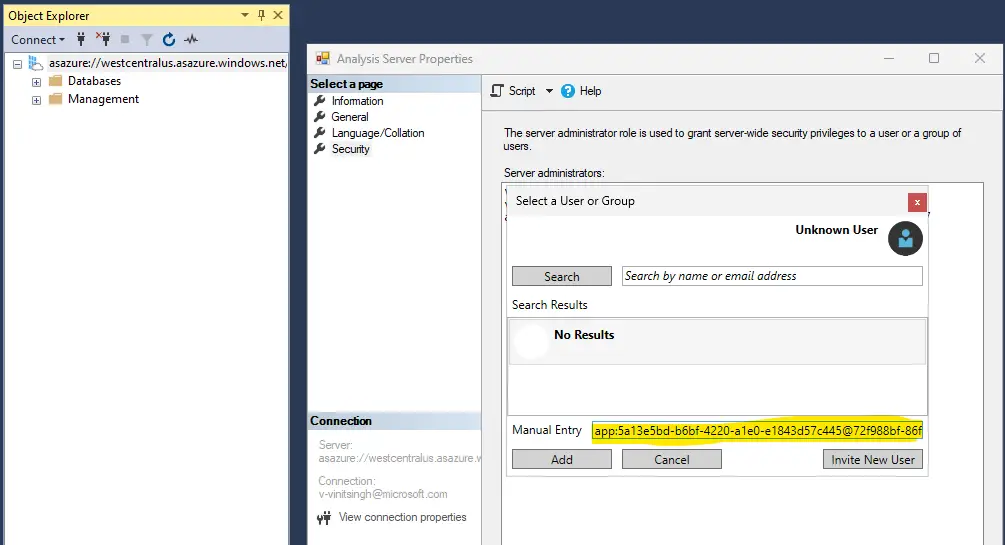
Method 1: Go to SSMS and you can add this above UserId to make SP as server Admin.
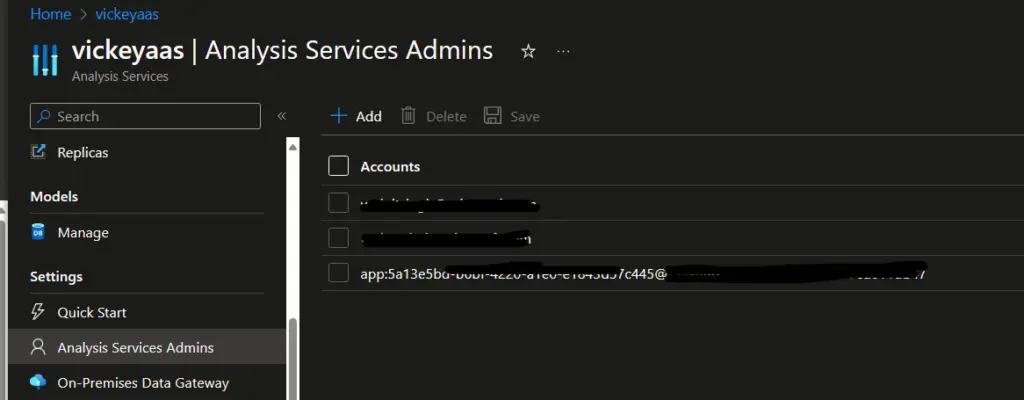
Method 2: Go to Azure Analysis Services (AAS) admin portal and you can add the same here as well!
#3) Gateway (On-Prem & Azure)
Note: If you’re doing full refresh/process to the AAS models by using PowerShell script then you have to configure on-prem gateway. Follow this doc to configure: https://kingfishertechtips.in/on-prem-sql-db-tabular-model-to-azure-aas/
Also if you to not installed AAS client libraries you can check this: https://learn.microsoft.com/en-us/analysis-services/client-libraries?view=asallproducts-allversions
Refresh Using PowerShell (Azure/Windows)?
AAS Model Refresh Using PowerShell ISE (Use Tenant_ID, Secret_Value, AppId (ClientID) from above prerequisites to this below script). Please use PowerShell as administrator and run this below script.
You can follow this document where I will guide you on how to process the model using PowerShell script: https://kingfishertechtips.in/process-aas-model-using-powershell-azure-windows/
PowerShell Script
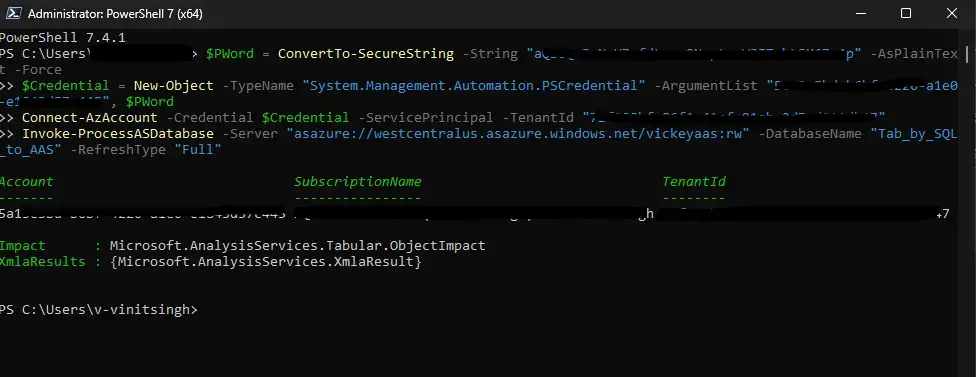
$PWord = ConvertTo-SecureString -String “aQs8Q~JhghgJgC-ON.pt~rWHGVfJkijKSM6Zc4p” -AsPlainText -Force
$Credential = New-Object -TypeName “System.Management.Automation.PSCredential” -ArgumentList “5a13e5bd-b6bf-4220-a1e0-e1843d57c445“, $PWord
Connect-AzAccount -Credential $Credential -ServicePrincipal -TenantId “727363bf-862-41af-91hy-2d7hg022db47“
Invoke-ProcessASDatabase -Server “asazure://westcentralus.asazure.windows.net/vickeyaas:rw” -DatabaseName “Tab_by_SQL_to_AAS” -RefreshType “Full”
Refresh Using Azure Automation?
To do automation of any PowerShell script we have create automation account and then import modules related to AAS model process. So first we will create Automation account and then I will show you how to import the required module to your automation account.
Below we have 4 – Steps to follow and automate the process one-by-one?
$1) Azure Automation Account?
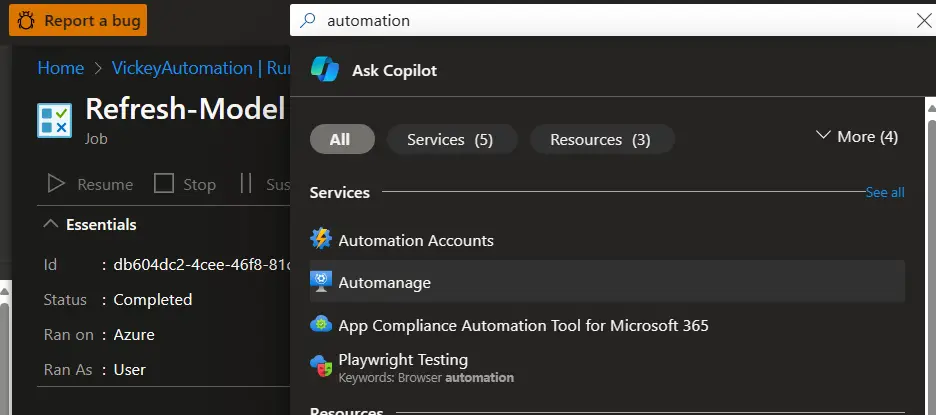
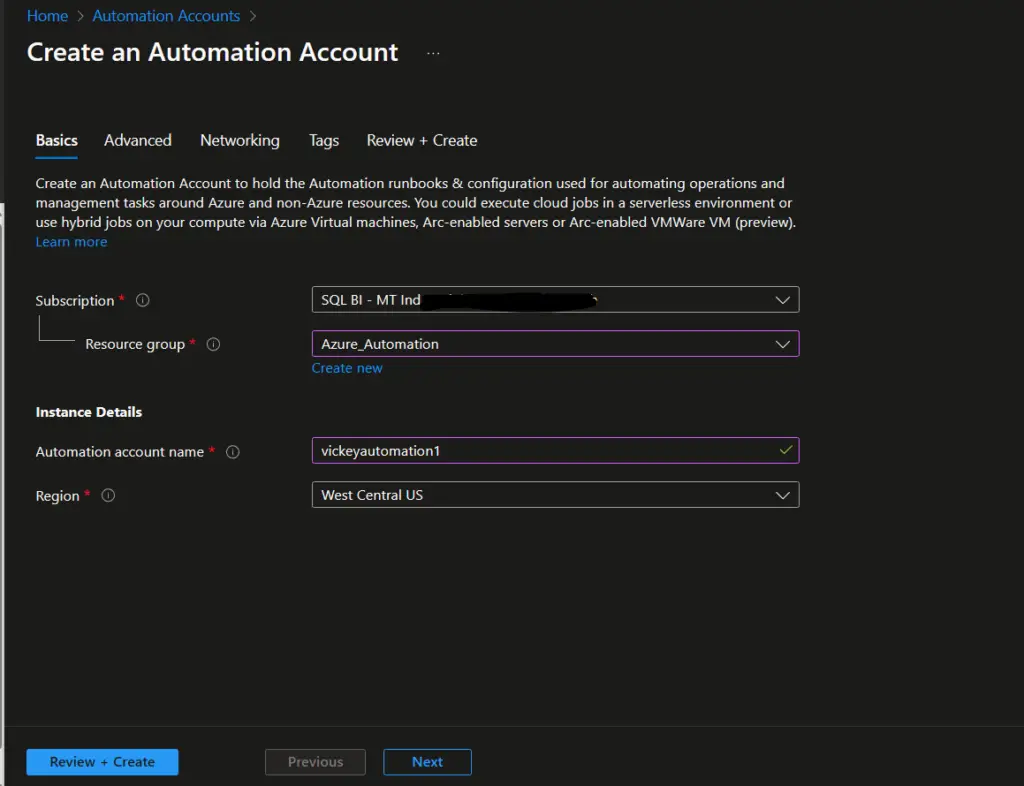
Step 1: Create Azure Automation Account first, go to azure portal and search for “Automation”.
Step 2: Select the resource group or create new one and then give a name with region specified and click on “Review and Create“.
$2) Pass Service Credential in Azure Automation?
Step 1: Now from the left pan click on “credential” and then click on “Add a credentials” and give the name and under Username provide “AppID (ClientID)” and in the Password give “Secret Value” and then click on Create.
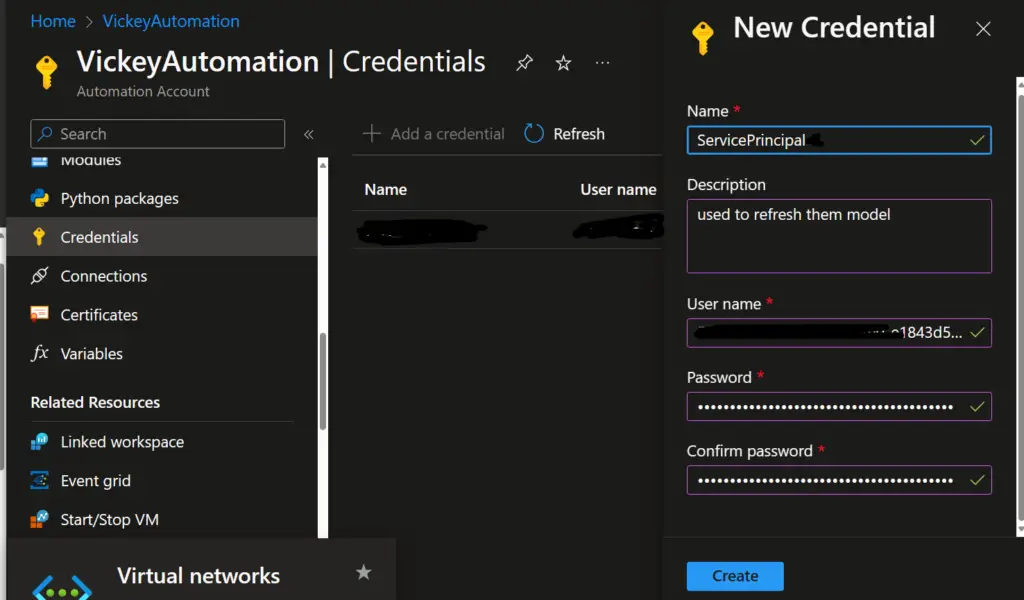
Note: If you are using same script as of mine then in the script file, I am passing one “ServicePrincipal” as one of the parameters, so I am giving the exact name to call my Service Principal which we created in PREREQUISTS. If you don’t want use service principal, then to get the script which we did for PowerShell refresh, and you can directly run it.
$3) Importing Module?
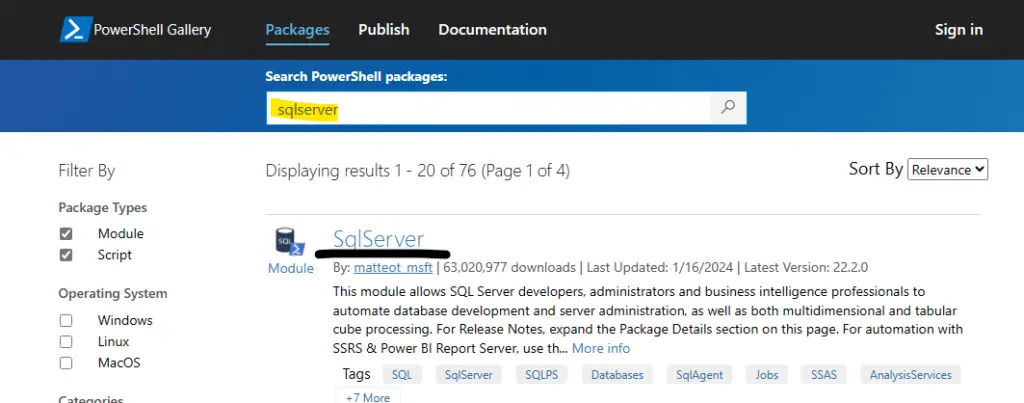
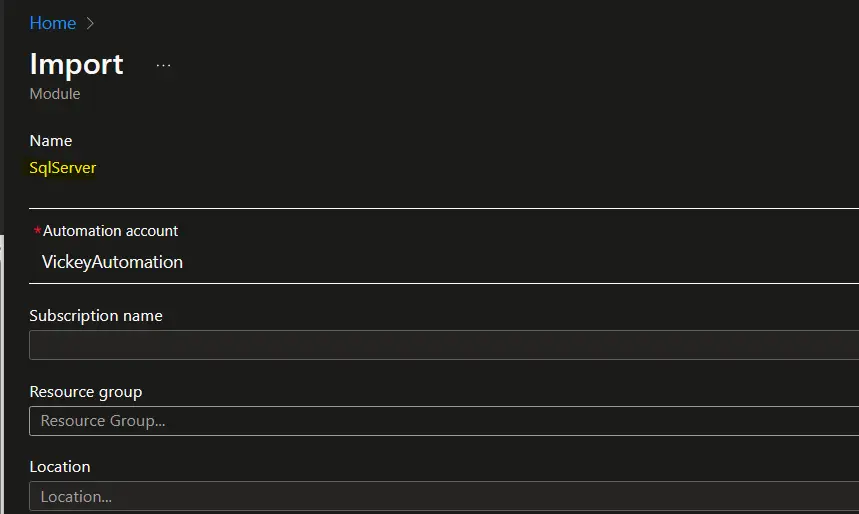
Step 1: Browse this below document and follow the steps listed below to import the modules to your Automation Account. Browse this PowerShell Gallery | Home and search for “sqlserver” module as shown.
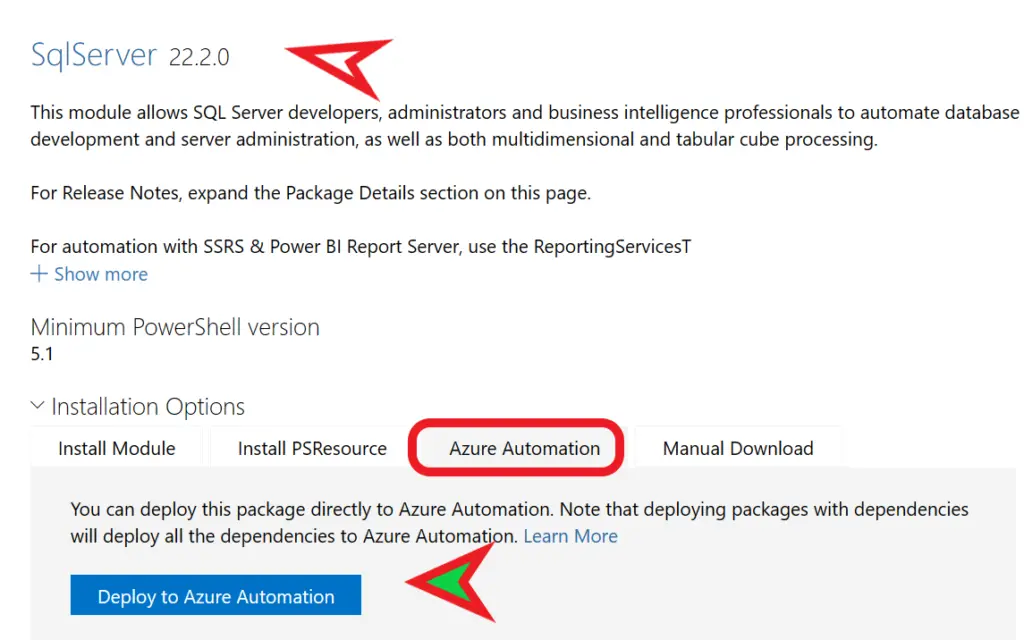
Step 2: Click on Azure Automation and then Deploy it. Then it will take you to new page and ask you to sign-in with your azure credentials.
Step 3: Now, we have to select the automation account you want to deploy this module and hence proceed with the wizard setup.
$4) Runbooks?
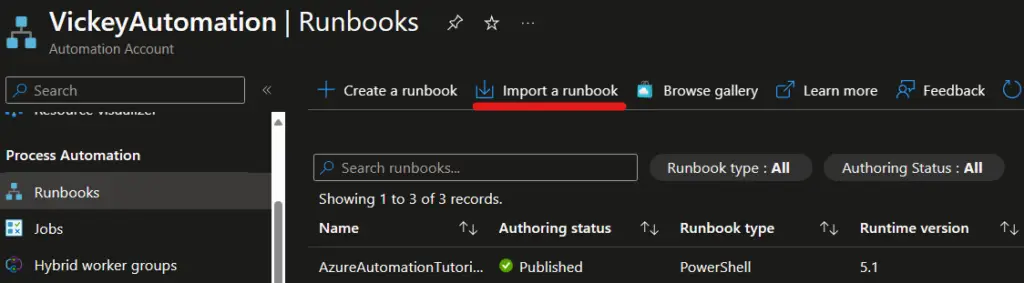
Step 1: Go back to your azure automation account and click on “Runbooks” and then click on “Create a runbook” from the top menu to automate the process.
Step 2: I will import my custom script into azure runbook, I have provided the script file in the this download link! You can import from that here and give the required details and click on Import from bottom of the screen.
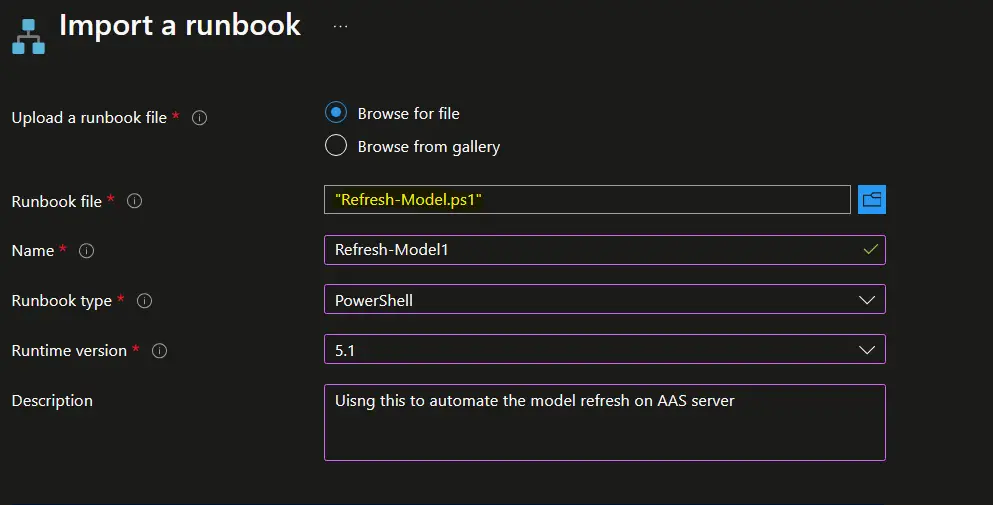
Note: The “sqlserver” module which we have imported supports only PowerShell 5.1, so I am using Runtime Version as 5.1 as shown below.
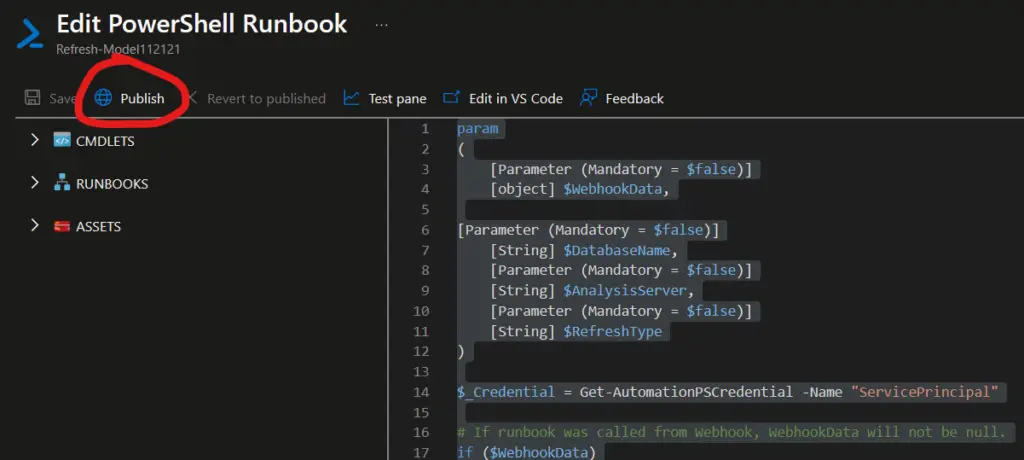
Step 3: Once deployed you will be able to see this Edit option, click on “Edit in portal” and proceed further.

Step 4: Don’t change anything if you’re using the same script as mine. Just click on “Publish” and your Runbook is ready to do the stuff.
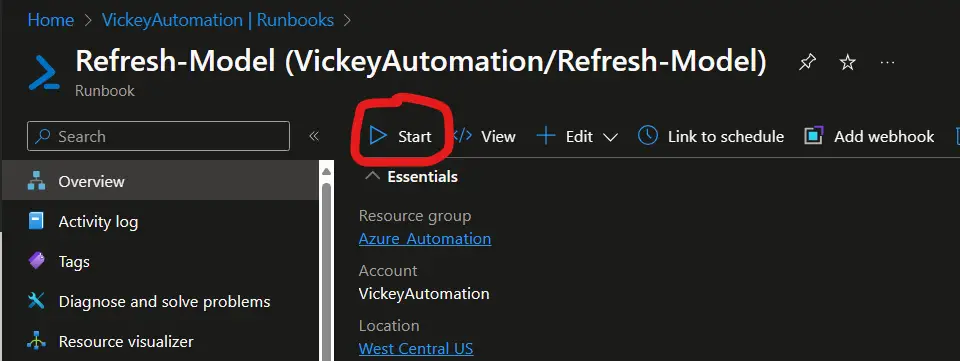
Step 5: Once published you will get this “Start” button option, click on that to start the automation process.
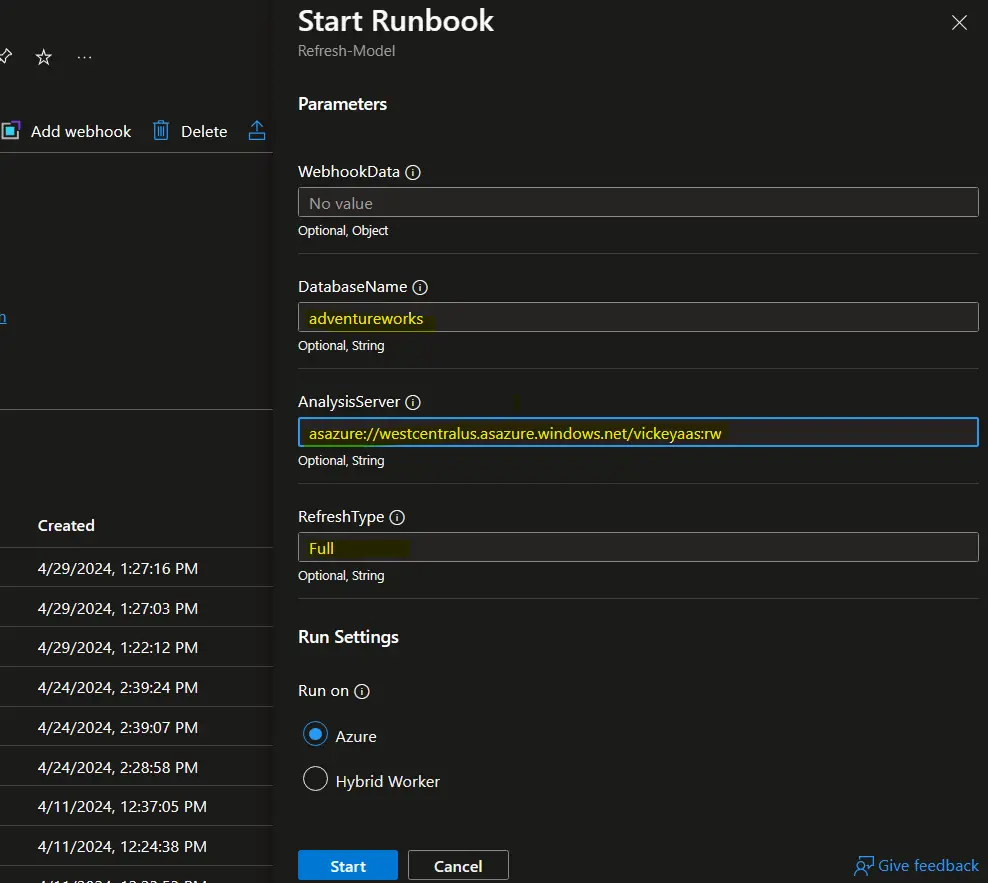
Step 6: In the next step you will be asked to provide the Database, Server name and Type of process, see below image and perform all the steps.
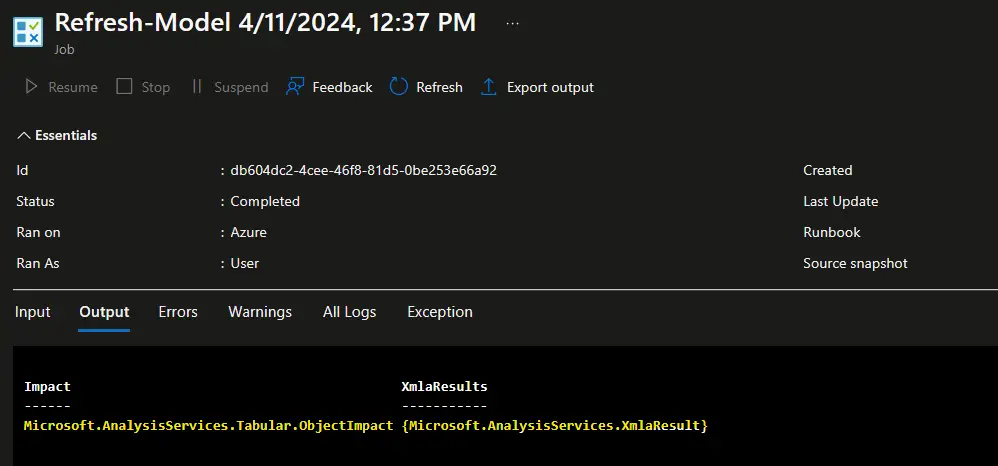
Step 7: If everything is working fine in runbook and all things are correctly setup then the runbook will execute and then the process will complete as shown below. My ASS is affected means there is successful change in my AAS models.
Other MSBI Posts: TSG Archives » Kingfisher Tech Tips
